

With this simple crochet pattern you can crochet an Amigurumi bear. The cocheted Amigurumi bear “Bruno” is a great plushie for big and small children. This crocher bear can be made with button joints what gives a great nostalgic look and makes it particularly movable.
Introduction: Amigurumi – Crochet Bear “Bruno”
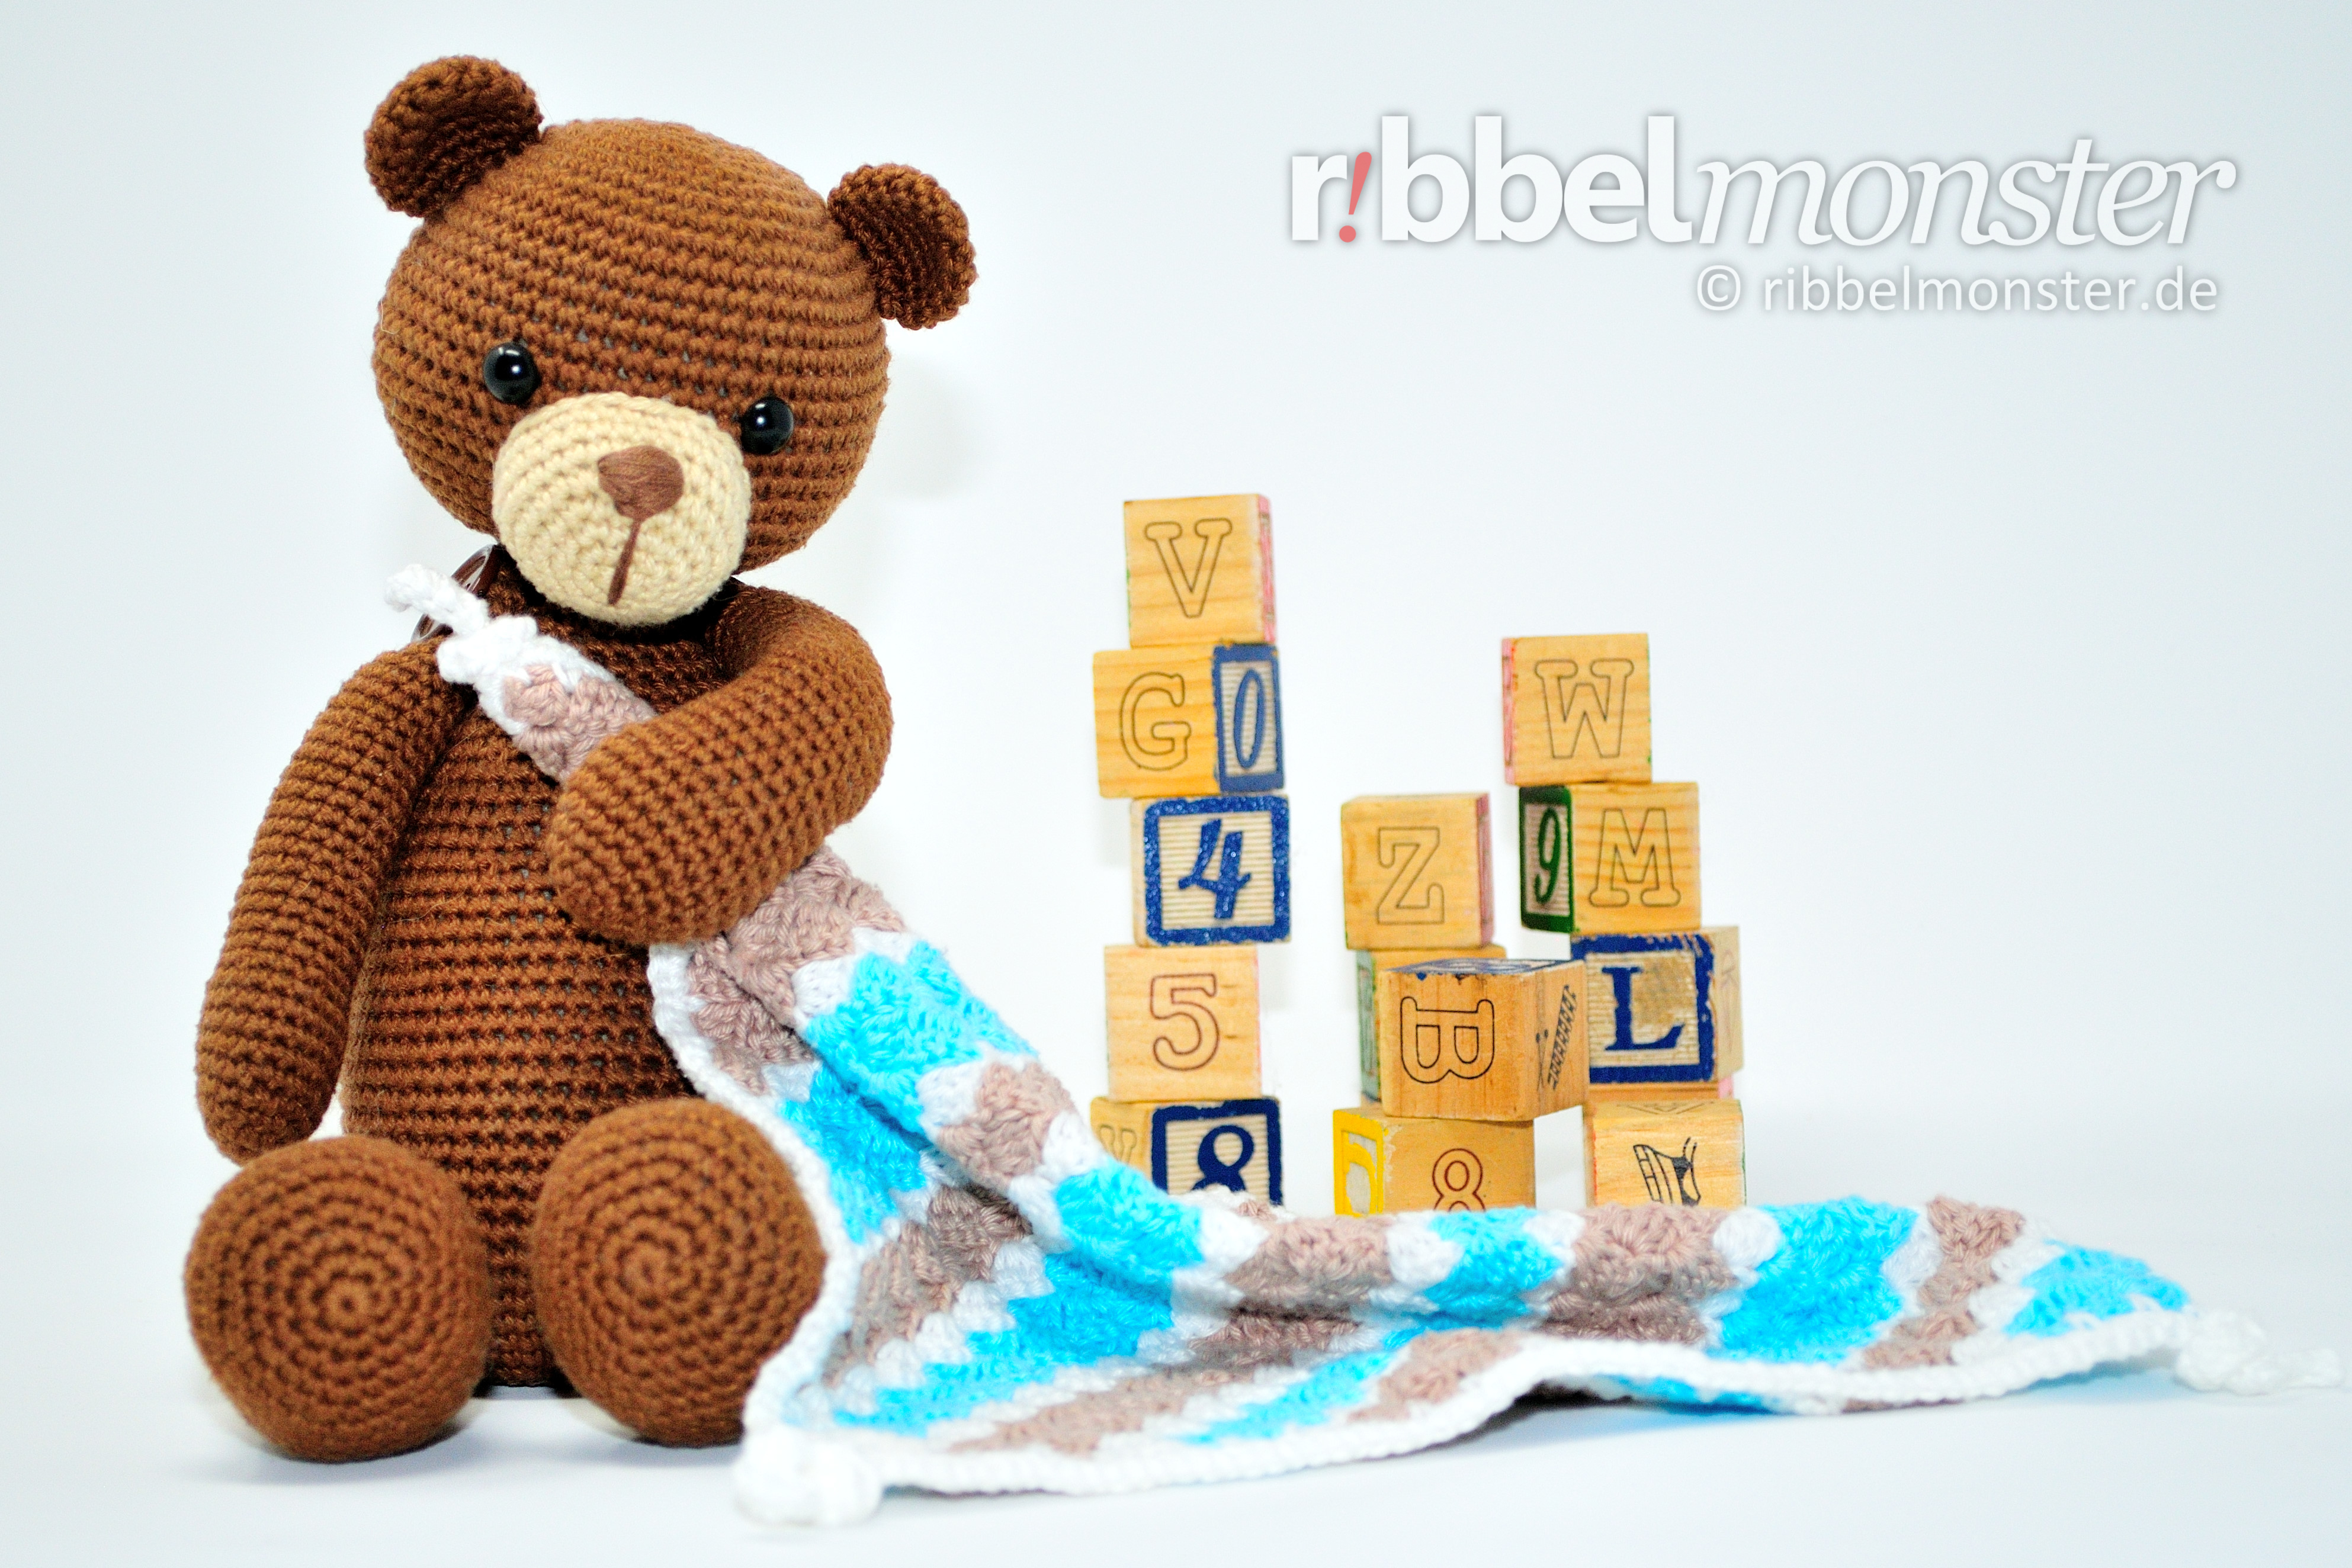
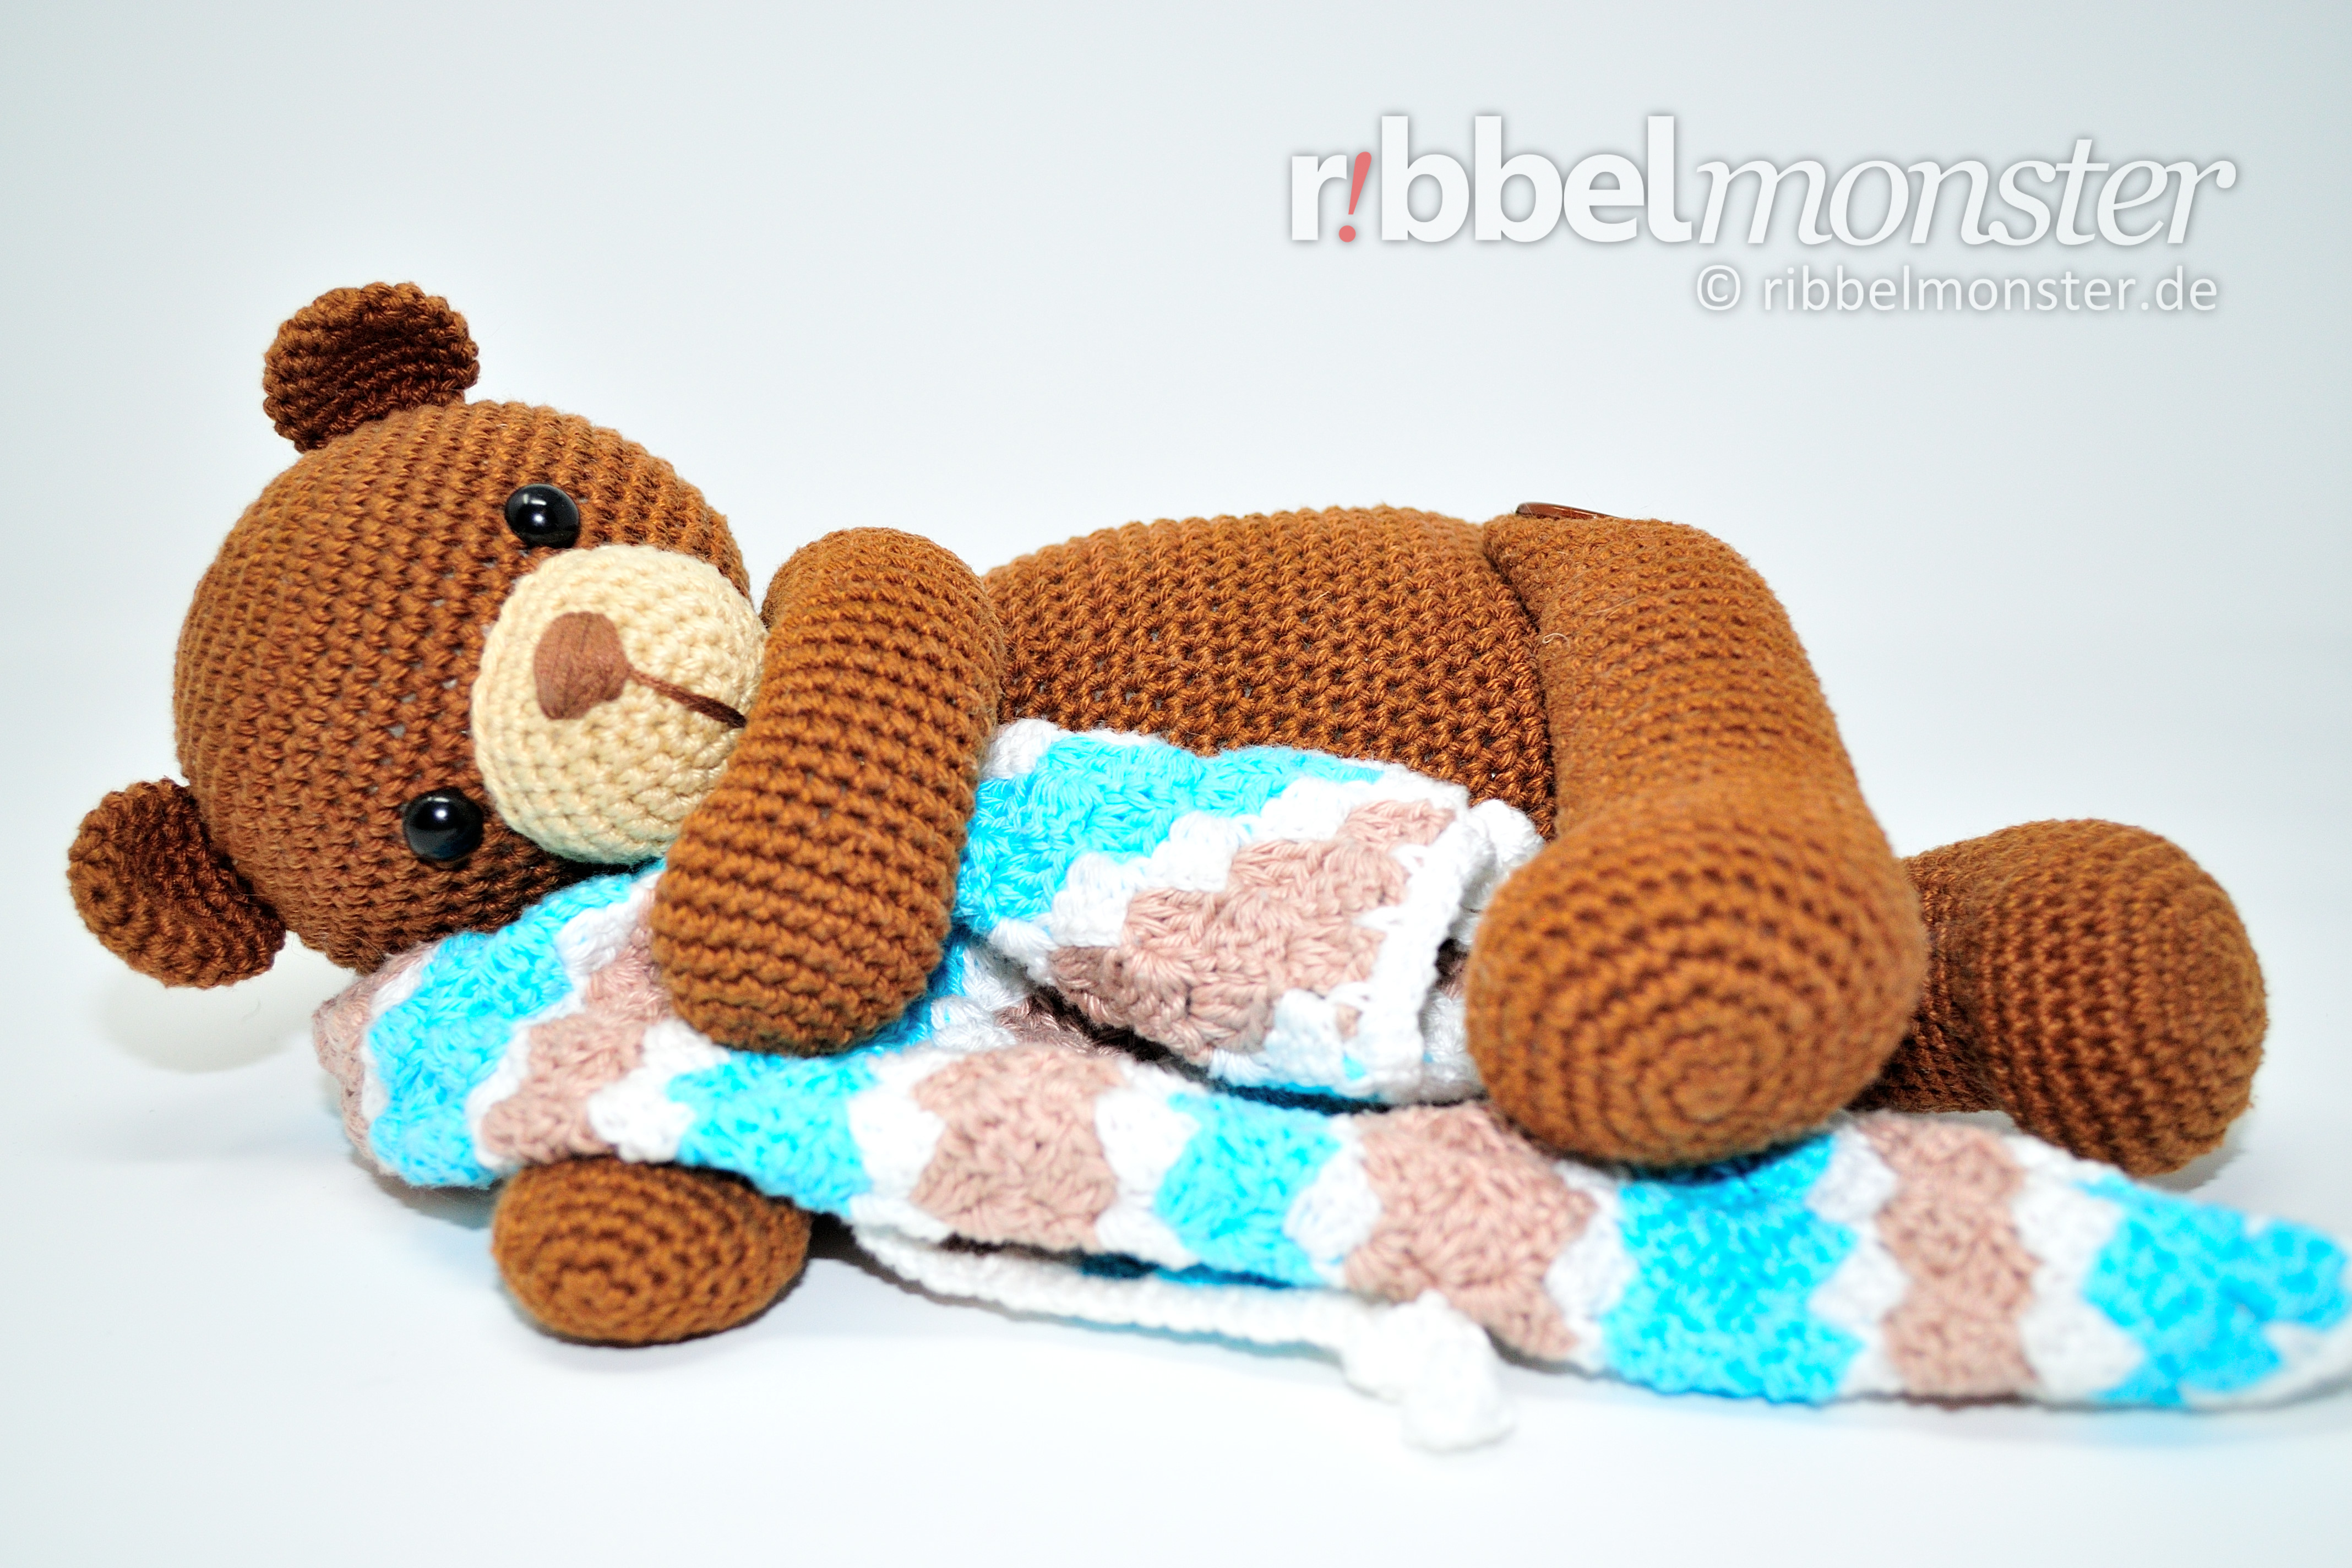
Bruno likes bricks so much,
but without his comforter he would be allone.
Sometimes his eyes become heavy,
then he just falls asleep!
Knowledge: Amigurumi – Crochet Bear “Bruno”
- Double Crochet Stitches (UK!)
- Half Treble Crochet Stitches (UK!)
- Magic Ring
- Slip Stitches
- Spiral Rounds
- Treble Crochet Stitches (UK!)
Note! By offsetting regular increases and decreases, they become almost invisible. You can recognize regular increases by the phrase “double every … stitch,” and regular decreases by the phrase “crochet together every … and … stitch”. The stitch chart for spheres and circles might also be helpful for you.
Note! Using a special technique for invisible decreases makes them nearly invisible. Although this technique requires a bit of practice, it’s worth giving it a try.
Supplies: Amigurumi – Crochet Bear “Bruno”
Note! This amigurumi can be made with or without button joints, as per your preference. You can learn about what button joints are and how to make them in the button joint tutorial. If you choose to use button joints, you will need 4 buttons, the size of which should match perfectly. Therefore, it’s advisable to choose them after completing the crochet work.
Darning Yarn
I have used darning yarn in the shade of brown here. If you cannot find a suitable darning yarn in your supplies, I have already selected some for you.
Filling
For filling, I used synthetic filling made of 100% polyester. However, there are numerous alternatives for filling material. If you’ve run out of filling, I’ve prepared a refill for you here.
Pins
You’ll also need a few pins. The more colorful your collection, the better. If you need more, I’ve found something for you.
Safety Eyes
I used 2 safety eyes with a diameter of 1/2 inches. The eyes are completely black. However, there are countless alternatives for amigurumi eyes. You might prefer other safety eyes as well.
Scissors – any
You’ll need any scissors. It’s best to use your most beautiful scissors because it brings you joy. If you don’t have really nice scissors, I’ve picked out some lovely ones for you.
Wool Needle
You’ll need a wool needle with a blunt tip. The thickness of the wool needle should match the thickness of your yarn. You might like the set of wool needles I’ve picked out for you.
Yarn – Schachenmayr – Catania – 157 – marone (braun)
I used yarn in the shade Maroon. The material is 100% cotton. The yardage is 137 yds / 1.75 oz. If you want to replenish your supply, I’ve already picked out the matching yarn for you here.
Yarn – Schachenmayr – Catania – 404 – sand (hellbraun, beige)
I used yarn in the shade Sand. The material is 100% cotton. The yardage is 137 yds / 1.75 oz. If you want to replenish your supply, I’ve already picked out the matching yarn for you here.
Note! The specified yarn was used for the example shown here. In principle, you can use any yarn and an appropriate needle size. However, the quality of the material also affects the quality of the result, so you should avoid cutting corners in the wrong place. Also, the thickness of the yarn and the needle will influence the size of the outcome, which you can, of course, intentionally take advantage of.
Size: Amigurumi – Crochet Bear “Bruno”
Note! If you want to change the size, you can simply use a thicker or thinner yarn with a suitable needle size. Simply doubling the rounds, rows, and stitches, on the other hand, will only result in an uneven outcome.
Here you find the size specifications for the crocheted bear Bruno without ears.
| Needle Size | Yarn | Sitting | Standing |
| 12 (shown example) | 137yds / 1.75oz, 100% cotton | 20cm | 30cm |
Crochet Pattern: Amigurumi – Crochet Bear “Bruno”
For the bear “Bruno” we first crochet head, body, ears, arms, legs, snout and a tail. Then all parts are sewn together and then your bear “Bruno” is already finished.
Crochet Bear Head (1x)
We crochet the head for the bear from top to buttom with double crochet stitches (UK!) in spiral rounds.
- brown:
- 1st round:
- magic ring
- into the magic ring:
- 6 double crochet stitches (UK!)
- = 6 stitches
- 2nd round:
- double every stitch
- = 12 stitches
- 3rd round:
- double every 2nd stitch
- = 18 stitches
- 4th round:
- double every 3rd stitch
- = 24 stitches
- 5th round:
- double every 4th stitch
- = 30 stitches
- 6th round:
- double every 5th stitch
- = 36 stitches
- 7th round:
- double every 6th stitch
- = 42 stitches
- 8th round:
- double every 7th stitch
- = 48 stitches
- 9th round:
- double every 8th stitch
- = 54 stitches
- 10th round:
- double every 9th stitch
- = 60 stitches
- 11th – 21st round:
- (= 11 rounds)
- each stitch one stitch
- = 60 stitches
- Attach Safety Eyes, Position:
- after the 16th round
- 9 stitches distance
- 22nd round:
- crochet together every 9th and 10th stitch
- = 54 stitches
- 23rd round:
- crochet together every 8th and 9th stitch
- = 48 stitches
- 24th round:
- crochet together every 7th and 8th stitch
- = 42 stitches
- 25th round:
- crochet together every 6th and 7th stitch
- = 36 stitches
- 26th round:
- crochet together every 5th and 6th stitch
- = 30 stitches
- 27th round:
- crochet together every 4th and 5th stitch
- = 24 stitches
- fill and stuff completely
- cut the thread, pull off the loop
Crochet Bear Body (1x)
We crochet the tail for the bear from the tip to the base in spiral rounds with double crochet stitches (UK!). The body is completely filled and stuffed but not completely closed but sewn later with the thread end and the opening to the head.
- brown:
- 1st round:
- magic ring
- into the magic ring:
- 6 double crochet stitches (UK!)
- = 6 stitches
- 2nd round:
- double every stitch
- = 12 stitches
- 3rd round:
- double every 2nd stitch
- = 18 stitches
- 4th round:
- double every 3rd stitch
- = 24 stitches
- 5th round:
- double every 4th stitch
- = 30 stitches
- 6th round:
- double every 5th stitch
- = 36 stitches
- 7th round:
- double every 6th stitch
- = 42 stitches
- 8th round:
- double every 7th stitch
- = 48 stitches
- 9th round:
- double every 8th stitch
- = 54 stitches
- 10th round:
- double every 9th stitch
- = 60 stitches
- 11th – 25th round:
- (= 15 rounds)
- each stitch one stitch
- = 60 stitches
- 26th round:
- crochet together every 29th and 30th stitch
- = 58 stitches
- 27th round:
- crochet together every 28th and 29th stitch
- = 56 stitches
- 28th round:
- crochet together every 27th and 28th stitch
- = 54 stitches
- 29th round:
- crochet together every 26th and 27th stitch
- = 52 stitches
- 30th round:
- crochet together every 25th and 26th stitch
- = 50 stitches
- 31st round:
- crochet together every 24th and 25th stitch
- = 48 stitches
- 32nd round:
- crochet together every 23rd and 24th stitch
- = 46 stitches
- 33rd round:
- crochet together every 22nd and 23rd stitch
- = 44 stitches
- 34th round:
- crochet together every 21st and 22nd stitch
- = 42 stitches
- 35th round:
- crochet together every 20th and 21st stitch
- = 40 stitches
- 36th round:
- crochet together every 19th and 20th stitch
- = 38 stitches
- 37th round:
- crochet together every 18th and 19th stitch
- = 36 stitches
- 38th round:
- crochet together every 17th and 18th stitch
- = 34 stitches
- 39th round:
- crochet together every 16th and 17th stitch
- = 32 stitches
- 40th round:
- crochet together every 15th and 16th stitch
- = 30 stitches
- 41st round:
- crochet together every 14th and 15th stitch
- = 28 stitches
- 42nd round:
- crochet together every 13th and 14th stitch
- = 26 stitches
- 43rd round:
- crochet together every 12th and 13th stitch
- = 24 stitches
- 44th round:
- 3x 1 half treble crochet stitch (UK!) into one stitch
- 6x 1 treble crochet stitch (UK!) into one stitch
- 3x 1 half treble crochet stitch (UK!) into one stitch
- 11x 1 double crochet stitch (UK!) into one stitch
- 1x 1 slip stitch into one stitch
- = 24 stitches
- fill and stuff completely
- cut the thread generous, pull off the loop, DONT cut the thread end, will be needed for sewing later
Crochet Bear Ears (2x)
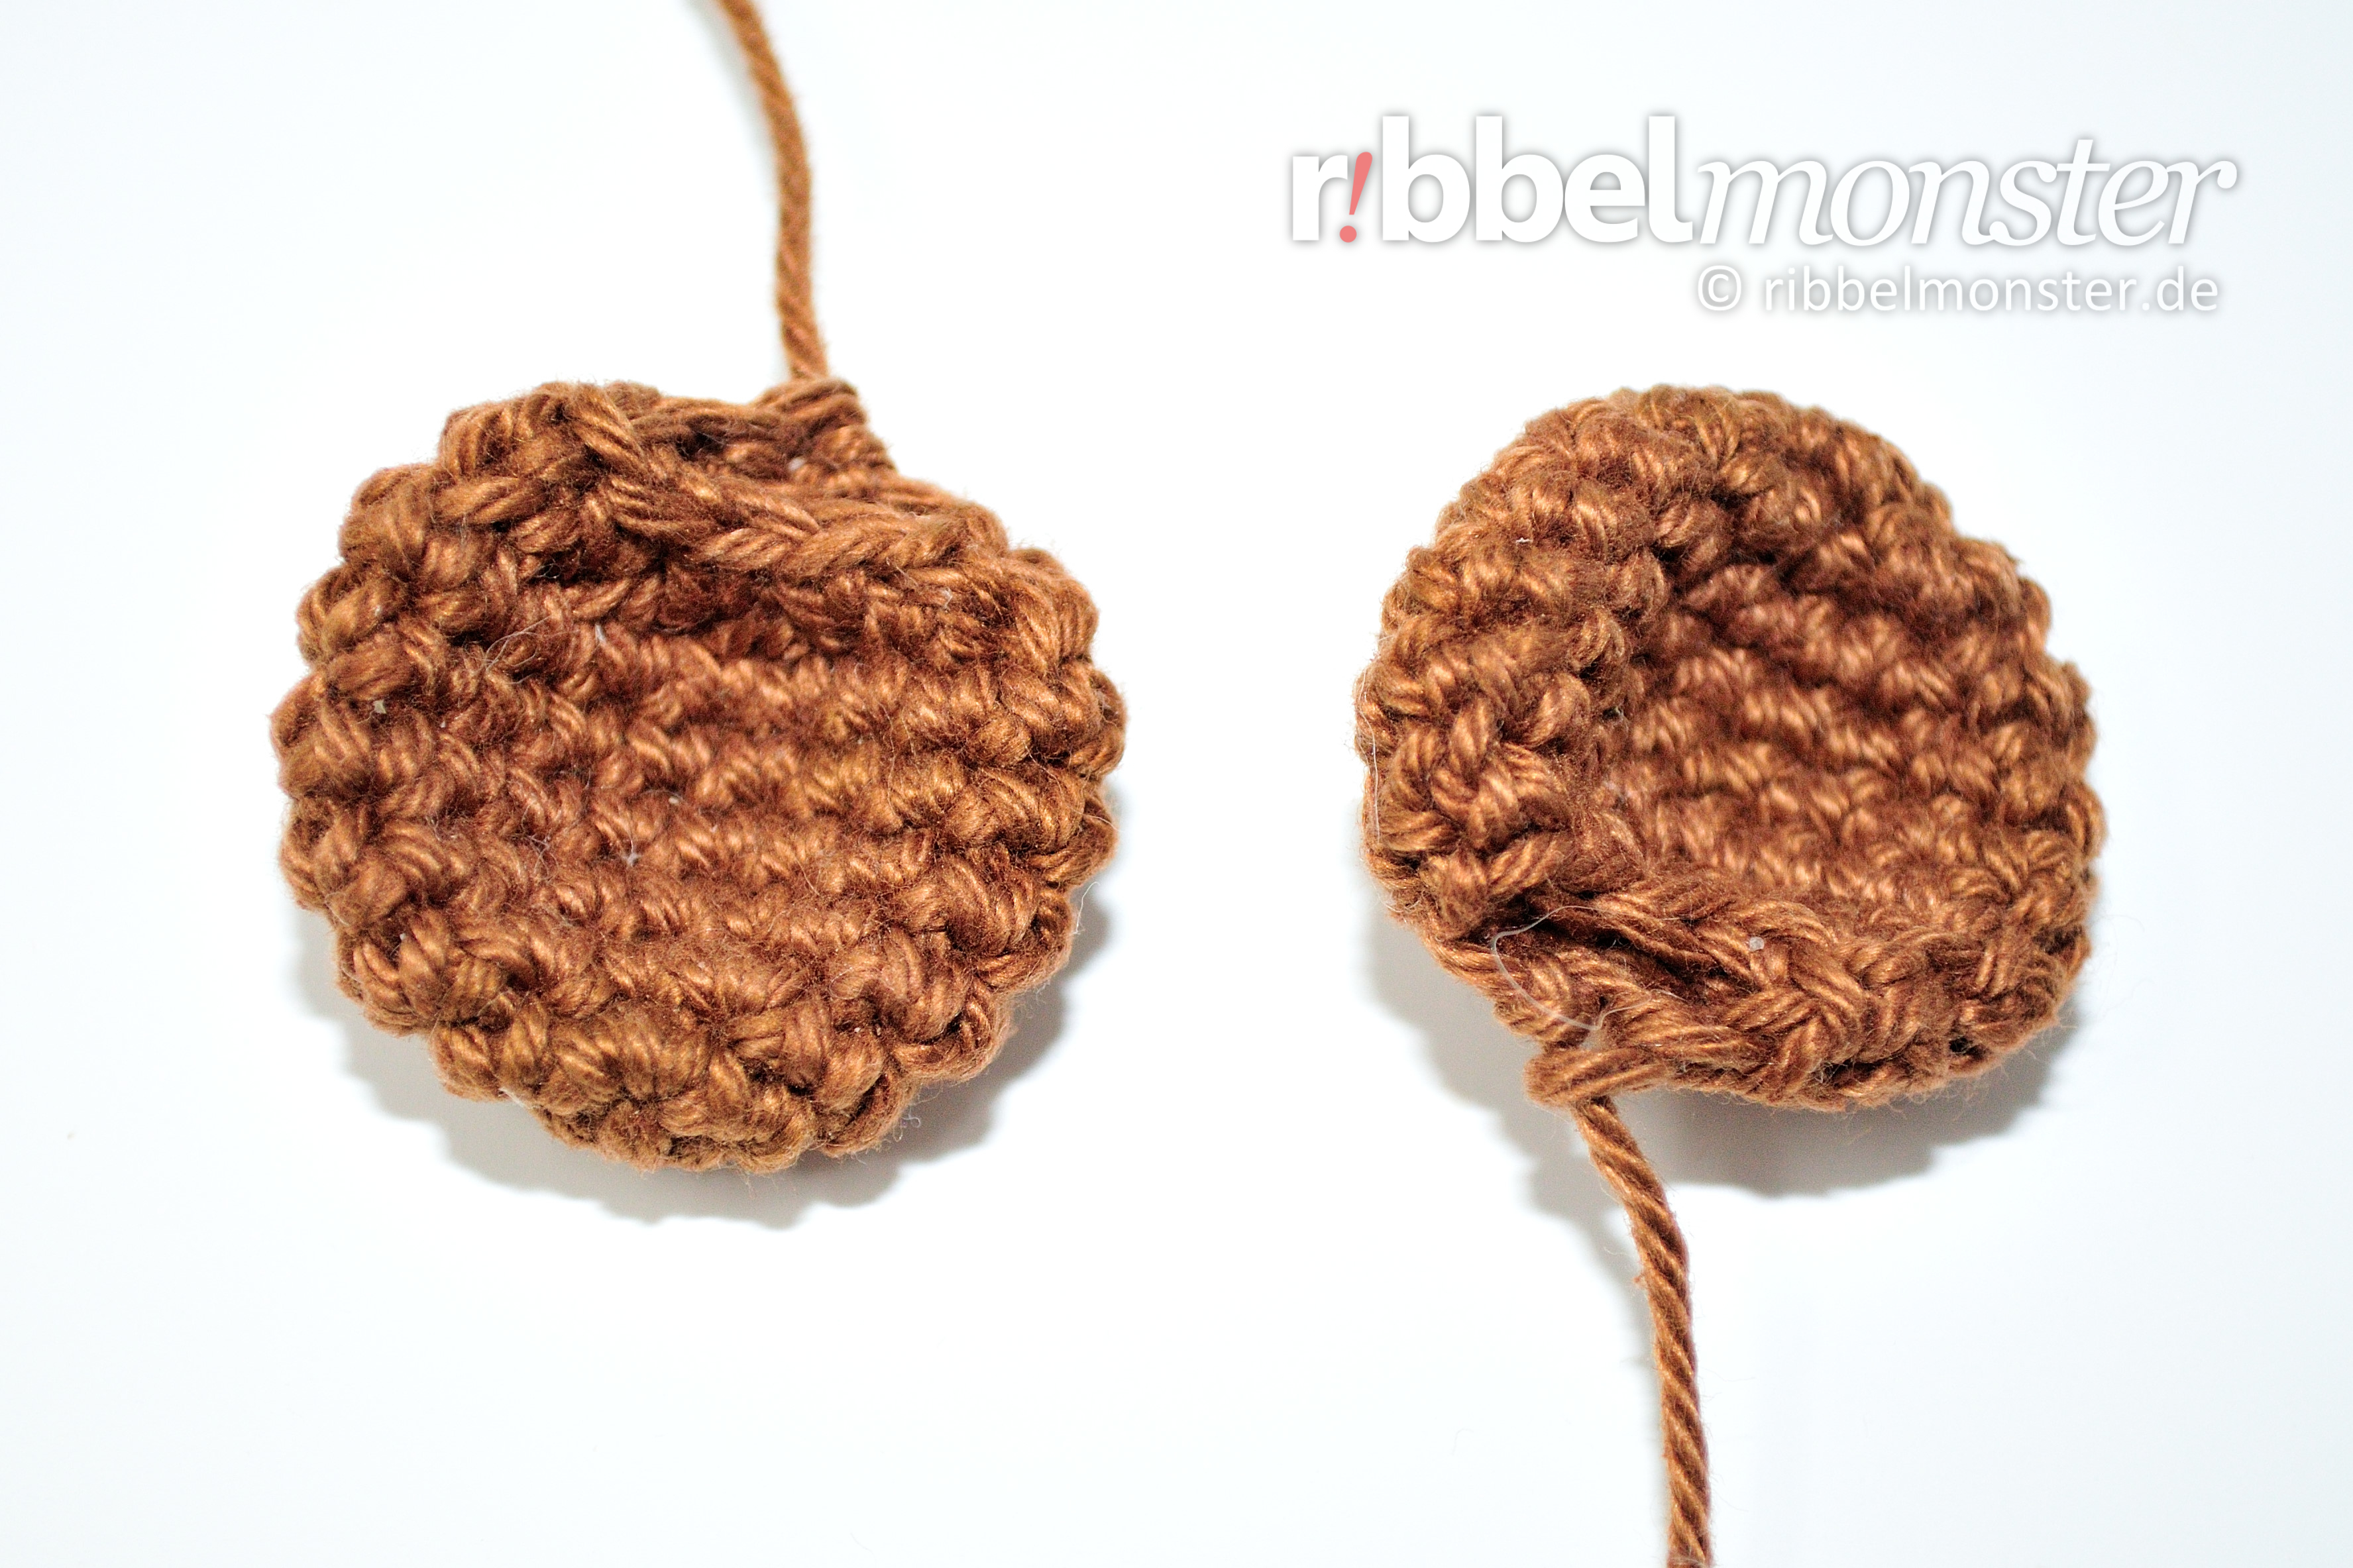
We crochet the ears for the bear from tip to the base in spiral rounds with double crochet stitches (UK!). The ears are not filled but foldet flat and then sewn with the thread end with the opening to the head.
Note! If you want to create several nearly identical parts, it’s advisable to work on them consecutively on the same day. For larger parts, it’s even recommended to work on them simultaneously in stages. Our tension and tightness can vary from day to day, leading to visible differences.
- brown:
- 1st round:
- magic ring
- into the magic ring:
- 6 double crochet stitches (UK!)
- = 6 stitches
- 2nd round:
- double every stitch
- = 12 stitches
- 3rd round:
- double every 2nd stitch
- = 18 stitches
- 4th – 7th round:
- (= 4 round)
- each stitch one stitch
- = 18 stitches
- 8th round:
- crochet together every 1st and 2nd stitch
- = 9 stitches
- cut the thread generous, pull off the loop, DONT cut the thread end, will be needed for sewing later
Crochet Bear Tail (1x)

We crochet the tail for the bear from the tip to the base in spiral rounds with double crochet stitches (UK!).
- brown:
- 1st round:
- magic ring
- into the magic ring:
- 6 double crochet stitches (UK!)
- = 6 stitches
- 2nd round:
- double every stitch
- = 12 stitches
- 3rd round:
- double every 2nd stitch
- = 18 stitches
- 4th – 7th round:
- (= 4 round)
- each stitch one stitch
- = 18 stitches
- 8th round:
- crochet together every 2nd and 3rd stitch
- = 12 stitches
- fill and stuff completely
- 9th round:
- crochet together every 1st and 2nd stitch
- = 6 stitches
- cut the thread generous, pull off the loop, DONT cut the thread end, will be needed for sewing later
Crochet Bear Arms (2x)
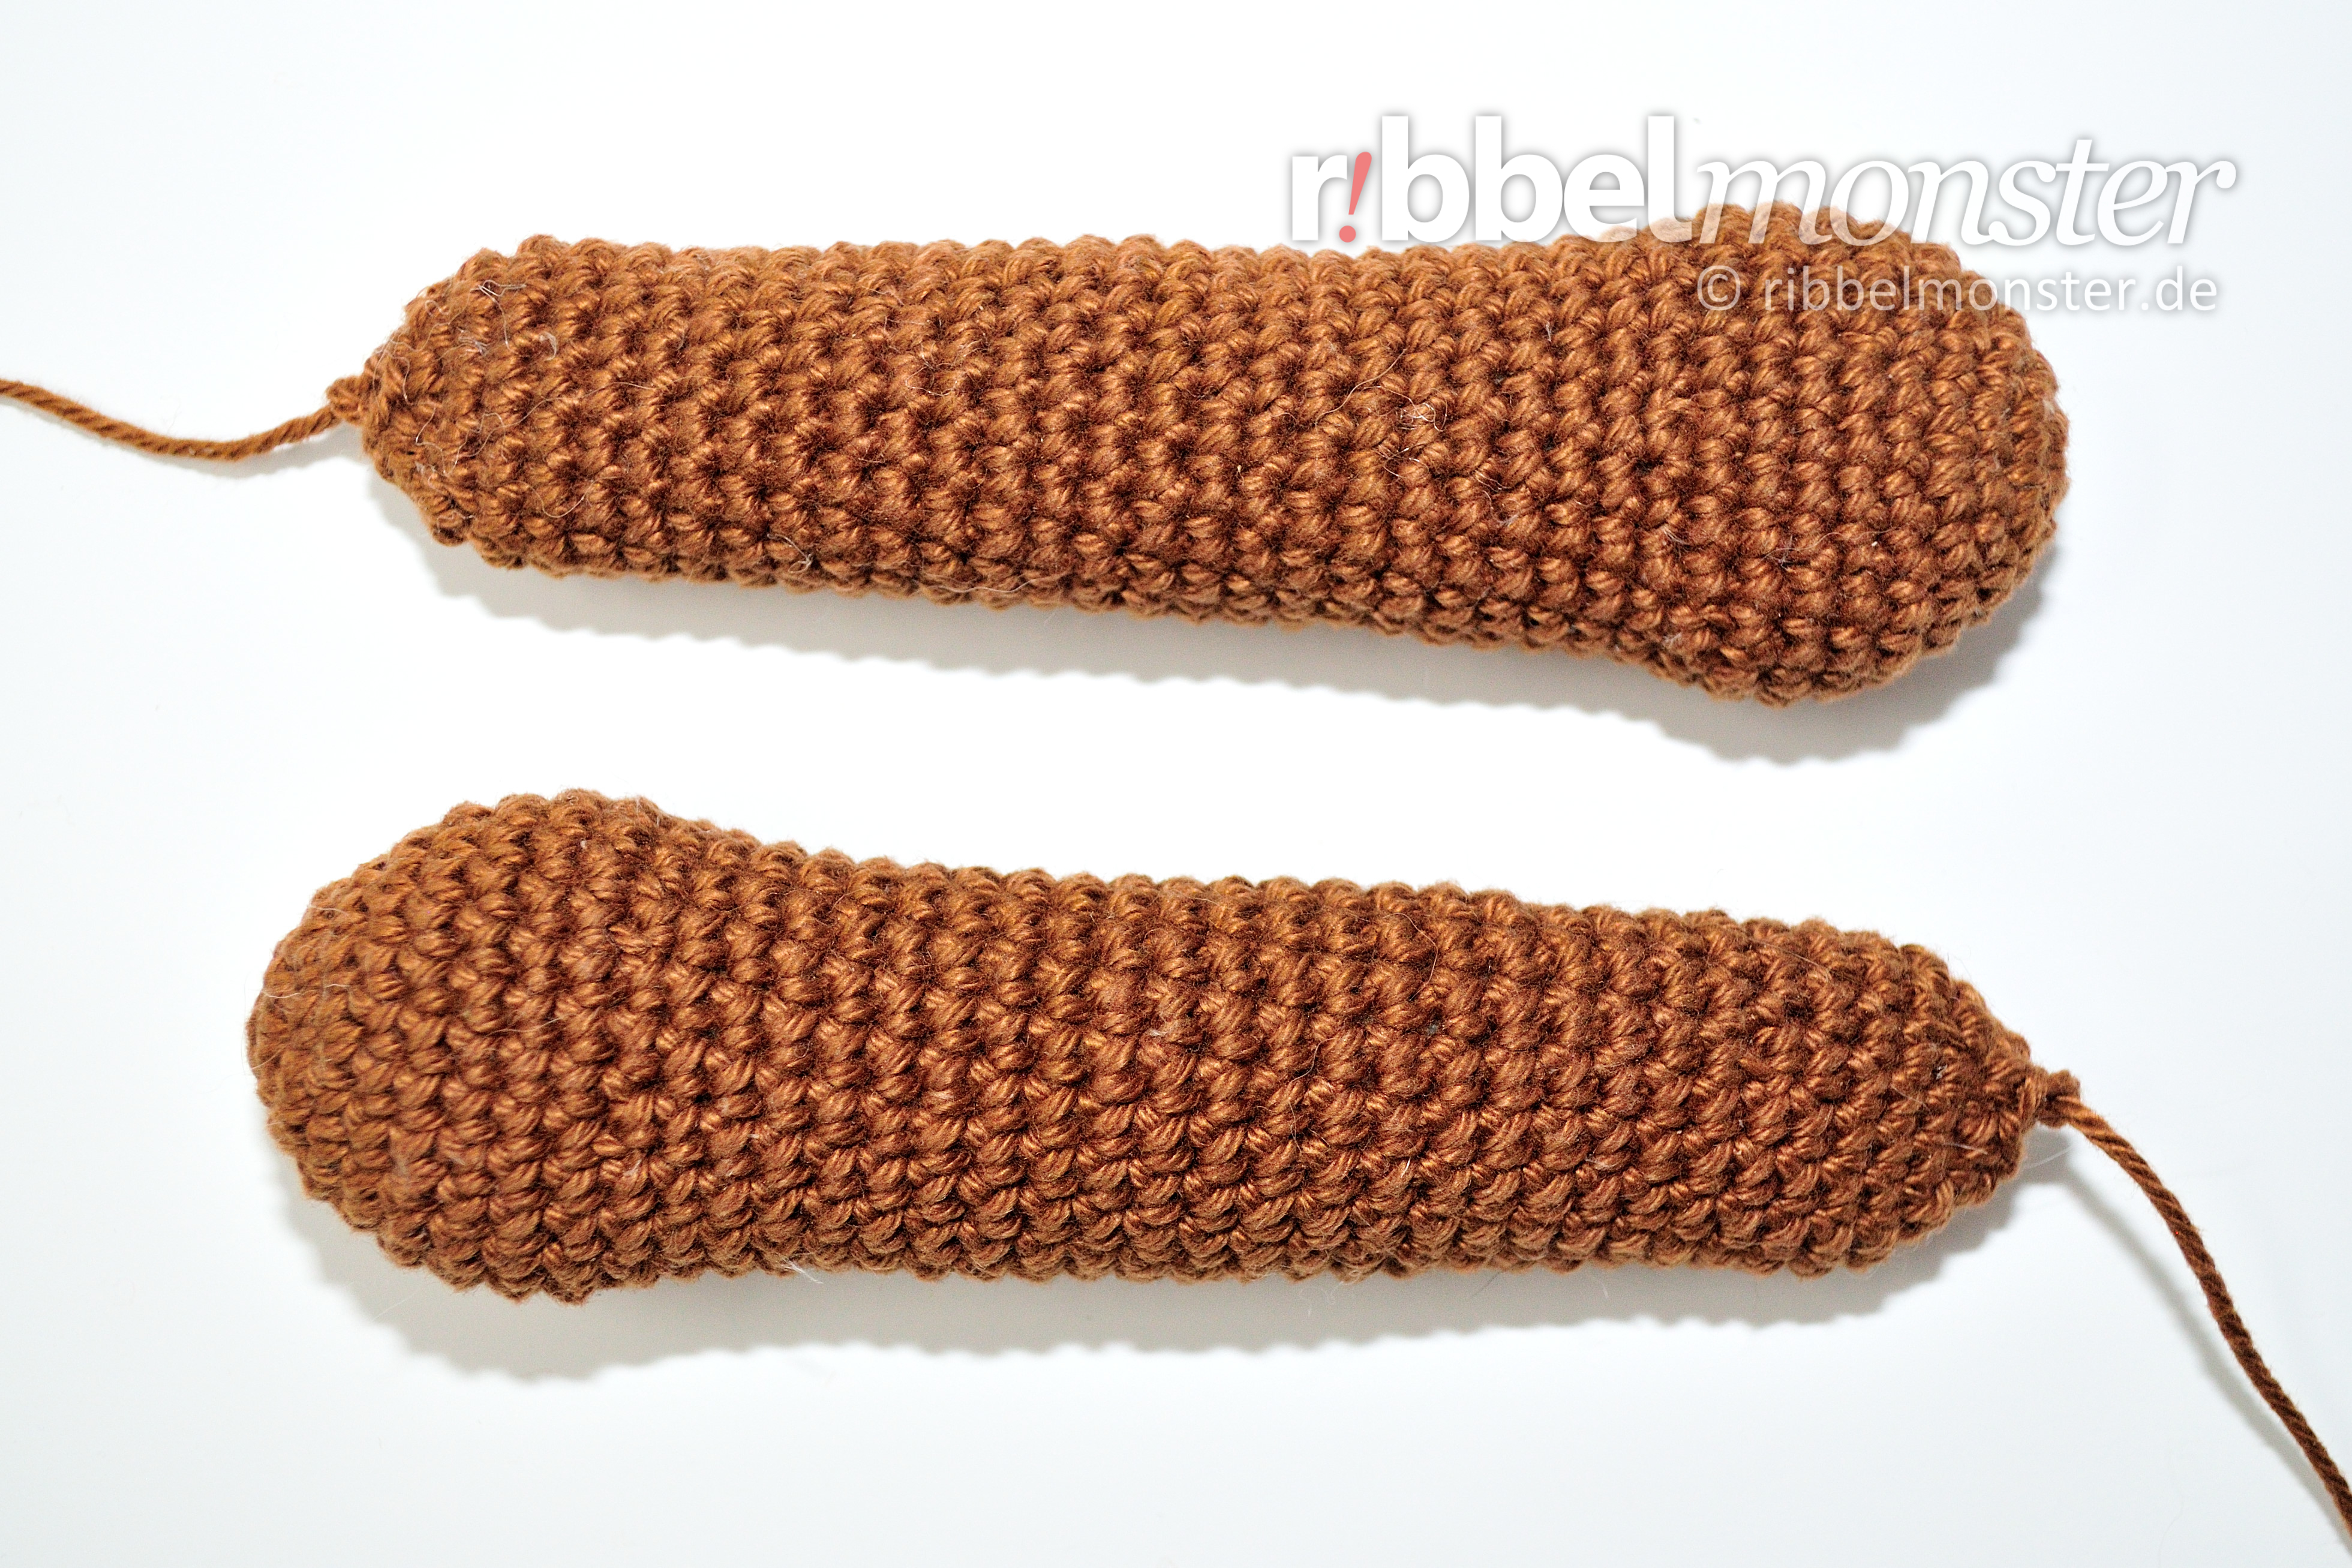
We crochet the arms for the bear from the finger tips to the shoulders in spiral rounds with double crochet stitches (UK!). The arms will be filled and stuffend and later sewn to the body with the thread end or closed and attached with botton joints.
Note! If you want to create several nearly identical parts, it’s advisable to work on them consecutively on the same day. For larger parts, it’s even recommended to work on them simultaneously in stages. Our tension and tightness can vary from day to day, leading to visible differences.
- brown:
- 1st round:
- magic ring
- into the magic ring:
- 6 double crochet stitches (UK!)
- = 6 stitches
- 2nd round:
- double every stitch
- = 12 stitches
- 3rd round:
- double every 4th stitch
- = 15 stitches
- 4th round:
- double every 5th stitch
- = 18 stitches
- 5th round:
- double every 6th stitch
- = 21 stitches
- 6th round:
- double every 7th stitch
- = 24 stitches
- 7th – 9th round:
- (= 3 rounds)
- each stitch one stitch
- = 24 stitches
- 10th round:
- crochet together every 3rd and 4th stitch
- = 18 stitches
- 11th – 22nd round:
- (= 12 rounds)
- each stitch one stitch
- = 18 stitches
- 23rd round:
- crochet together every 17th and 18th stitch
- = 17 stitches
- 24th – 26th round:
- (= 3 rounds)
- each stitch one stitch
- = 17 stitches
- 27th round:
- crochet together every 16th and 17th stitch
- = 16 stitches
- 28th – 30th round:
- (= 3 rounds)
- each stitch one stitch
- = 16 stitches
- 31st round:
- crochet together every 15th and 16th stitch
- = 15 stitches
- 32nd – 34th round:
- (= 3 rounds)
- each stitch one stitch
- = 15 stitches
- fill and stuff completely
- 35th round:
- crochet together every 4th and 5th stitch
- = 12 stitches
- without button joints:
- cut the thread generous, pull off the loop, DONT cut the thread end, will be needed for sewing later
- with button joints:
- 36th round:
- crochet together every 1st and 2nd stitch
- = 6 stitches
- cut the thread generous, pull off the loop, close remaining opening, secure and weave in the thread end
- 36th round:
Crochet Bear Legs (2x)
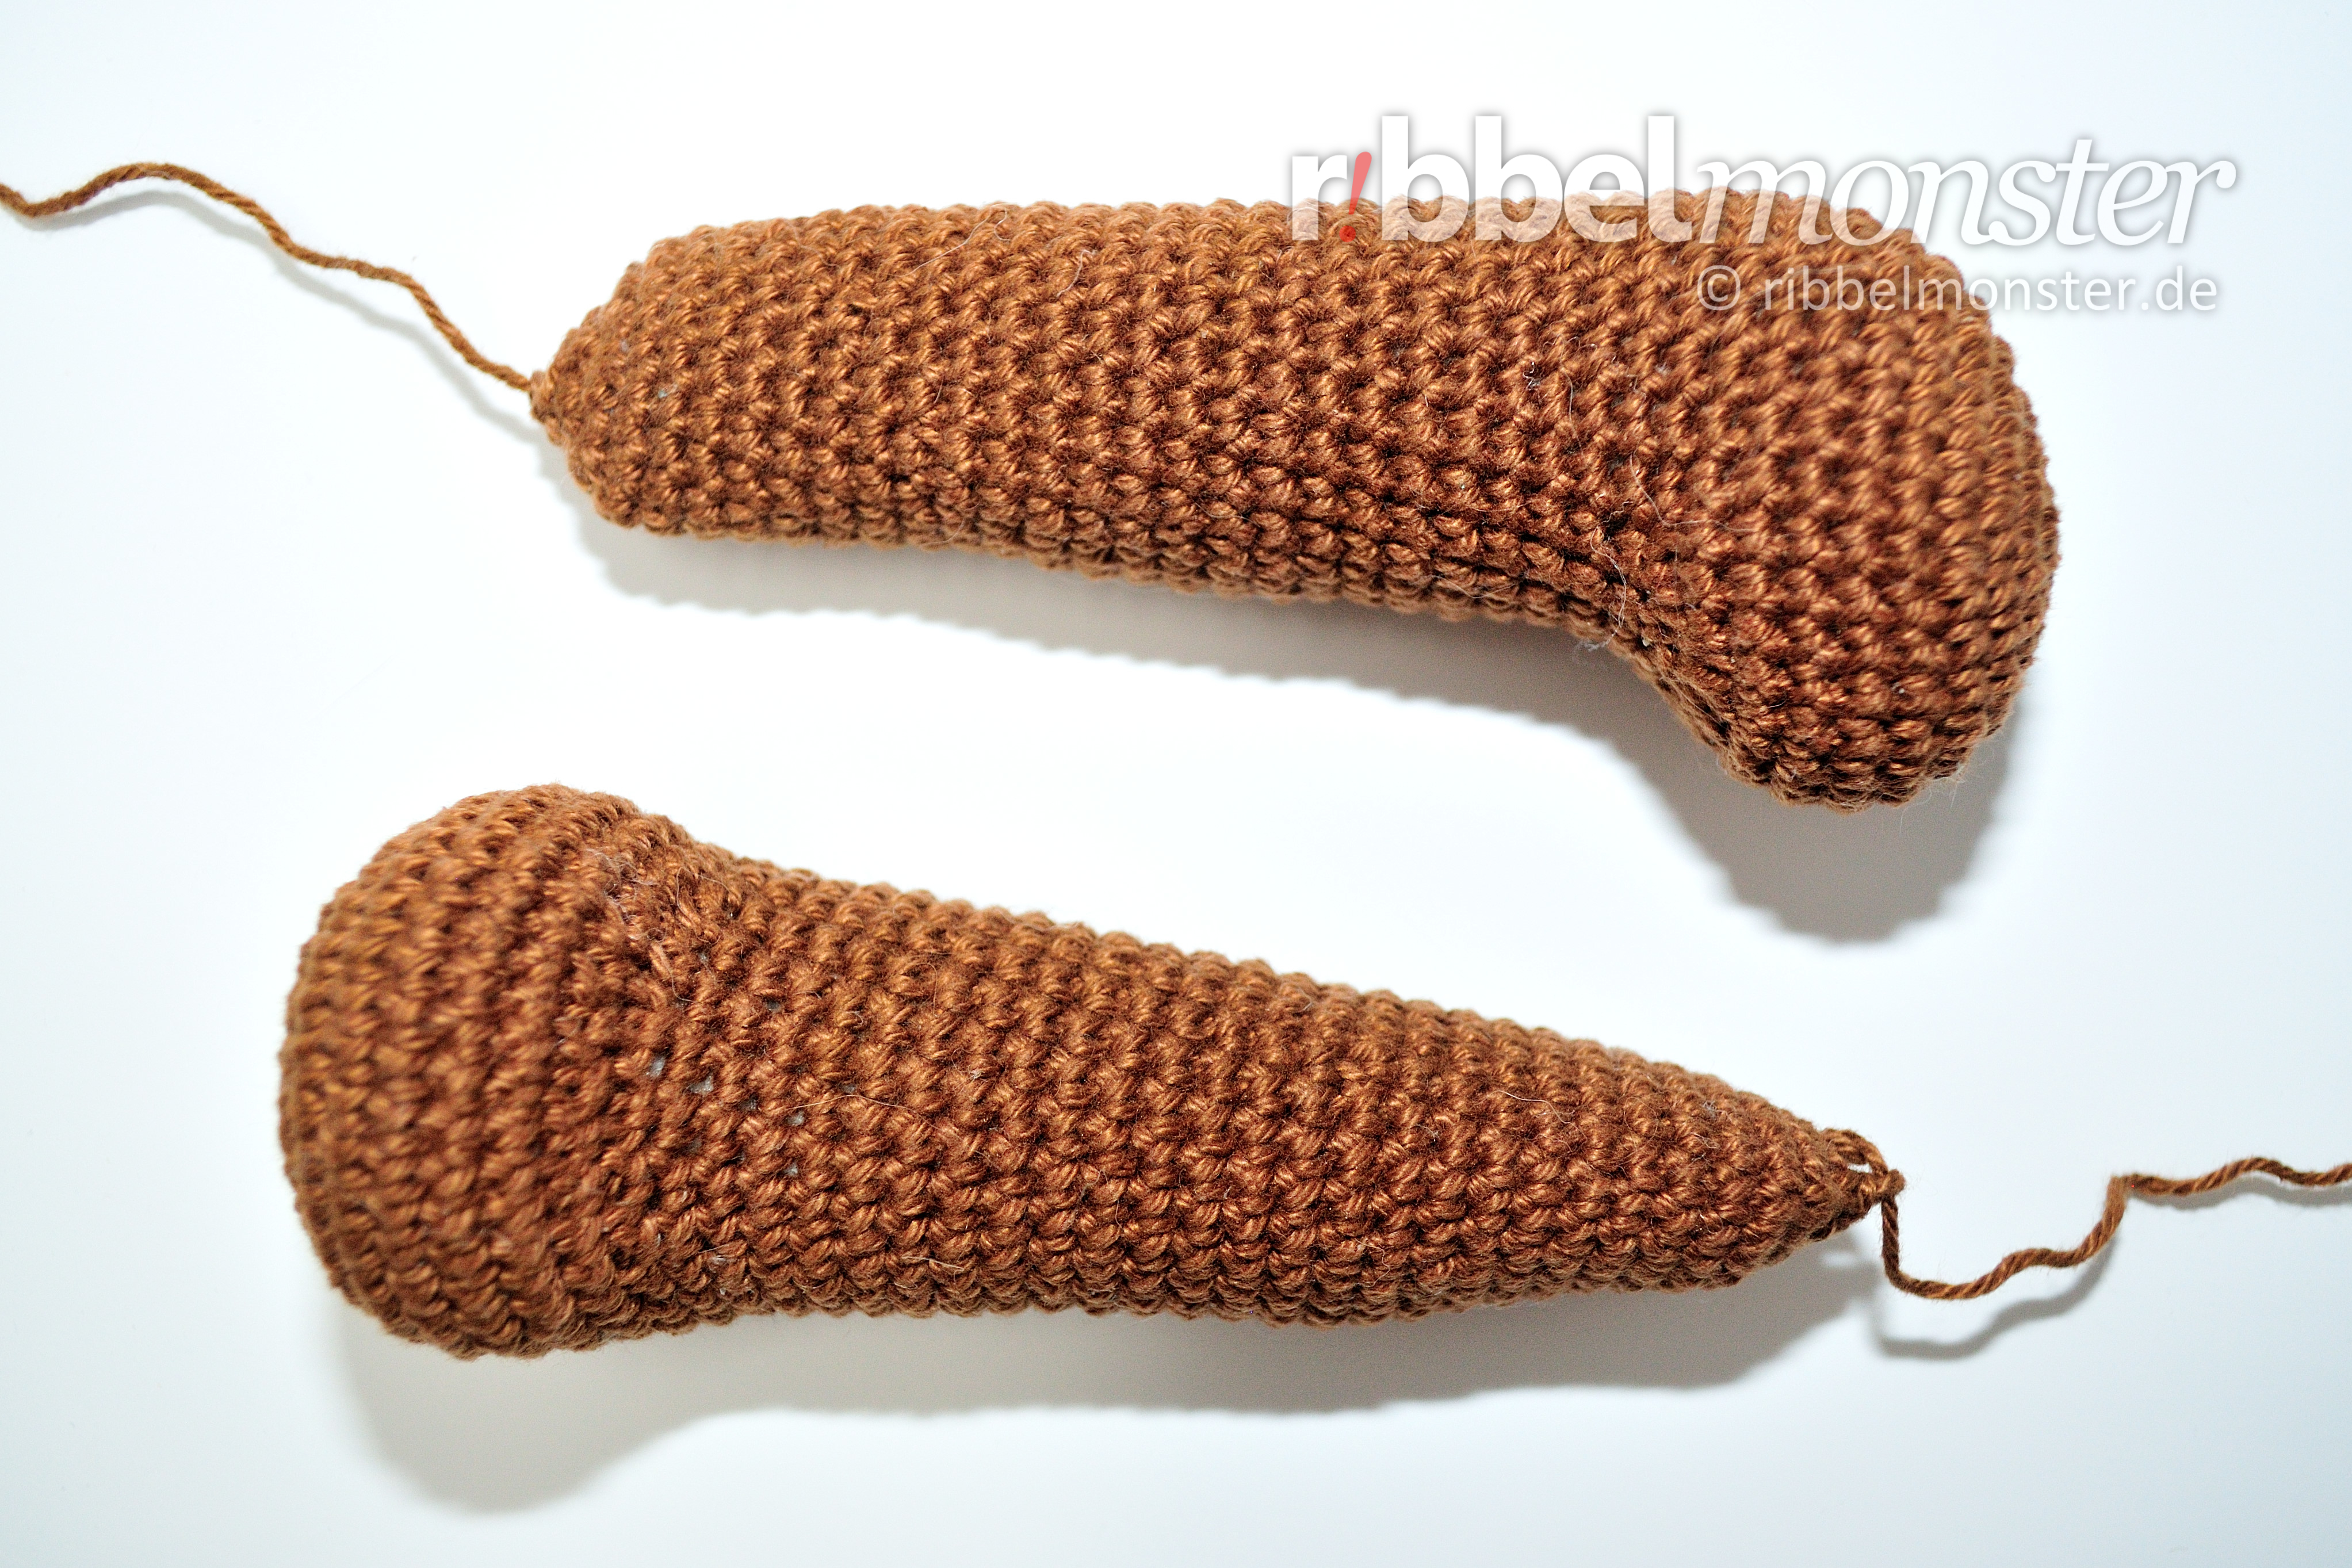
We crochet the arms for the bear from the toe tips to the hips with double crochet stitches (UK!) in spiral rounds. The arms will be filled and stuffend and later sewn to the body with the thread end or closed and attached with botton joints.
Note! If you want to create several nearly identical parts, it’s advisable to work on them consecutively on the same day. For larger parts, it’s even recommended to work on them simultaneously in stages. Our tension and tightness can vary from day to day, leading to visible differences.
- brown:
- 1st round:
- magic ring
- into the magic ring:
- 6 double crochet stitches (UK!)
- = 6 stitches
- 2nd round:
- double every stitch
- = 12 stitches
- 3rd round:
- double every 2nd stitch
- = 18 stitches
- 4th round:
- double every 3rd stitch
- = 24 stitches
- 5th round:
- double every 4th stitch
- = 30 stitches
- 6th round:
- double every 5th stitch
- = 36 stitches
- ERROR
- (= 4 round)
- each stitch one stitch
- = 36 stitches
- 11th round:
- 12x 1 double crochet stitch (UK!) into one stitch
- 6x crochet together two stitches with 1 double crochet stitch (UK!)
- 12x 1 double crochet stitch (UK!) into one stitch
- = 30 stitches
- 12th round:
- 9x 1 double crochet stitch (UK!) into one stitch
- 6x crochet together two stitches with 1 double crochet stitch (UK!)
- 9x 1 double crochet stitch (UK!) into one stitch
- = 24 stitches
- 13rd – 24th round:
- (= 12 rounds)
- each stitch one stitch
- = 24 stitches
- 25th round:
- crochet together every 23rd and 24th stitch
- = 23 stitches
- 26th round:
- each stitch one stitch
- = 23 stitches
- 27th round:
- crochet together every 22nd and 23rd stitch
- = 22 stitches
- 28th round:
- each stitch one stitch
- = 22 stitches
- 29th round:
- crochet together every 21st and 22nd stitch
- = 21 stitches
- 30th round:
- each stitch one stitch
- = 21 stitches
- 31st round:
- crochet together every 20th and 21st stitch
- = 20 stitches
- 32nd round:
- each stitch one stitch
- = 20 stitches
- 33rd round:
- crochet together every 19th and 20th stitch
- = 19 stitches
- 34th round:
- each stitch one stitch
- ERROR
- 35th round:
- crochet together every 18th and 19th stitch
- = 18 stitches
- 36th round:
- each stitch one stitch
- = 18 stitches
- fill and stuff completely
- 37th round:
- crochet together every 2nd and 3rd stitch
- = 12 stitches
- without button joints:
- cut the thread generous, pull off the loop, DONT cut the thread end, will be needed for sewing later
- with button joints:
- 38th round:
- crochet together every 1st and 2nd stitch
- = 6 stitches
- cut the thread generous, pull off the loop, close remaining opening, secure and weave in the thread end
- 38th round:
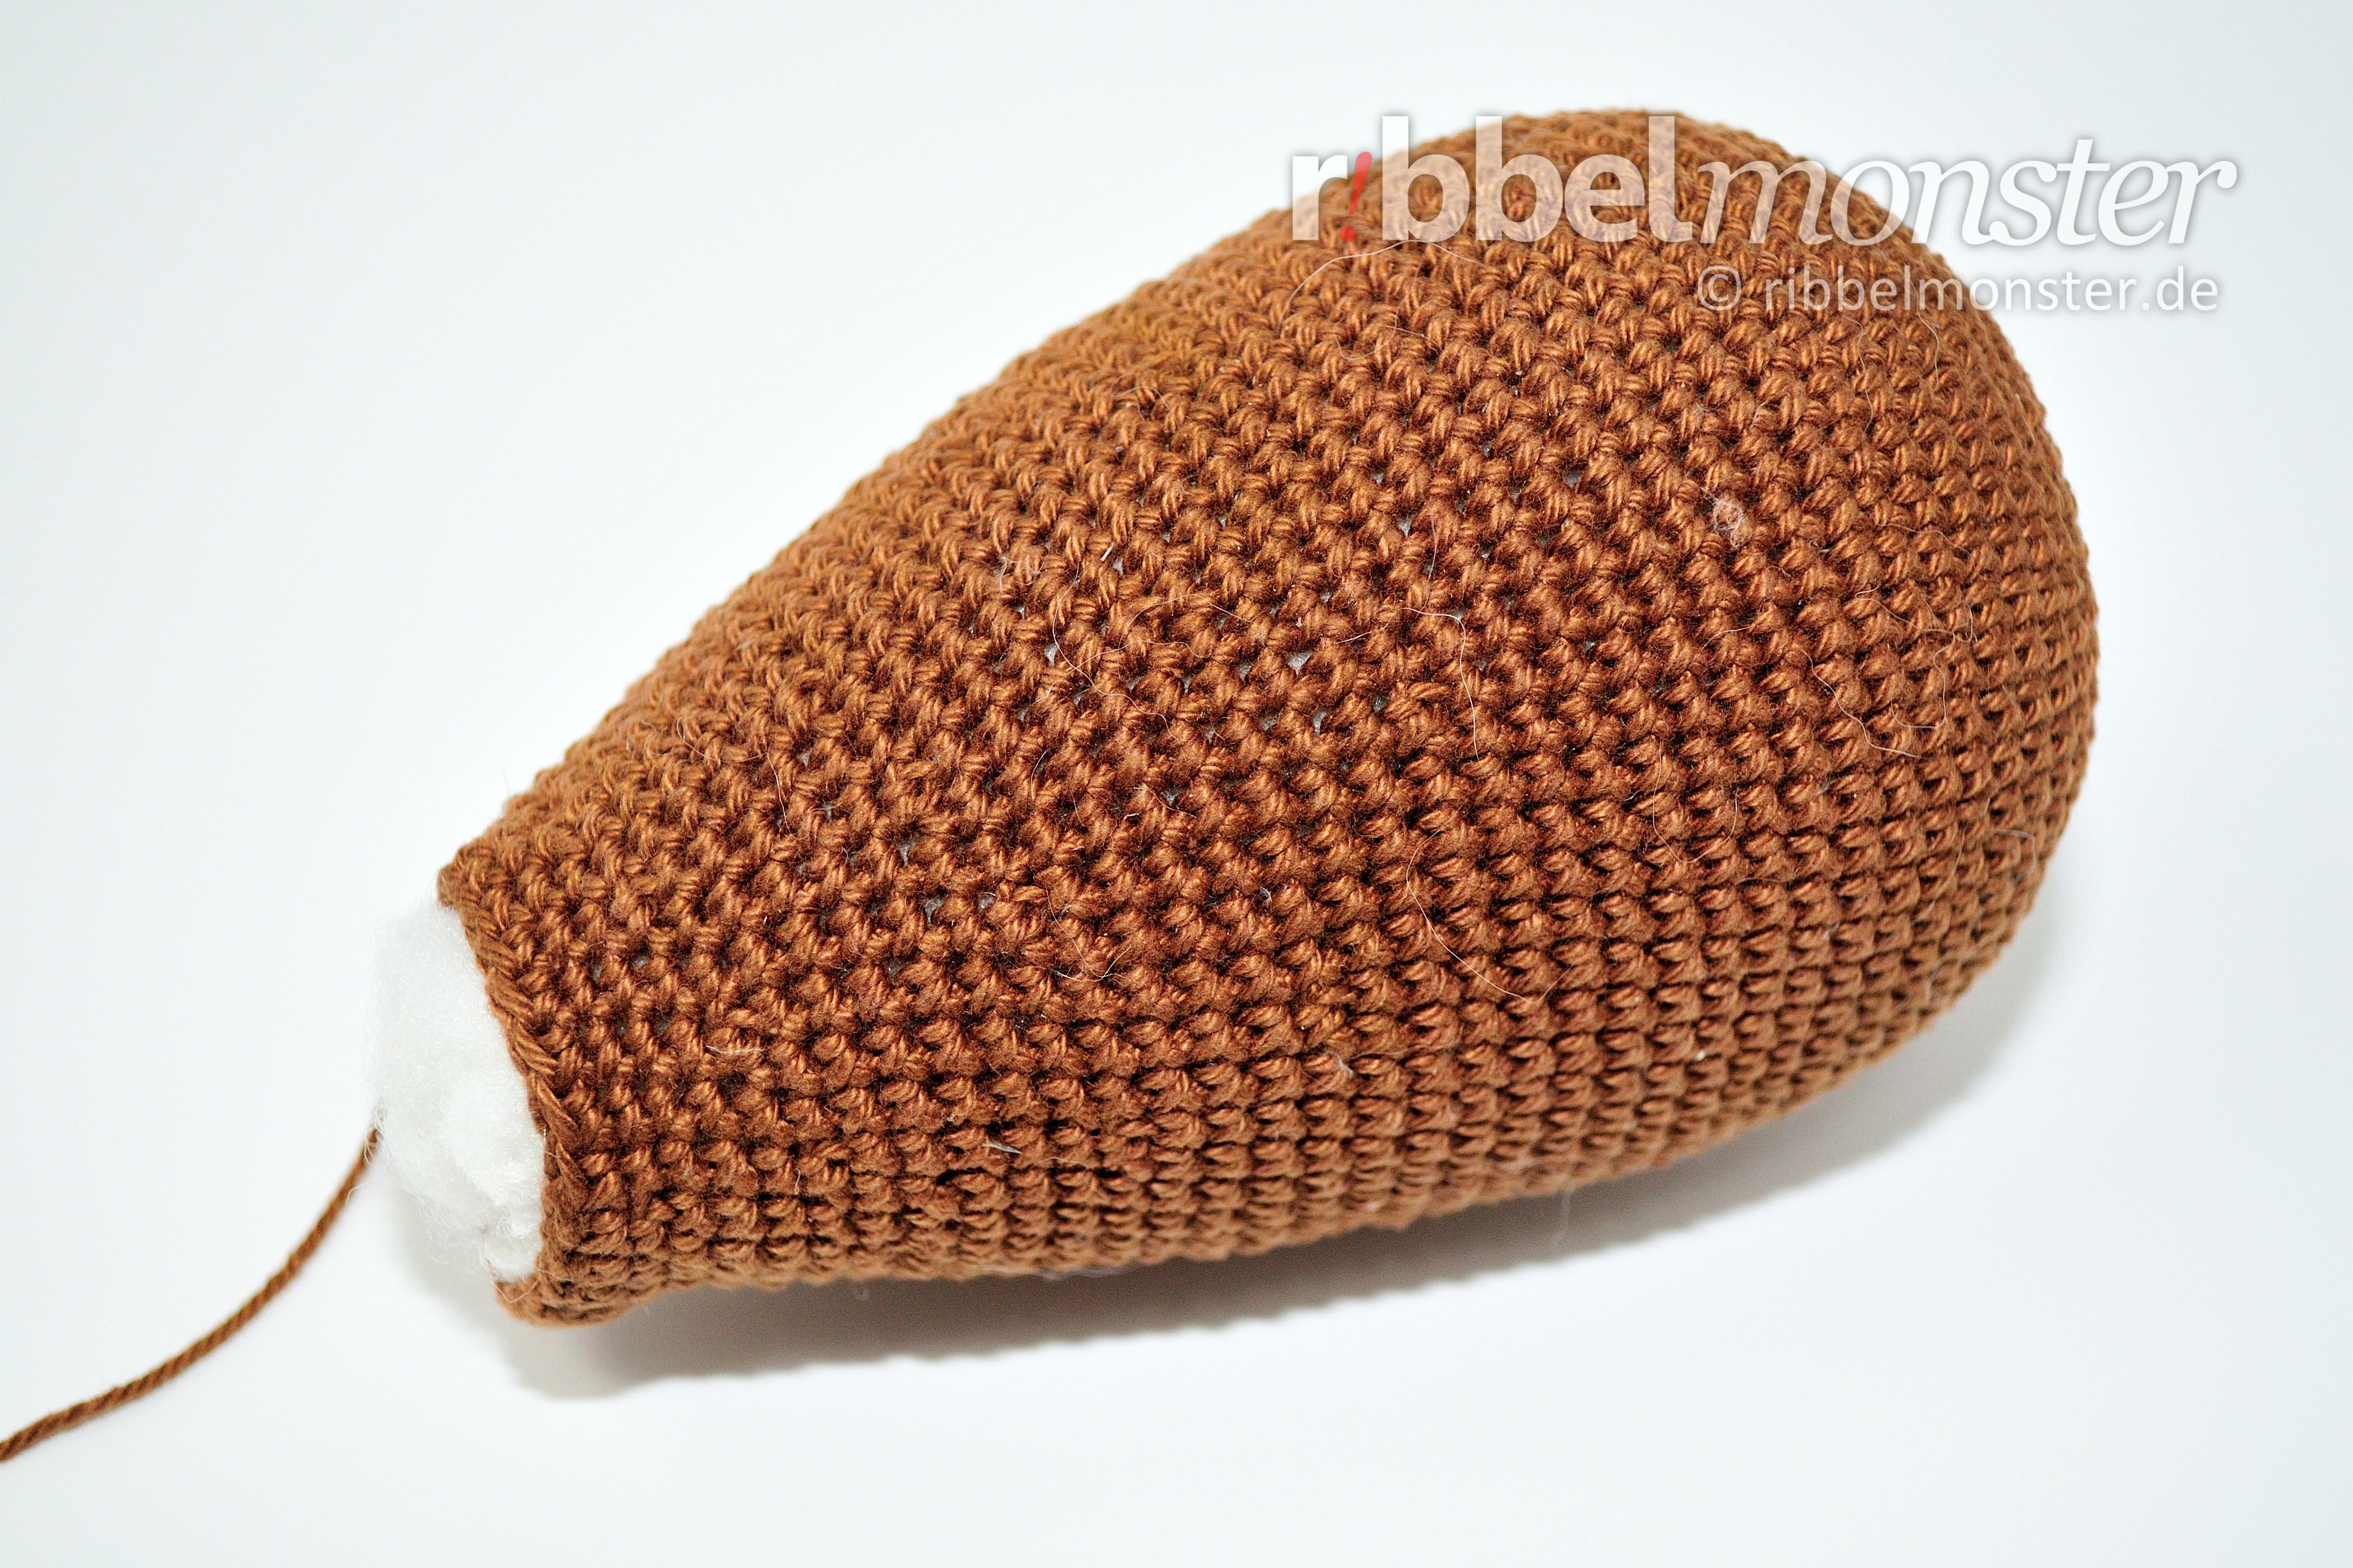
Crochet Bear Snout (1x)

We crochet the snout of the bear from the nose tip to the outside with double crochet stitches (UK!) in spiral rounds. Later the snout is sewn once around to the head and filled shortly before finishing.
- light brown:
- 1st round:
- magic ring
- into the magic ring:
- 6 double crochet stitches (UK!)
- = 6 stitches
- 2nd round:
- double every stitch
- = 12 stitches
- 3rd round:
- double every 2nd stitch
- = 18 stitches
- 4th round:
- double every 3rd stitch
- = 24 stitches
- 5th round:
- double every 4th stitch
- = 30 stitches
- 6th – 8th round:
- (= 3 rounds)
- each stitch one stitch
- = 30 stitches
- beyond the end of the round:
- 1x 1 slip stitch into one stitch
- cut the thread generous, pull off the loop, DONT cut the thread end, will be needed for sewing later
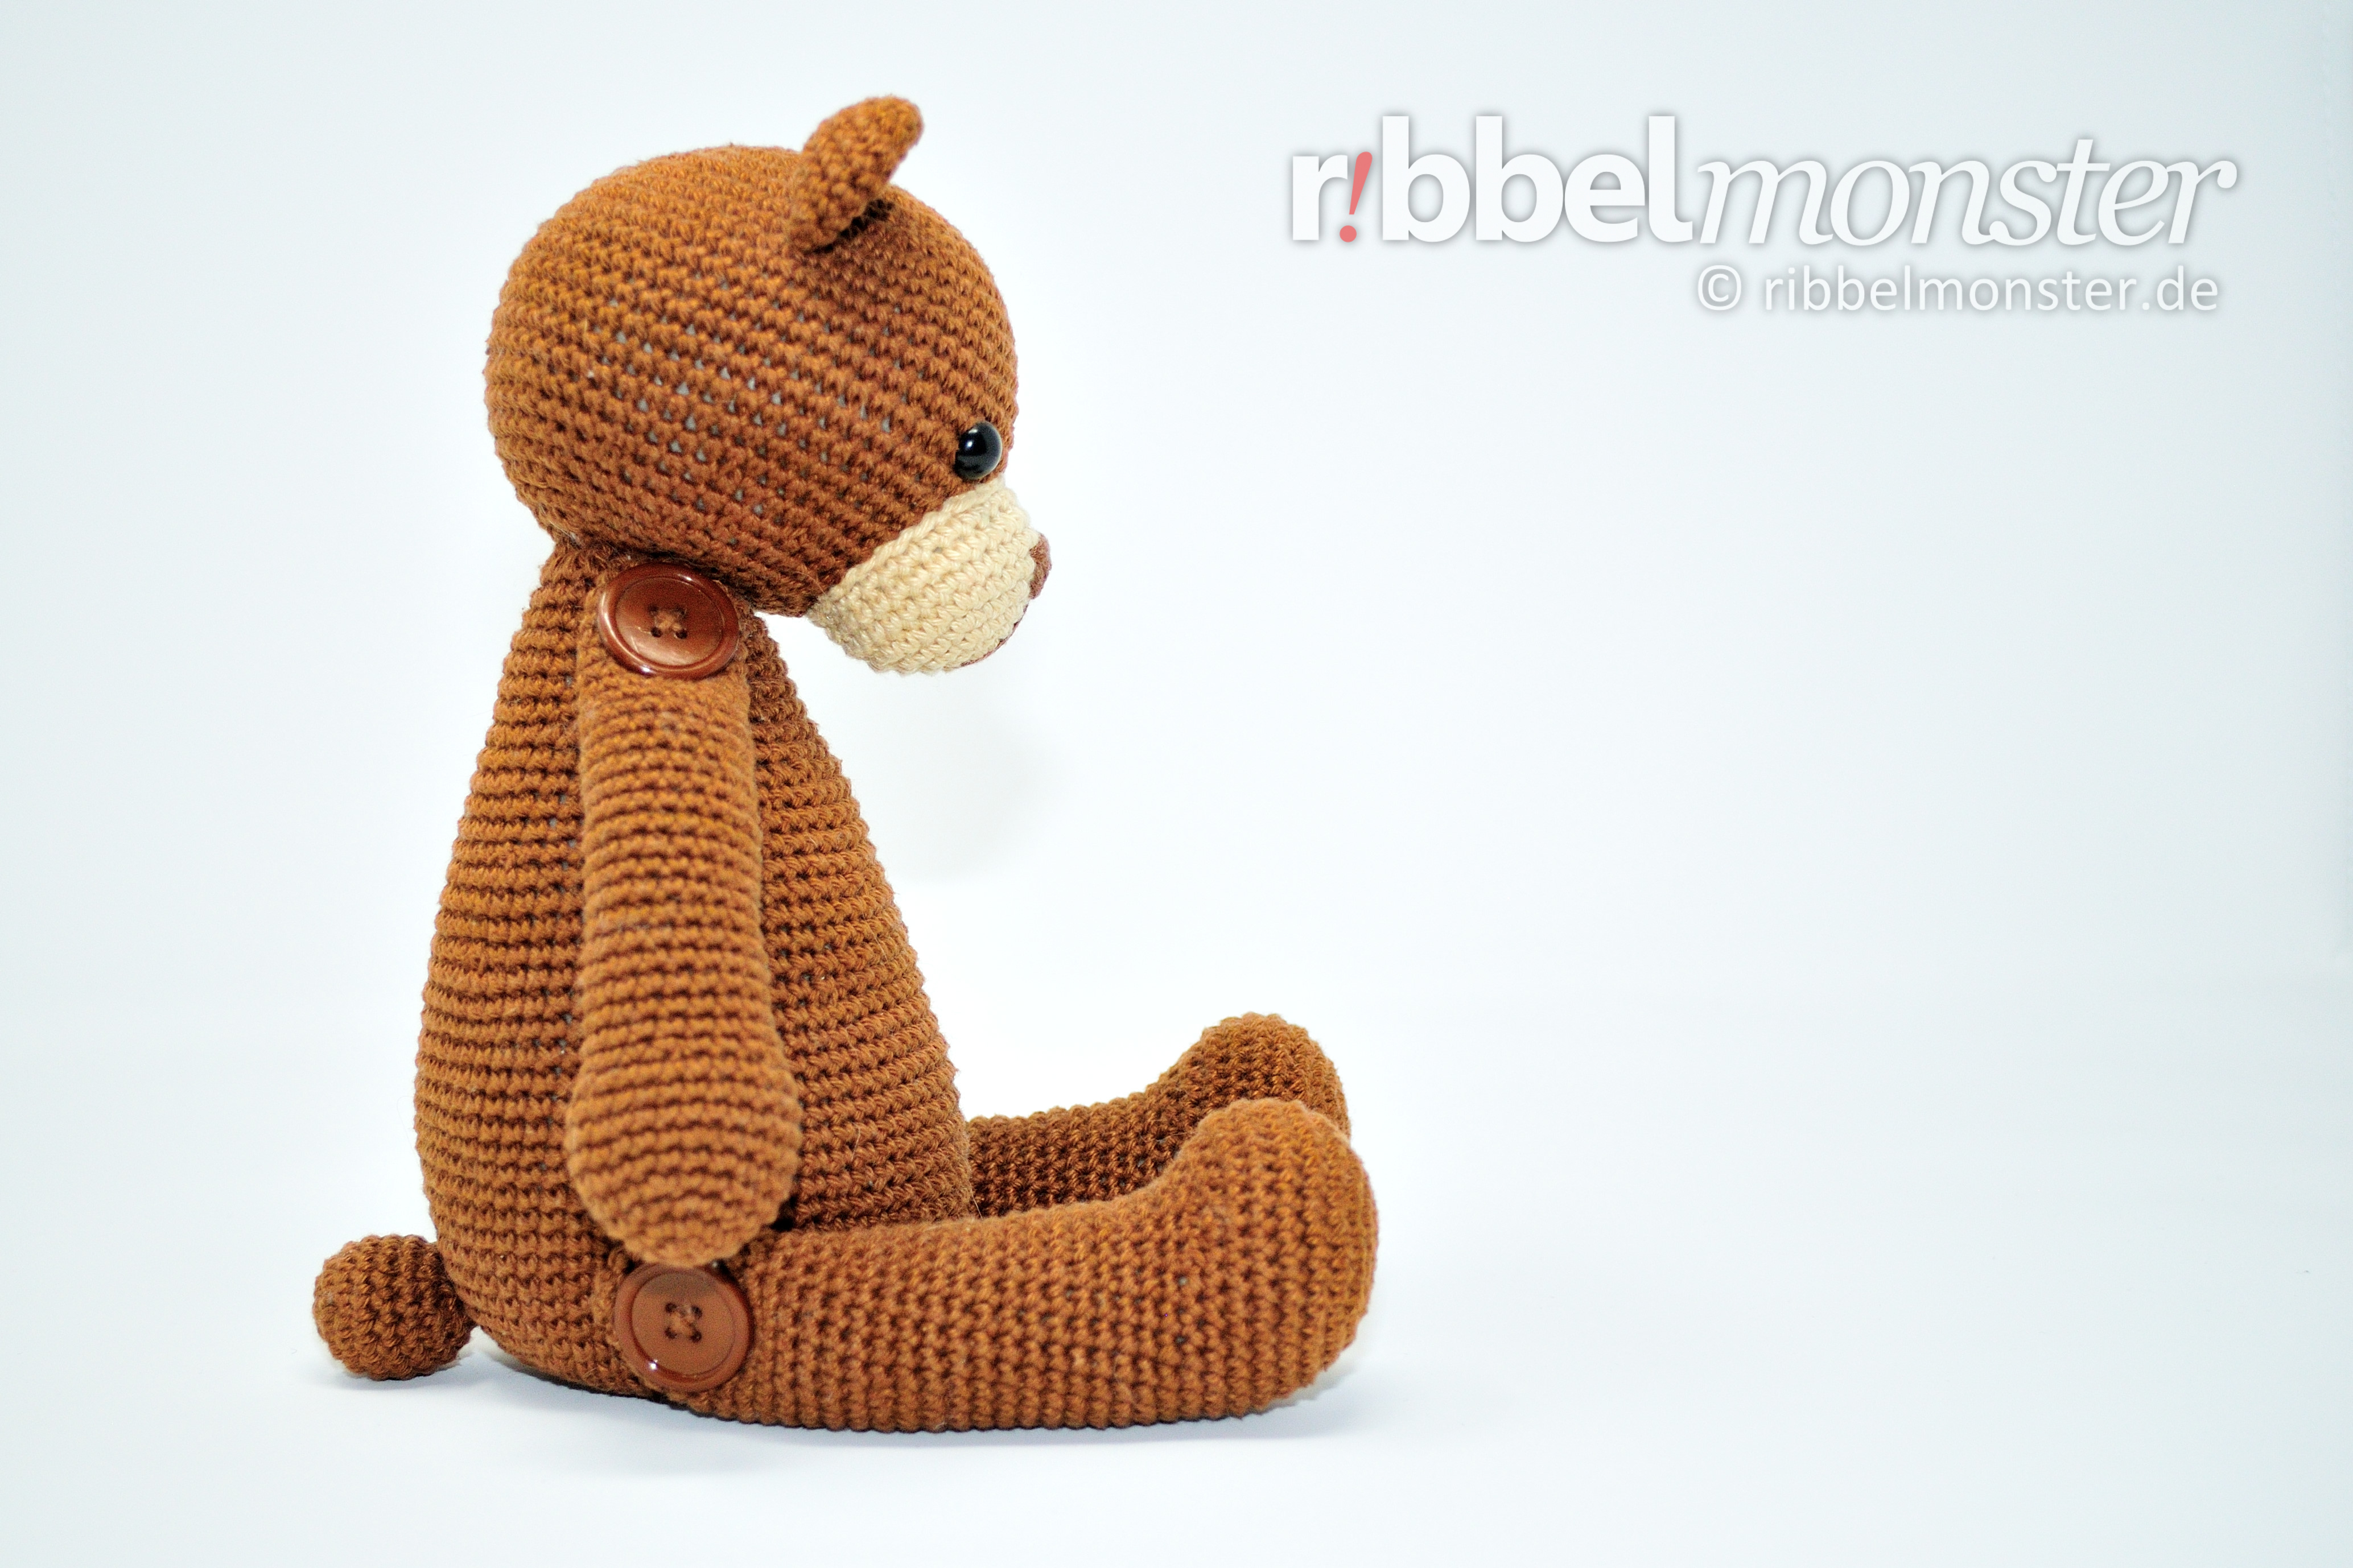
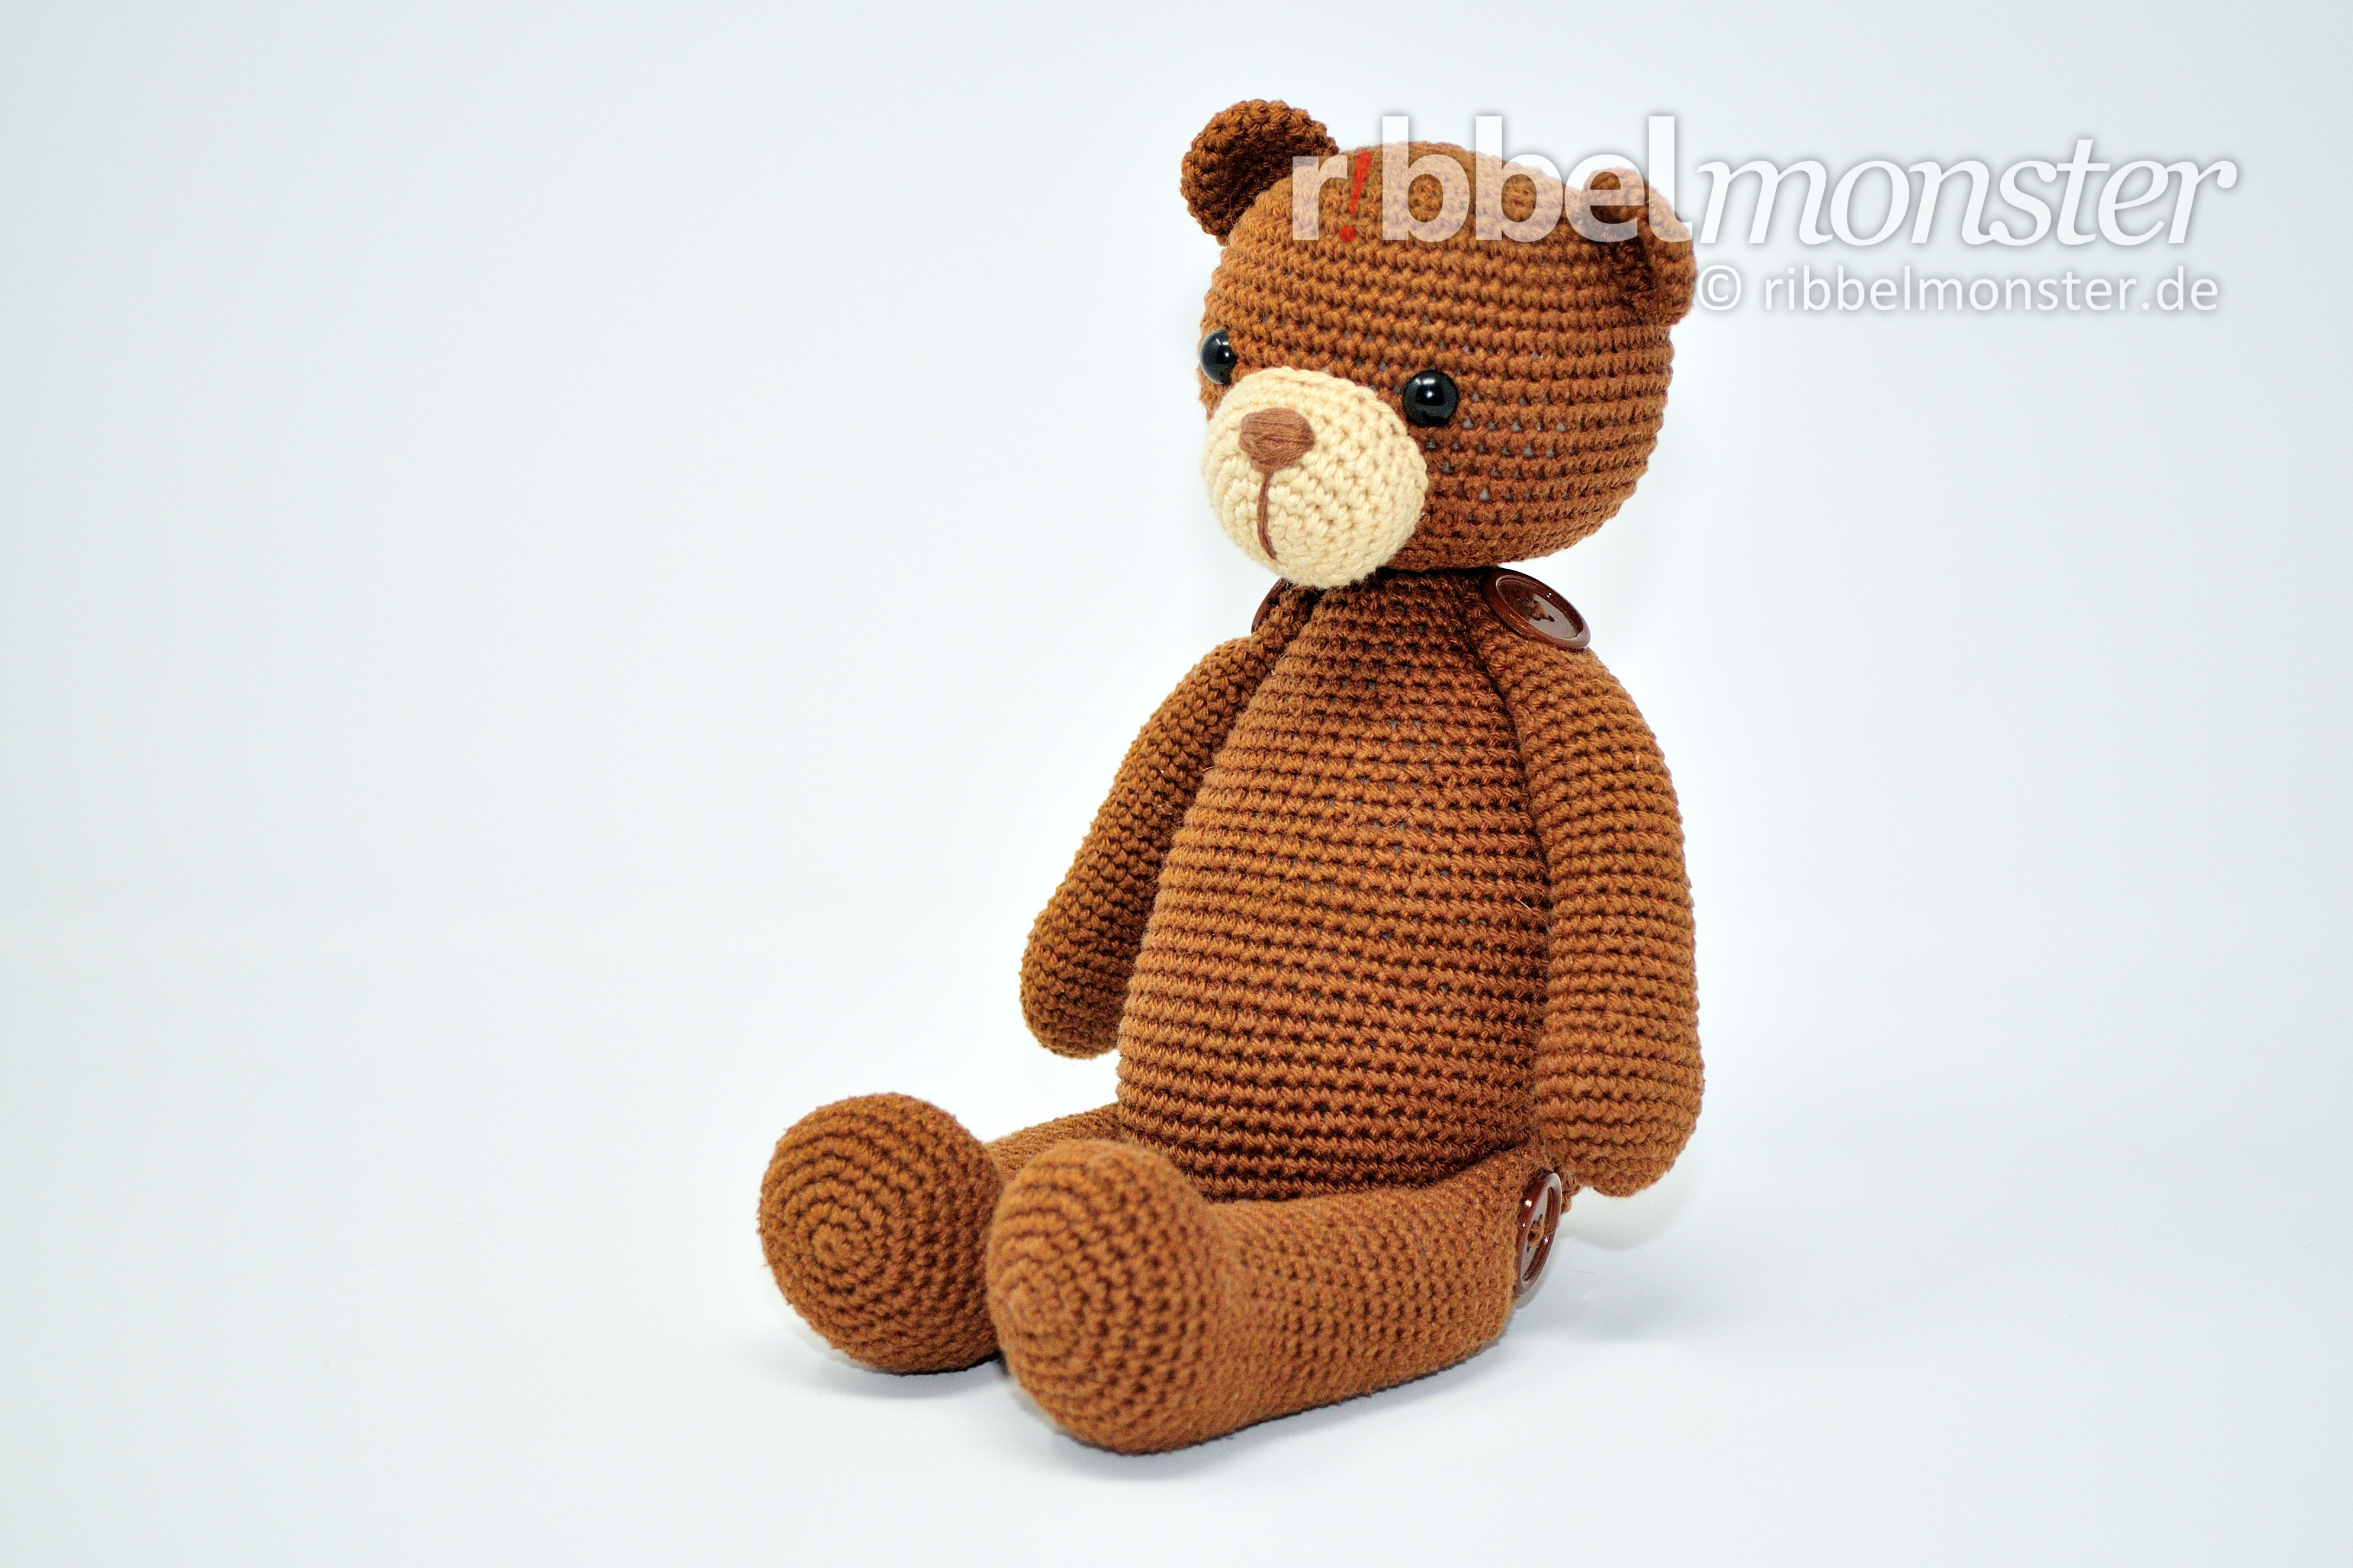
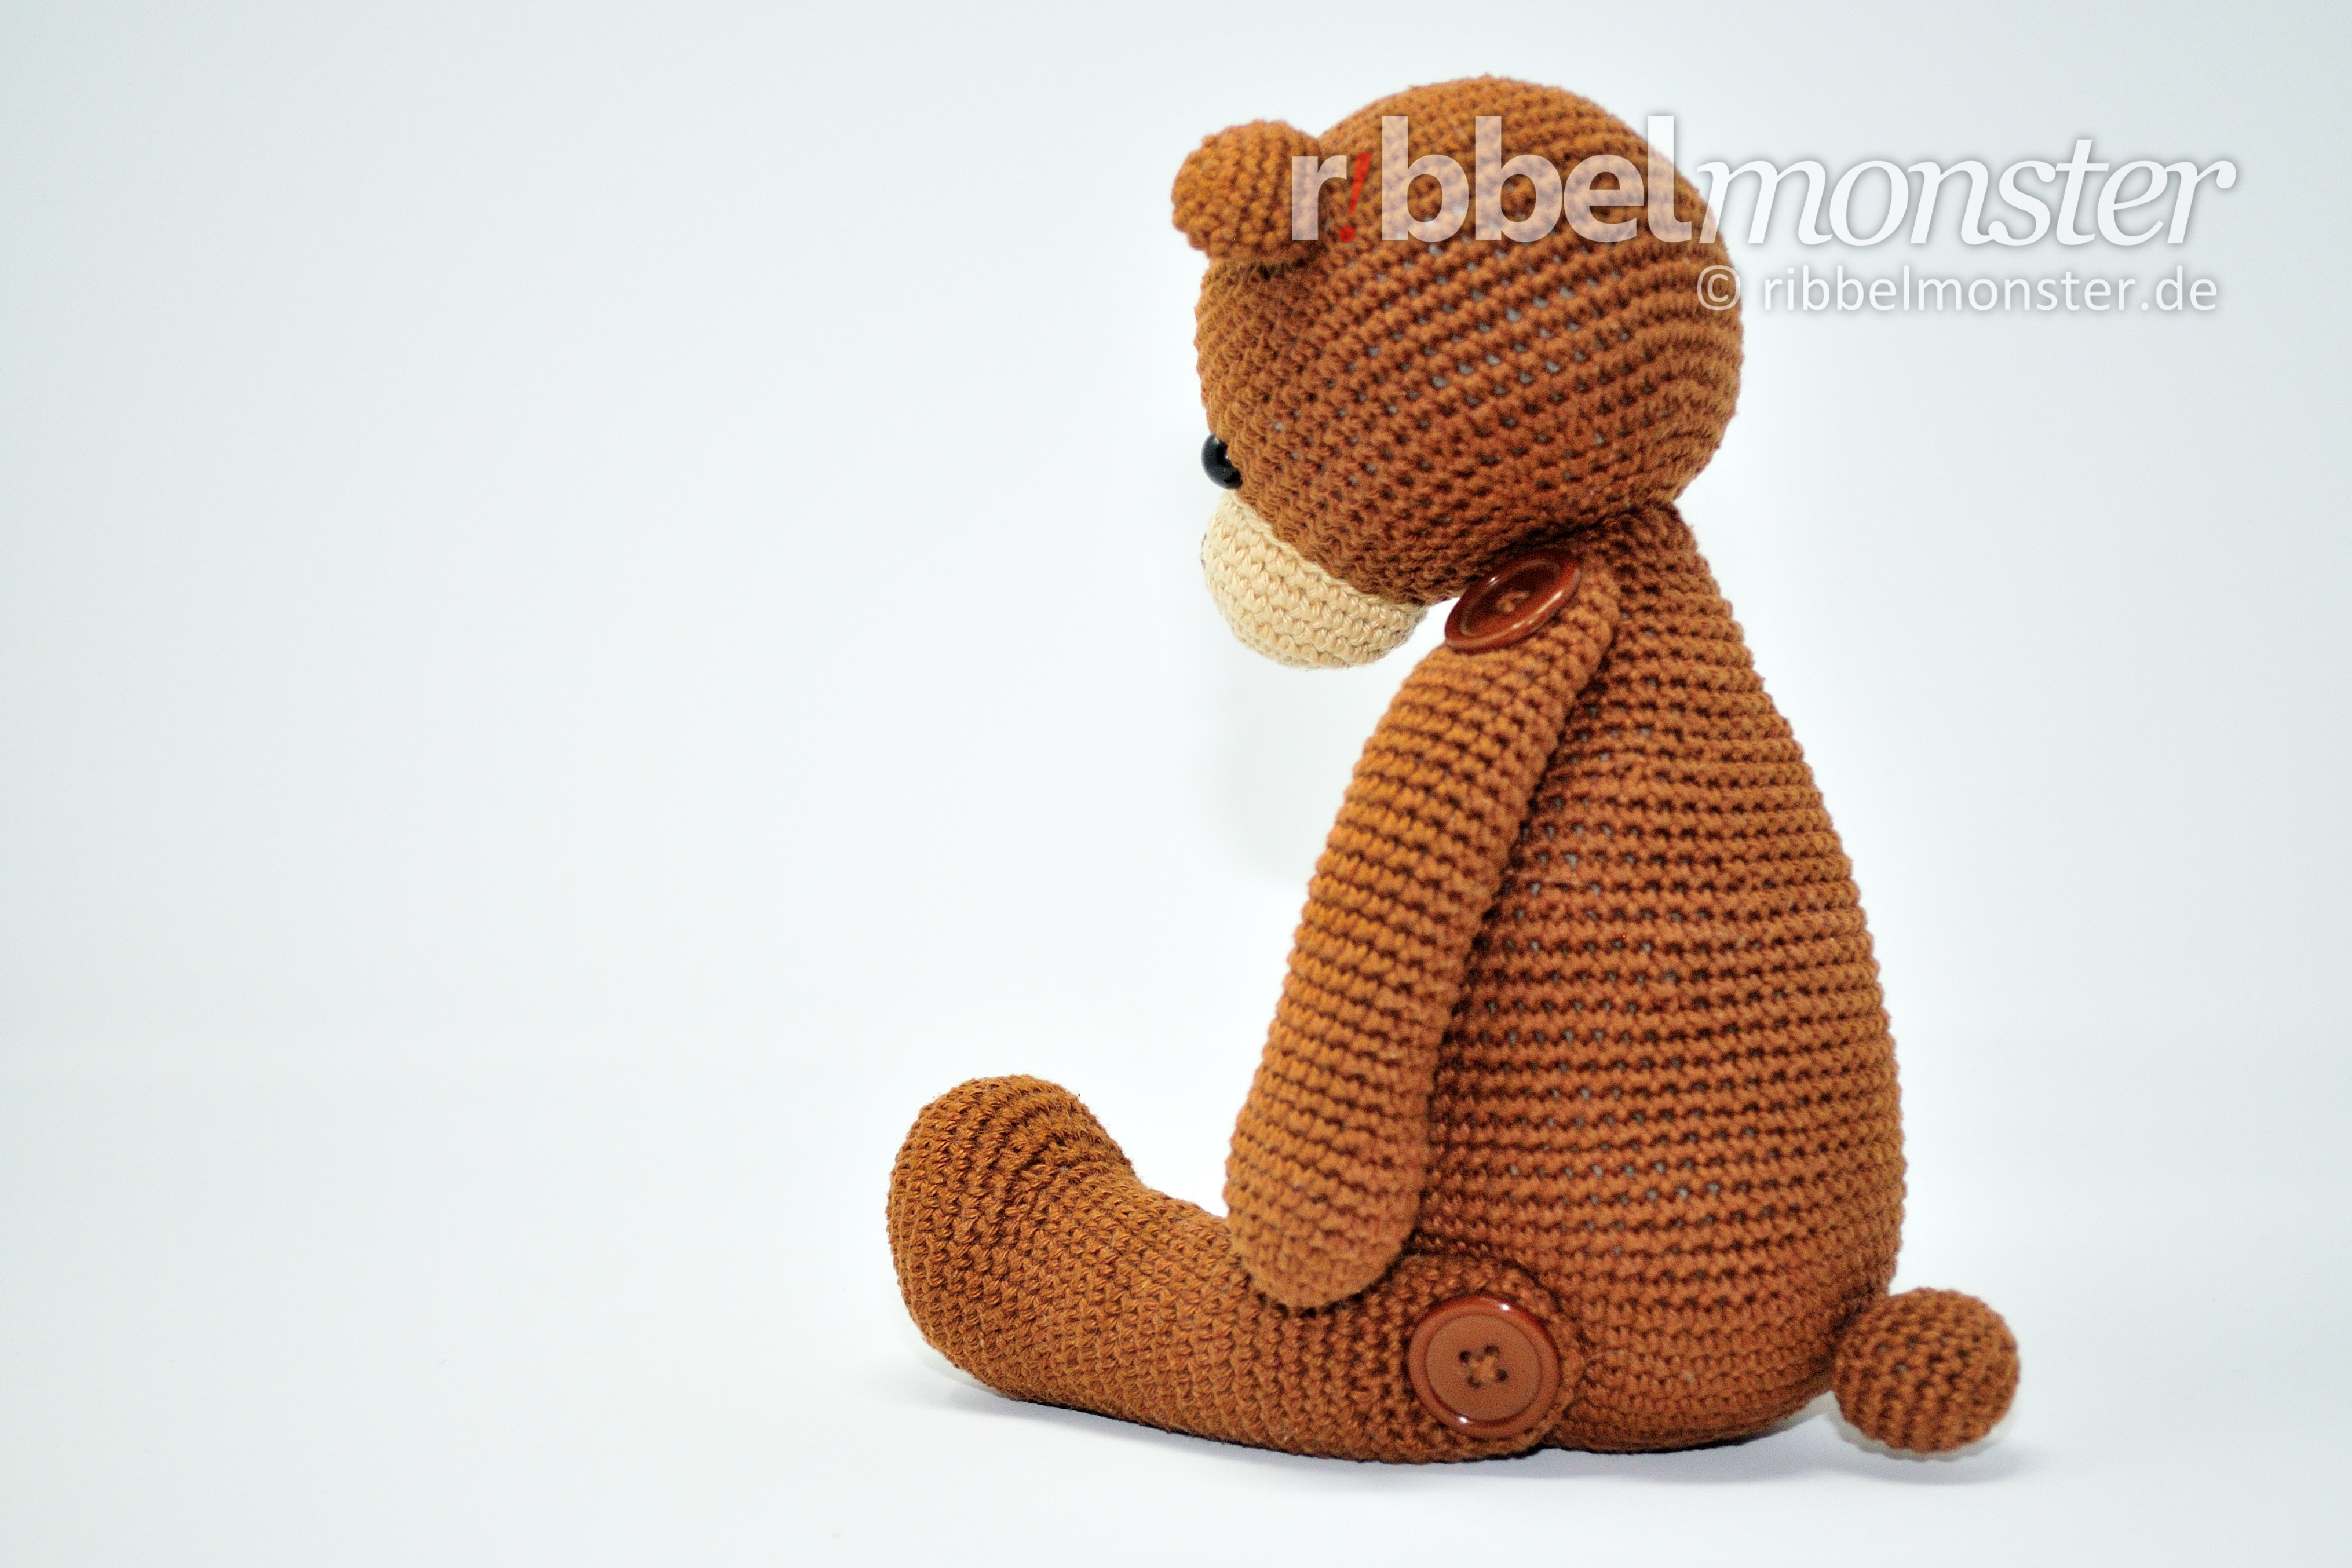
Finish Bear “Bruno”
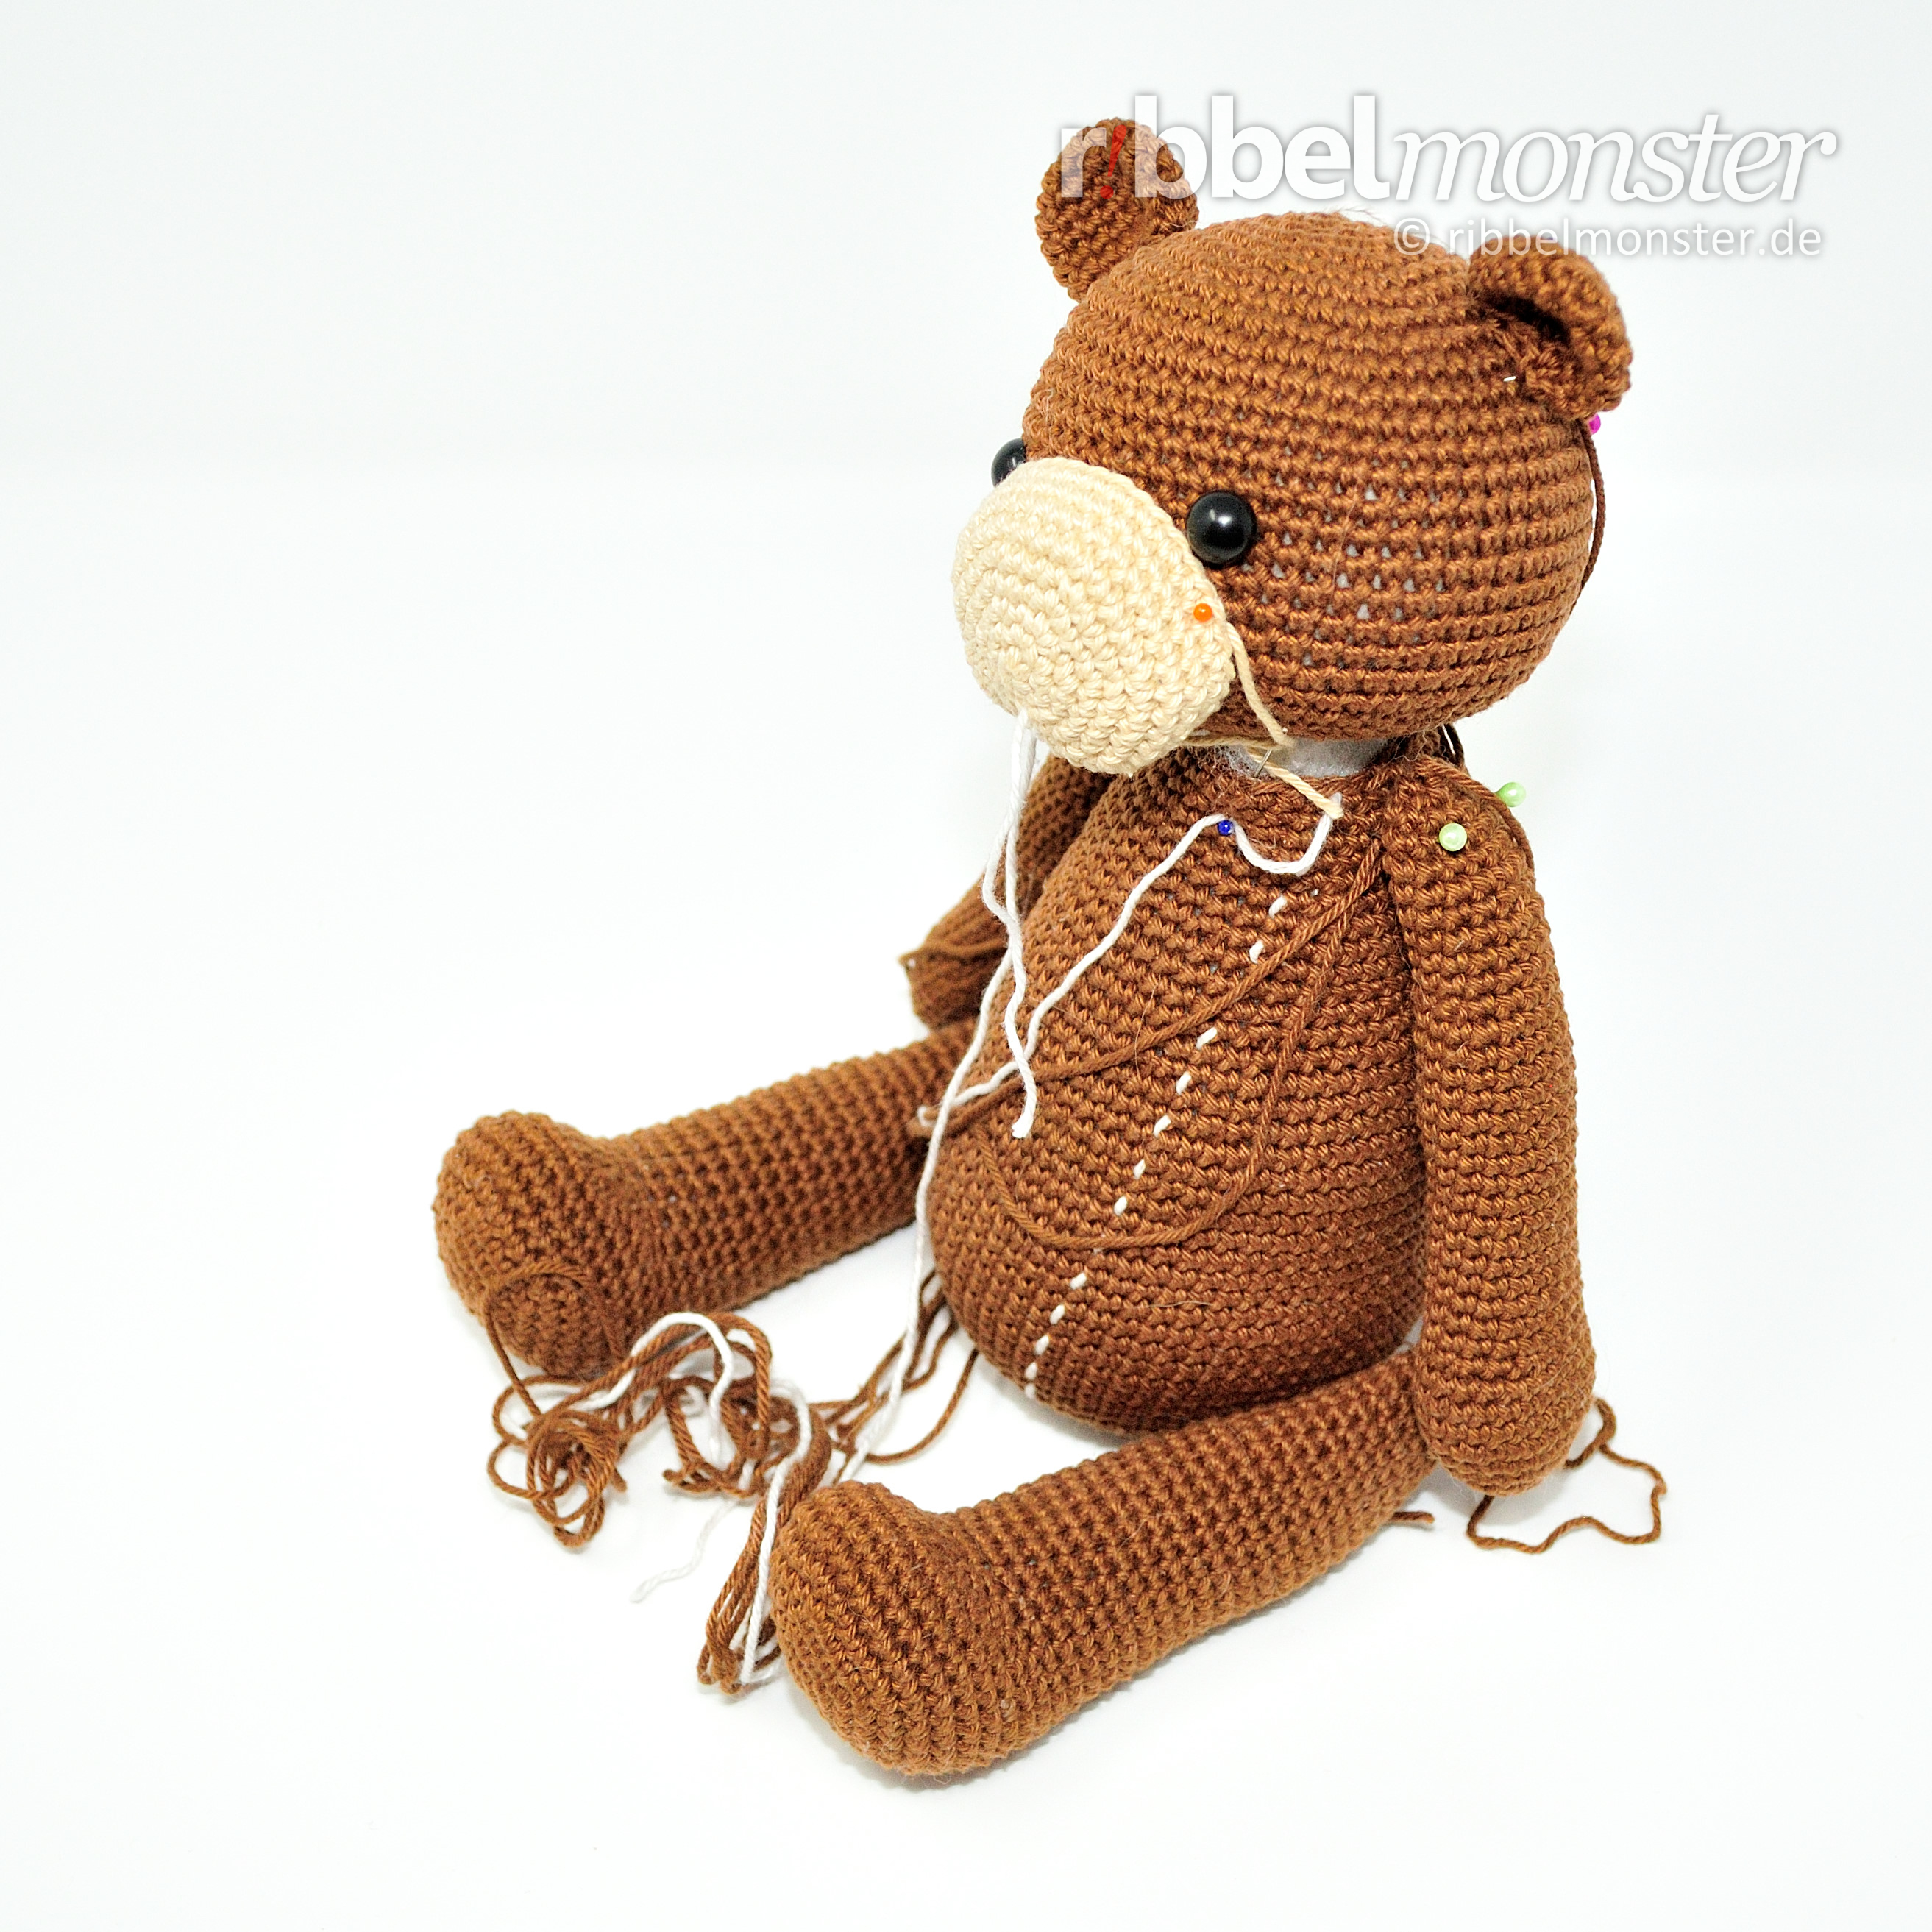
After you’ve finished crocheting all the parts, you can sew your bear together. For this you first put all parts together with pins. So you see if the positions are ok and can still easily make changes.
Sew head to body
First we sew the head around to the body. Both openings point to each other. The middle between the 6 treble crochet stitches (UK!) at the neck sits at the back and the middle between the eyes at the front. You can orient yourself to the Tutorial to sew together open parts.
Sew on the snout
Then we sew the snout with the thread end around to the head. For this you attach it first once around with pins. It sits exactly in the middle between the eyes with the upper edge touching the middel of the eyes. Now you can sew the snout step by step. Shortly before closing the snout is filled and stuffed. Finally you secure and weave in the thread end inside.
Sew on ears
Then the ears are folded flat and sewn with the thread ends with the opening to the head. They sit in a line parallel to the eyes on top of the head. They start after the 8th and end after the 12th round. When the ears are finished the thread ends are secured and weaved in inside the head.
Sew on arms and legs
Now mark the middle over the front of the body to place the arms and the legs at the same distance right and left of it.
Without button joints: The arms and legs are sewn to the body with the flat folded opening and the respective thread ends. Fold the top of the arms so that the break line runs in a line to the palms. The legs are fold the other way so that the break line runs through the middle of the foot tips. It is best to attach the arms and legs first with pins to check the positions. The arms are sewn with the flat-folded opening horizontally around the 39th round and have 14 stitches distance on the front. The legs on the other hand, are sewn with the flat-folded opening perpendicular to the center of the 13th round with 29 stitches at the front, while the toes point upwards. Finally, the thread ends are secured and weaved in inside the body.
With button joints: The arms and legs are attached paired with button joints to the body using a separate thread and buttons. It is best to first mark the respective entry holes with pins in order to hit the positions exactly. The entry holes of the arms sit after the 39th round and have 14 stitches distance on the front. The entry holes of the legs sit after the 13th round with a distance of 29 stitches on the front, while the toes point forward and up. If you have no idea how to make button joints, the Tutorial for Button Joints will help you.
Sew on tail
Finally you sew the tail with the flat-folded opening to the back of the bear. The tail sits around the 12th round in the middle on the back of the body. Use the end of the thread from the tail to sew it and finally secure and weave it in inside.
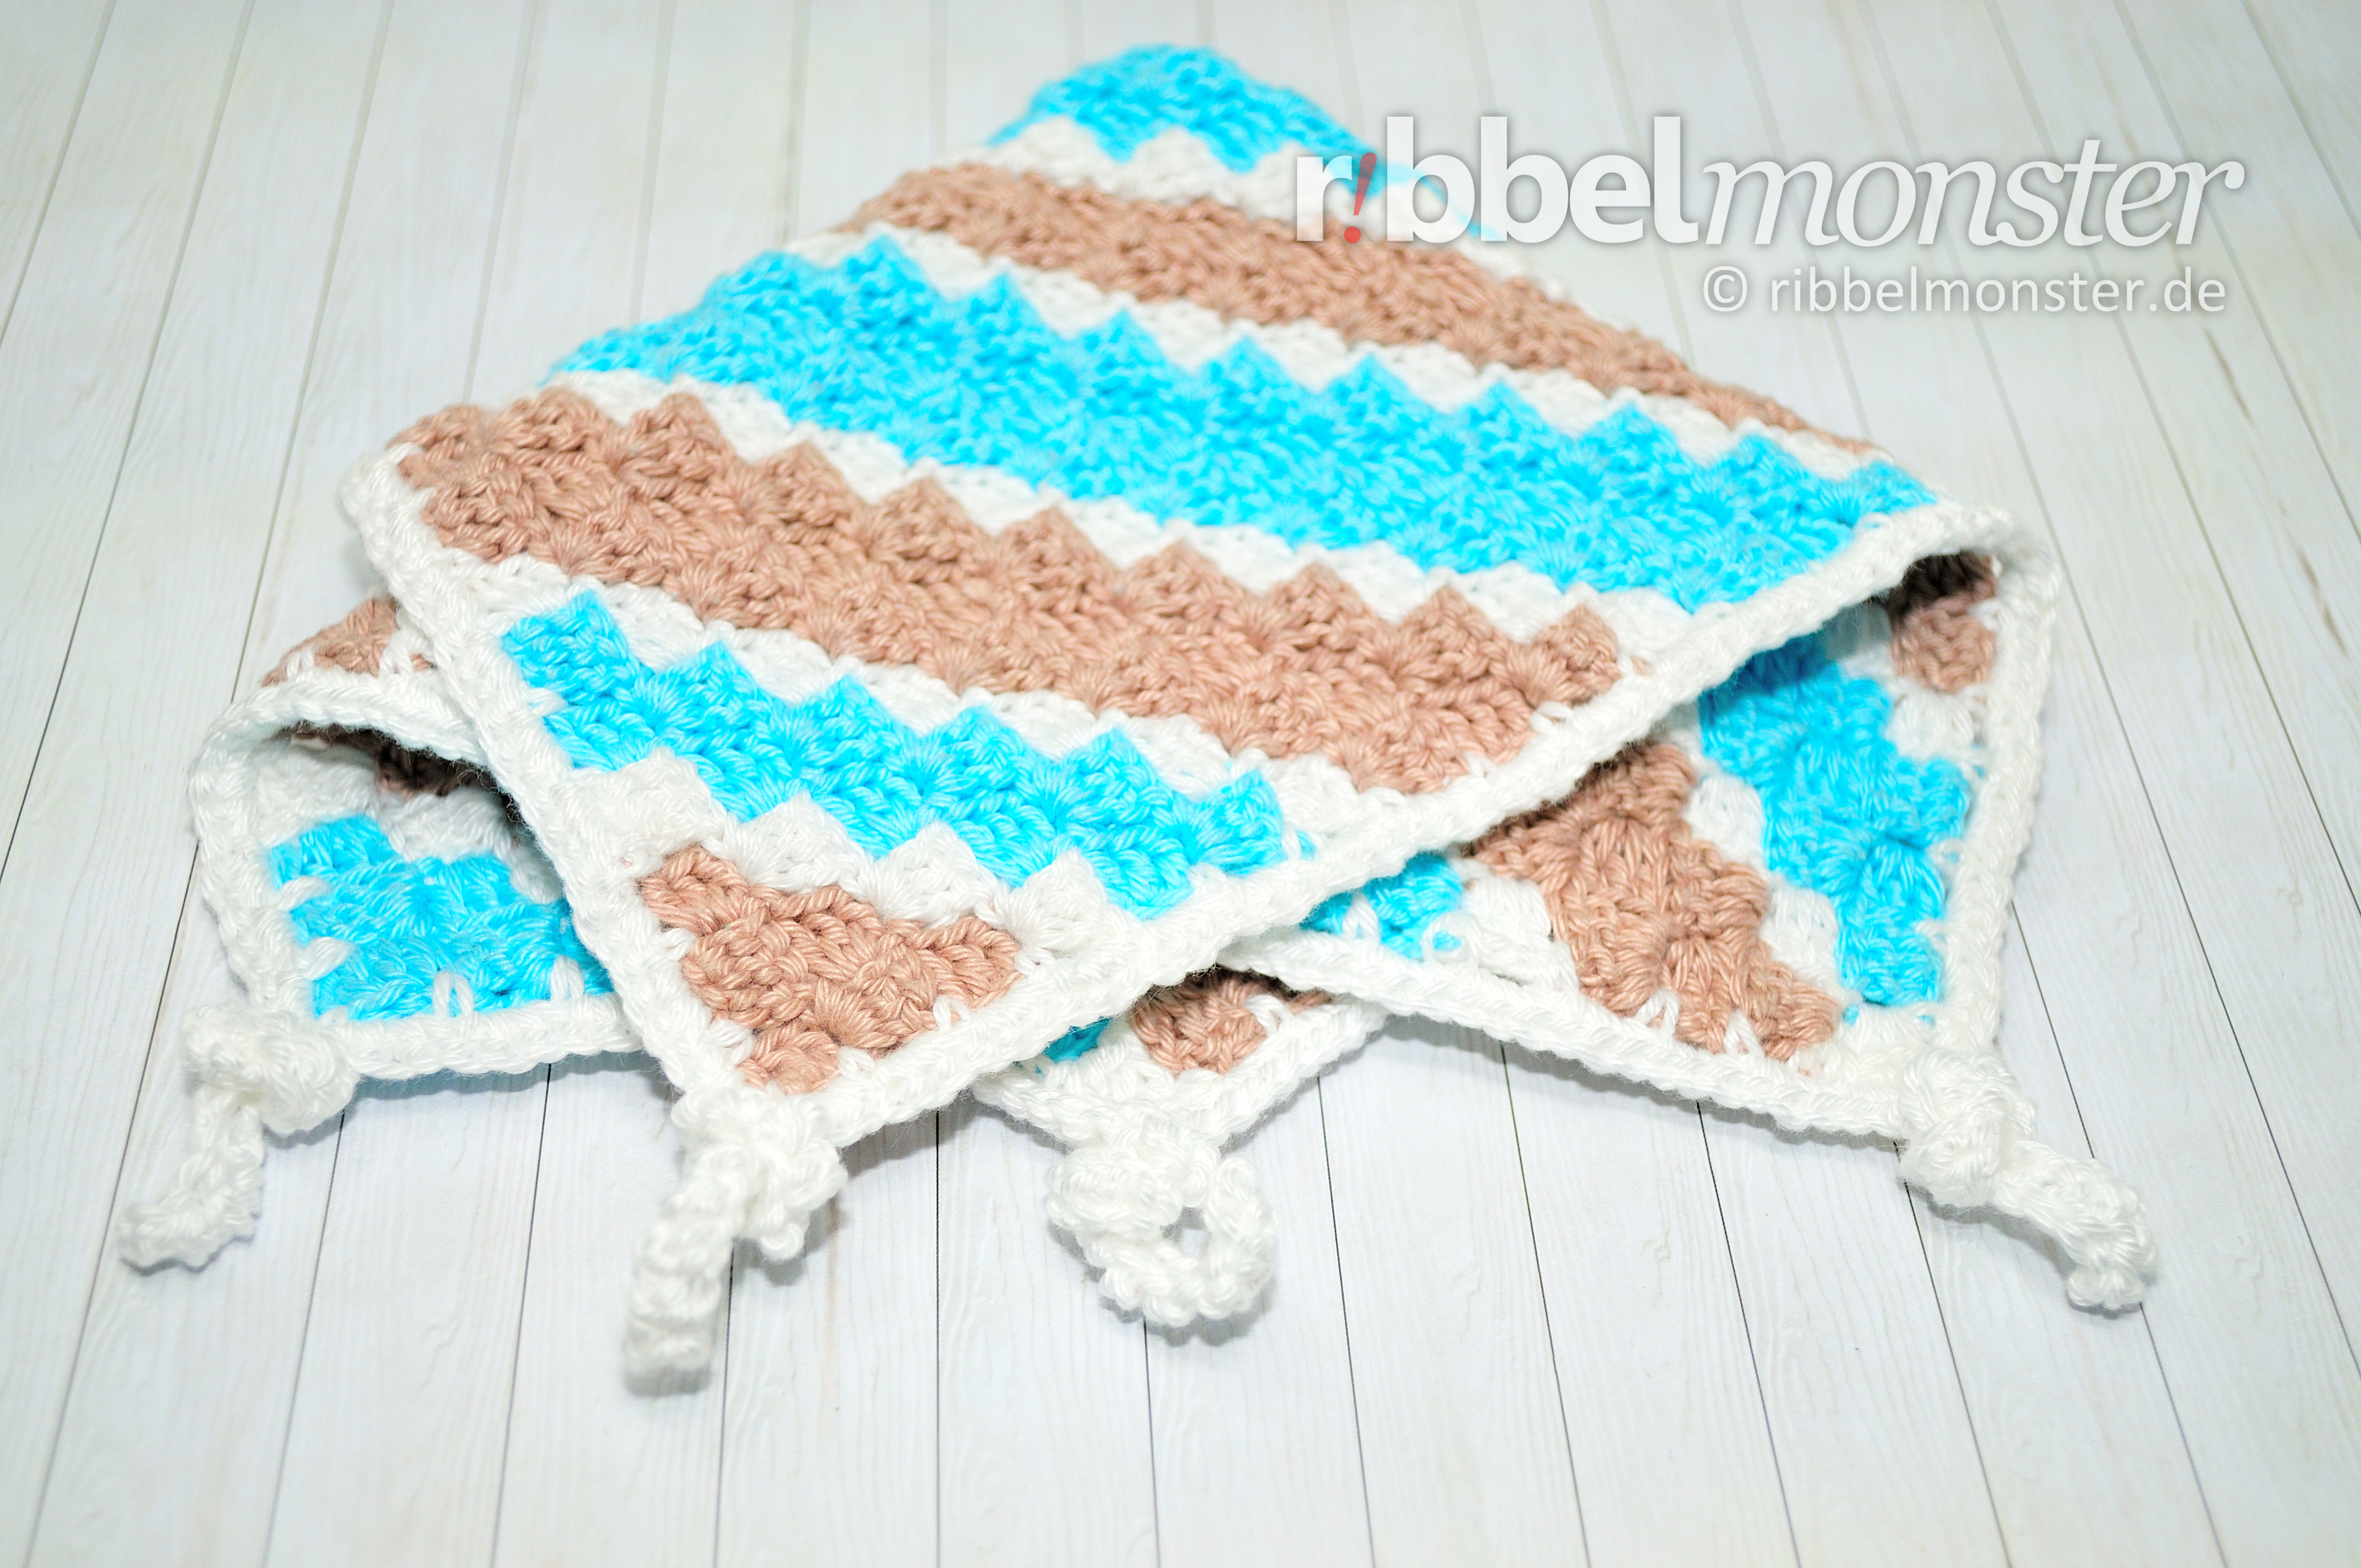
Tip: By the way the cuddly soft blanket of Bruno is the diagonally striped C2C comforter, which of course you can rework. This creates a great set to give away to big and little bear lovers!
Ich wünsche dir viel Freude damit!
Hast du das Ribbelmonster schon mit deinen Freunden geteilt?