

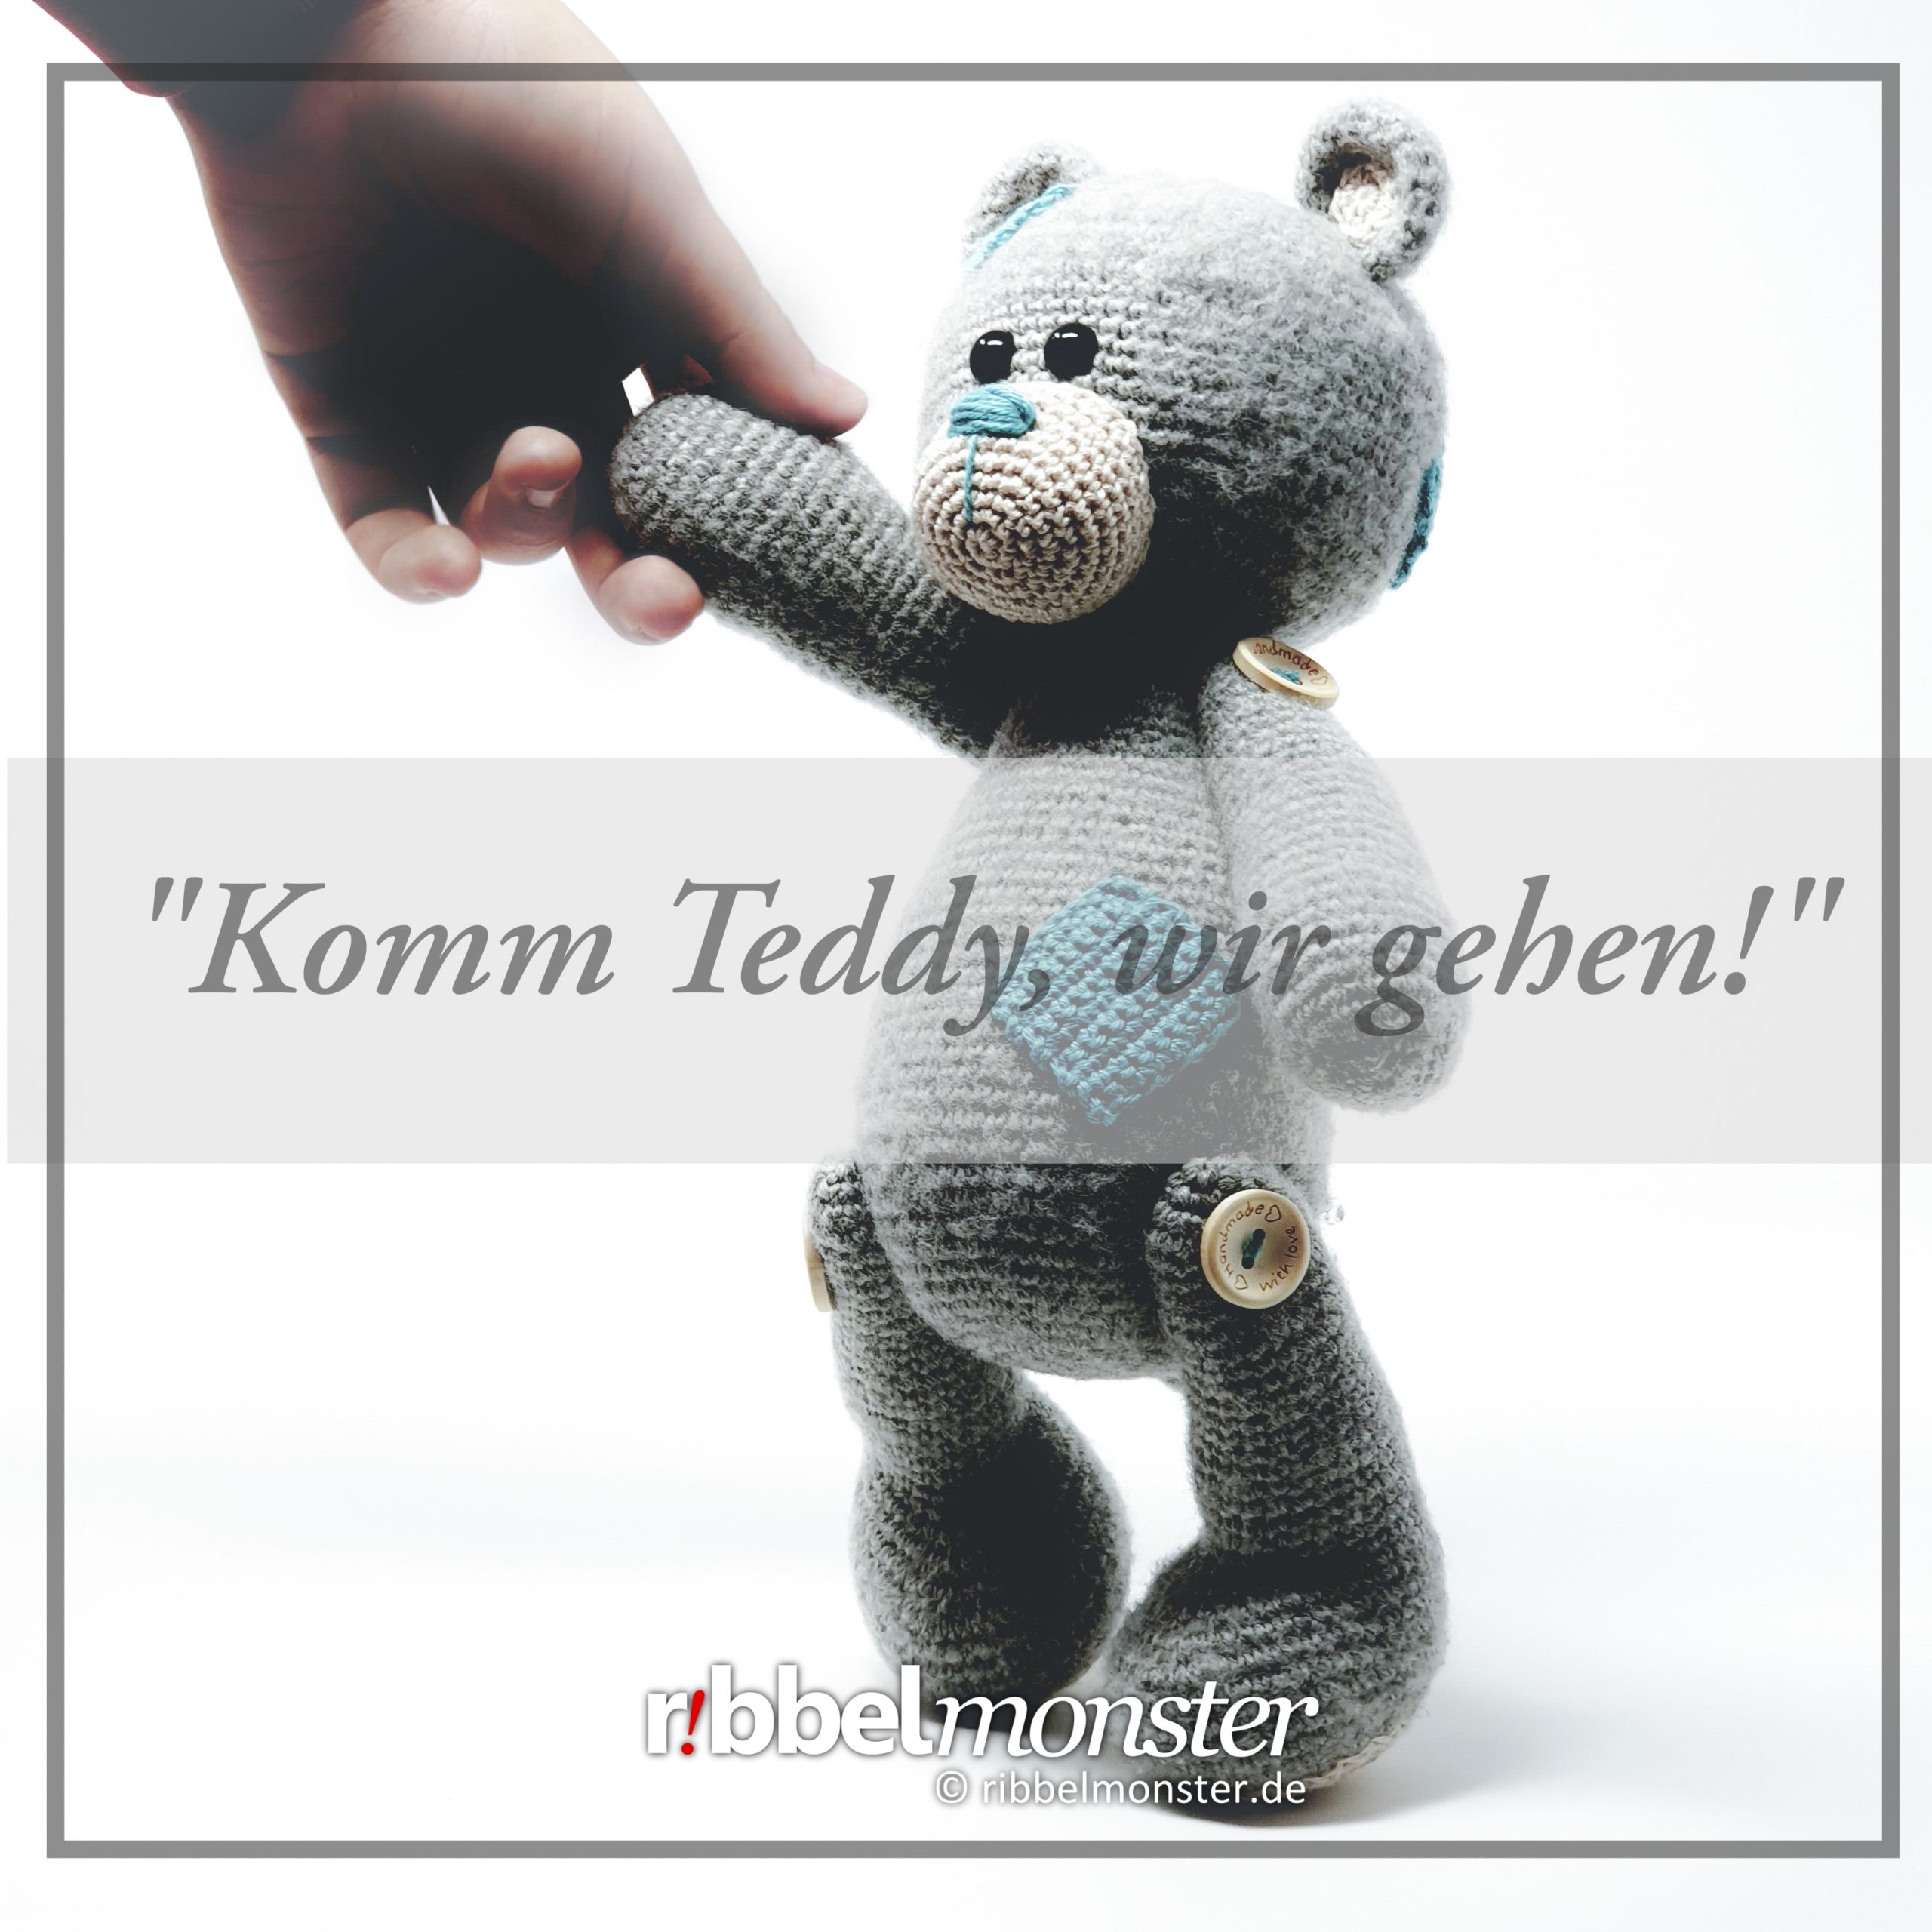
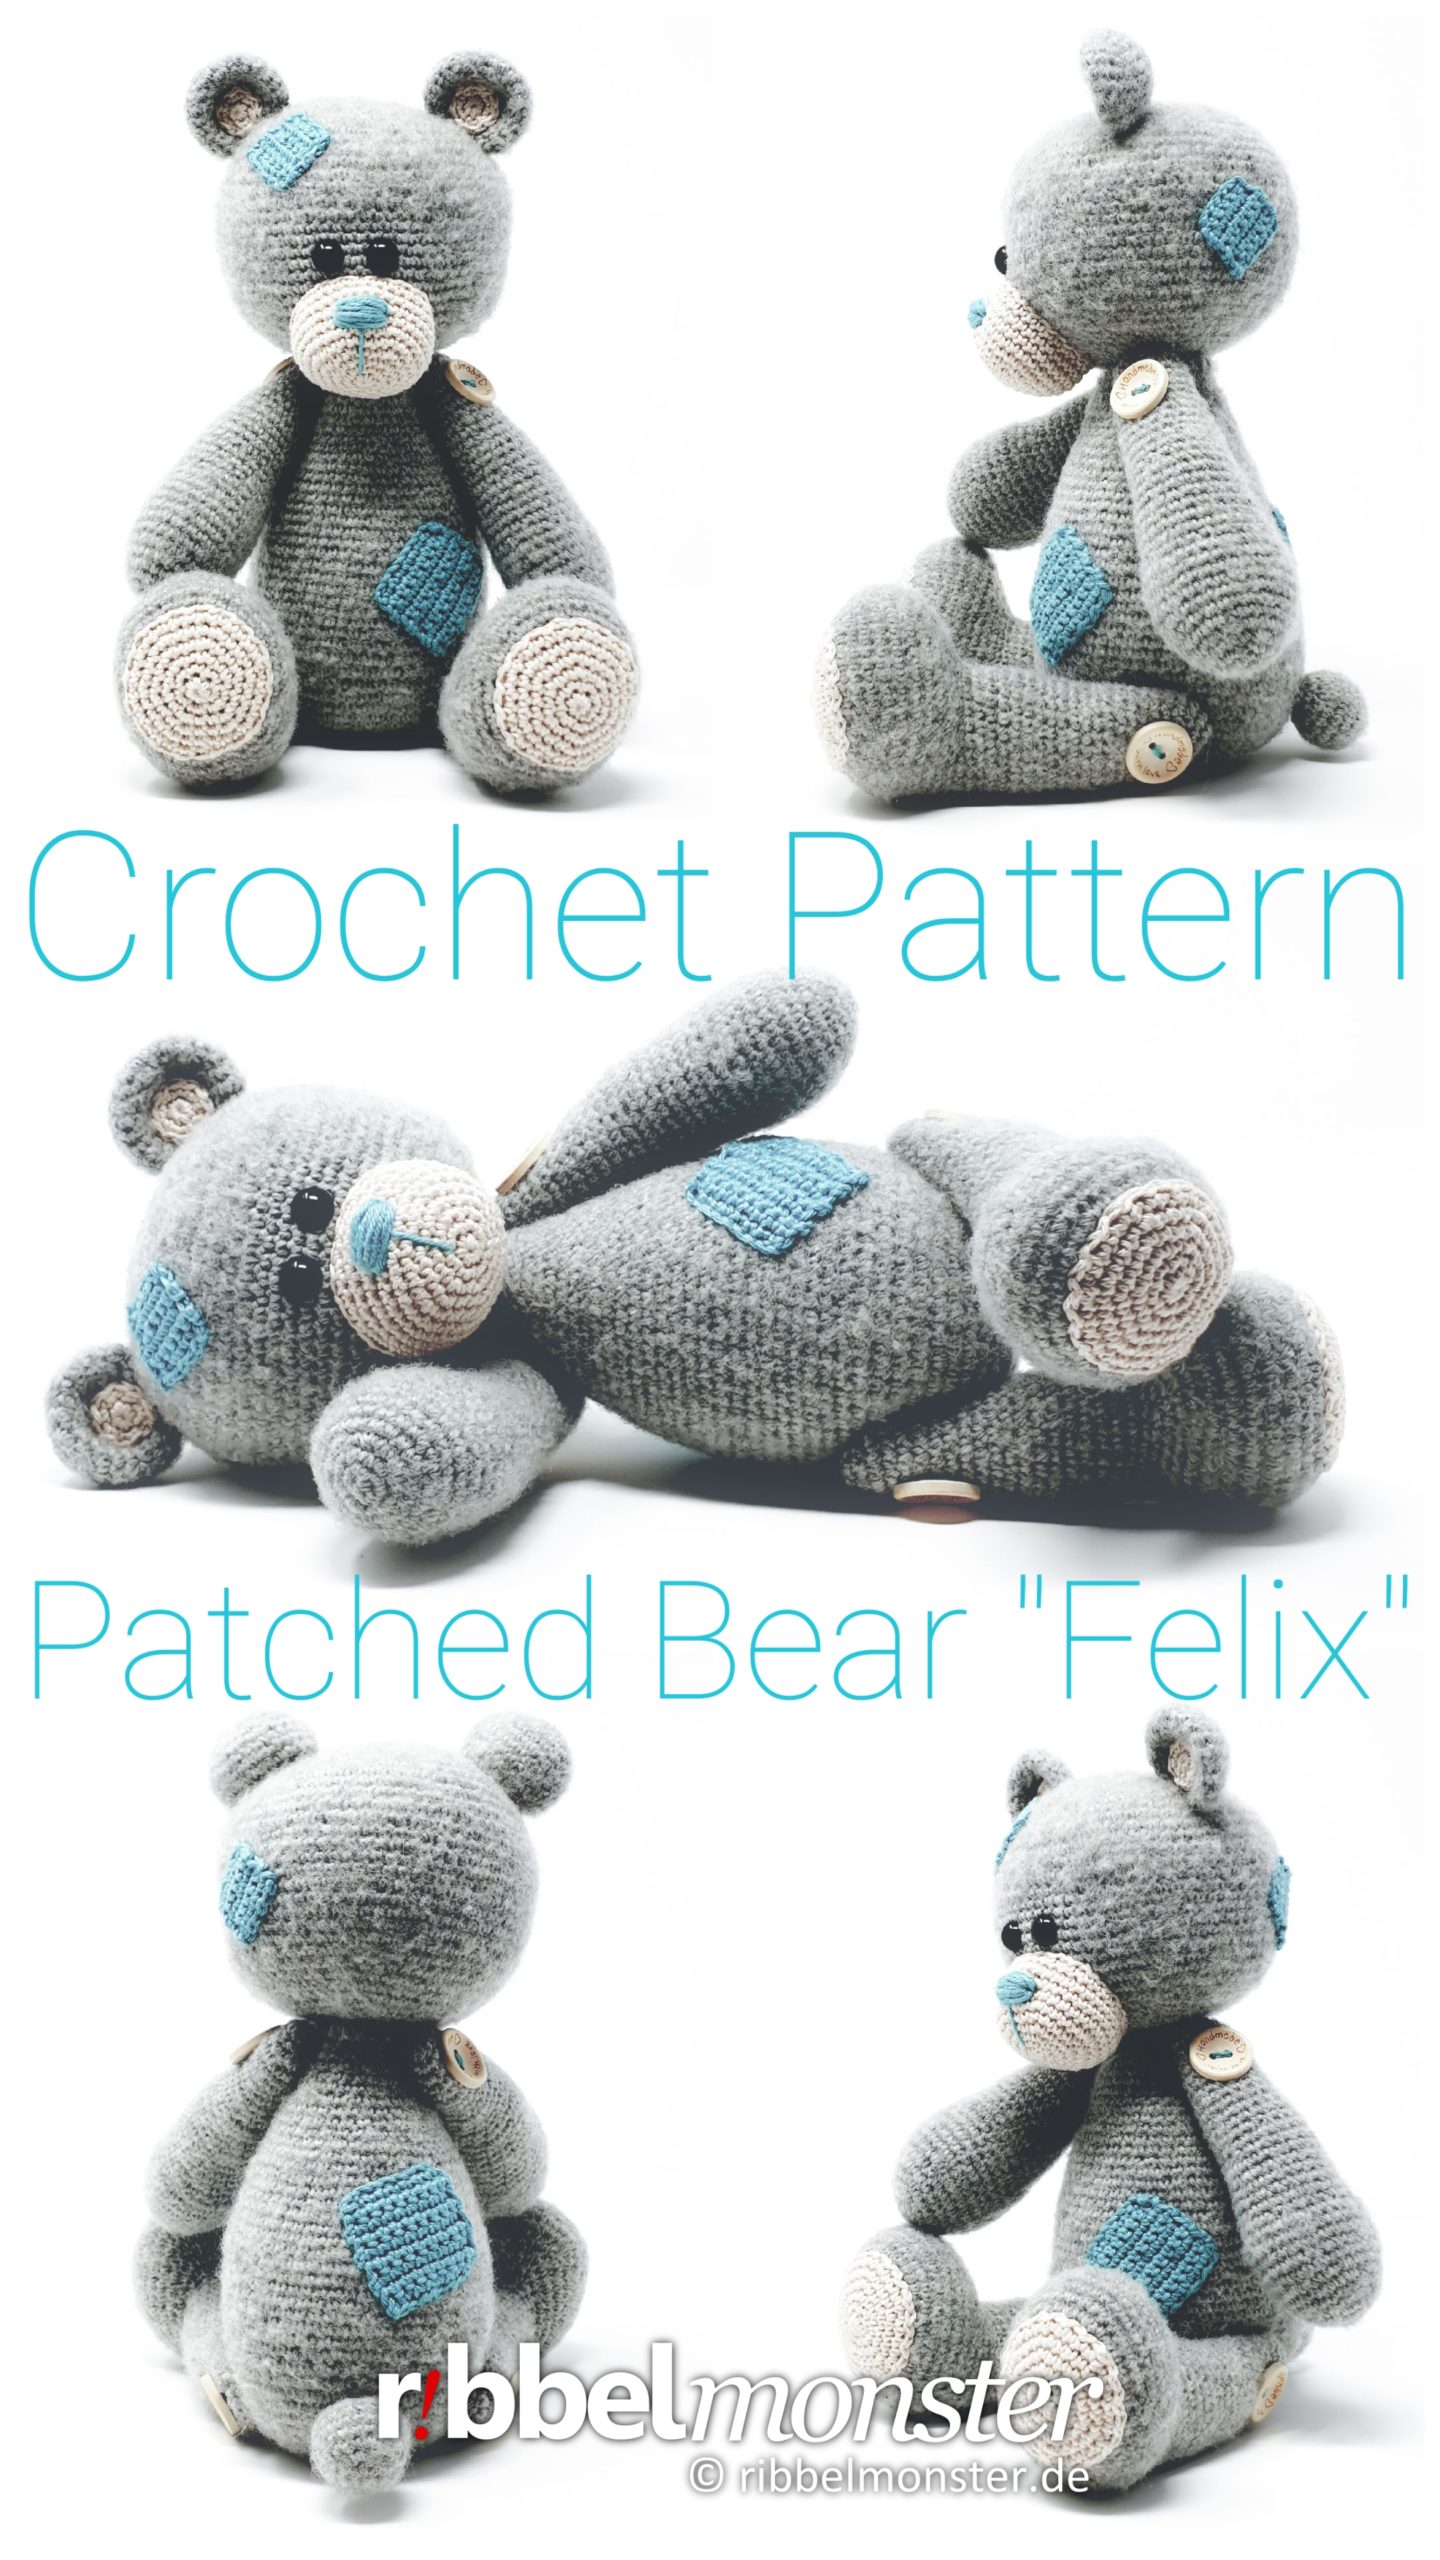
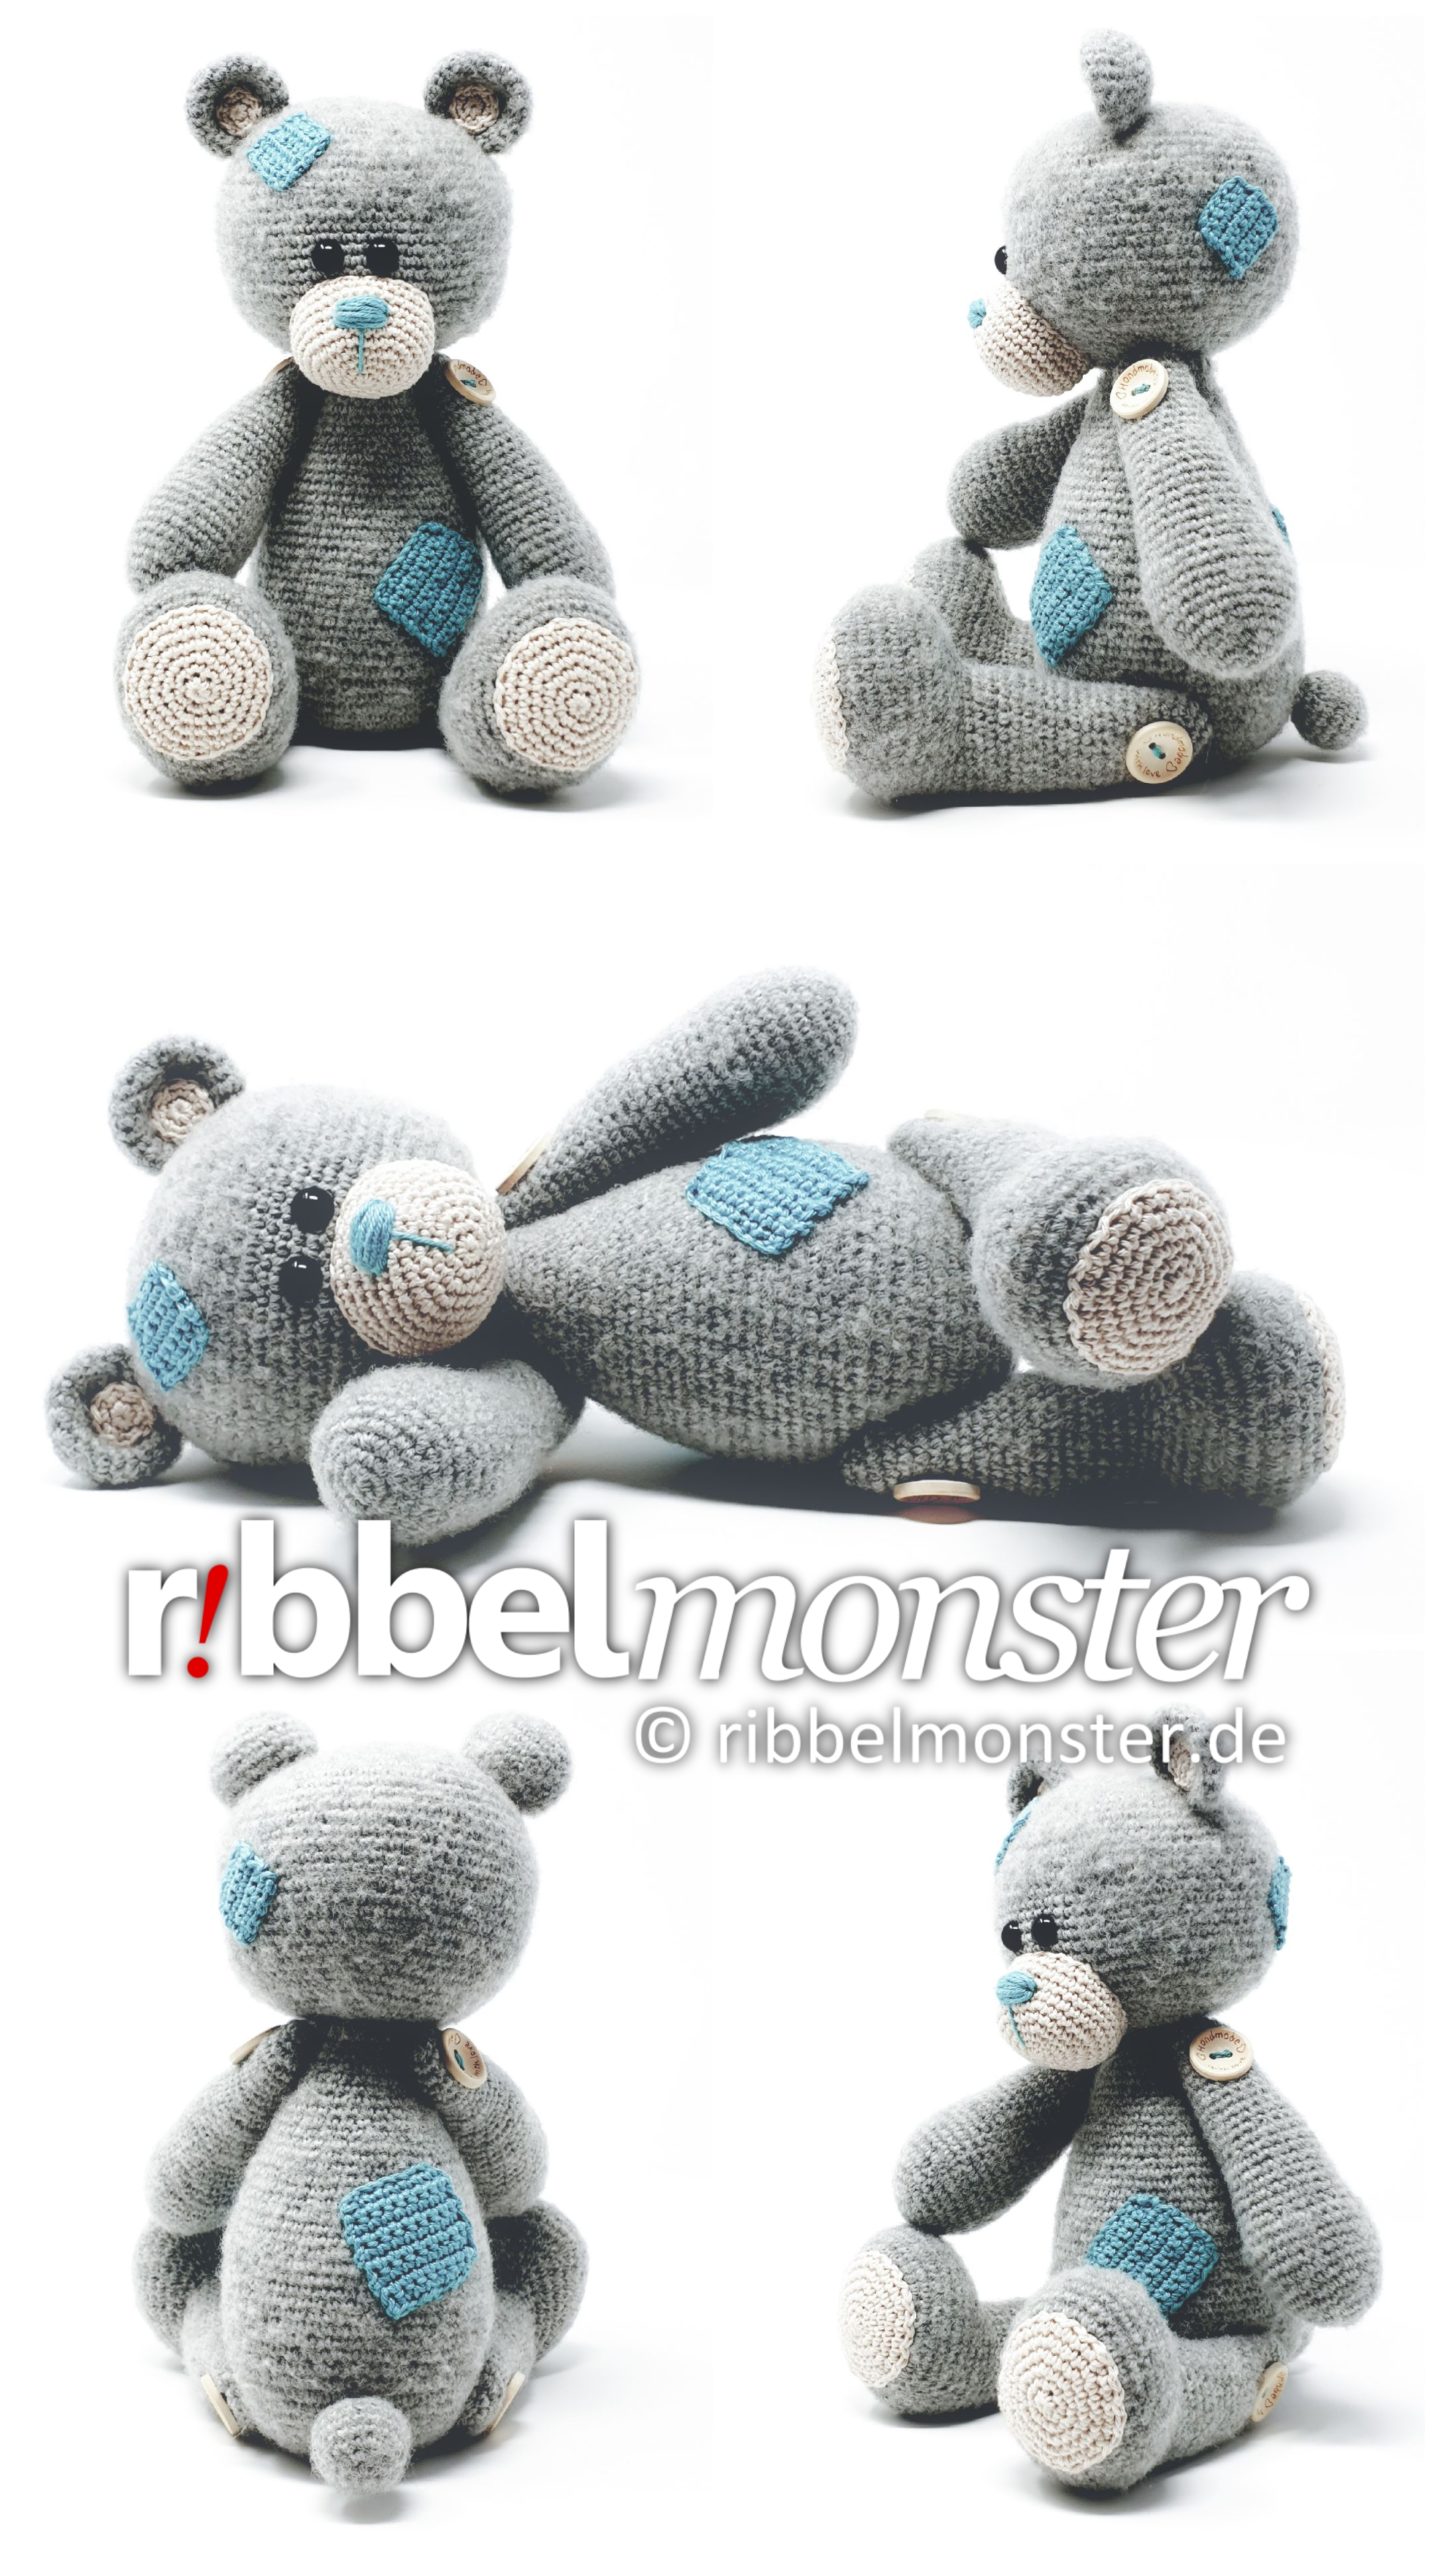
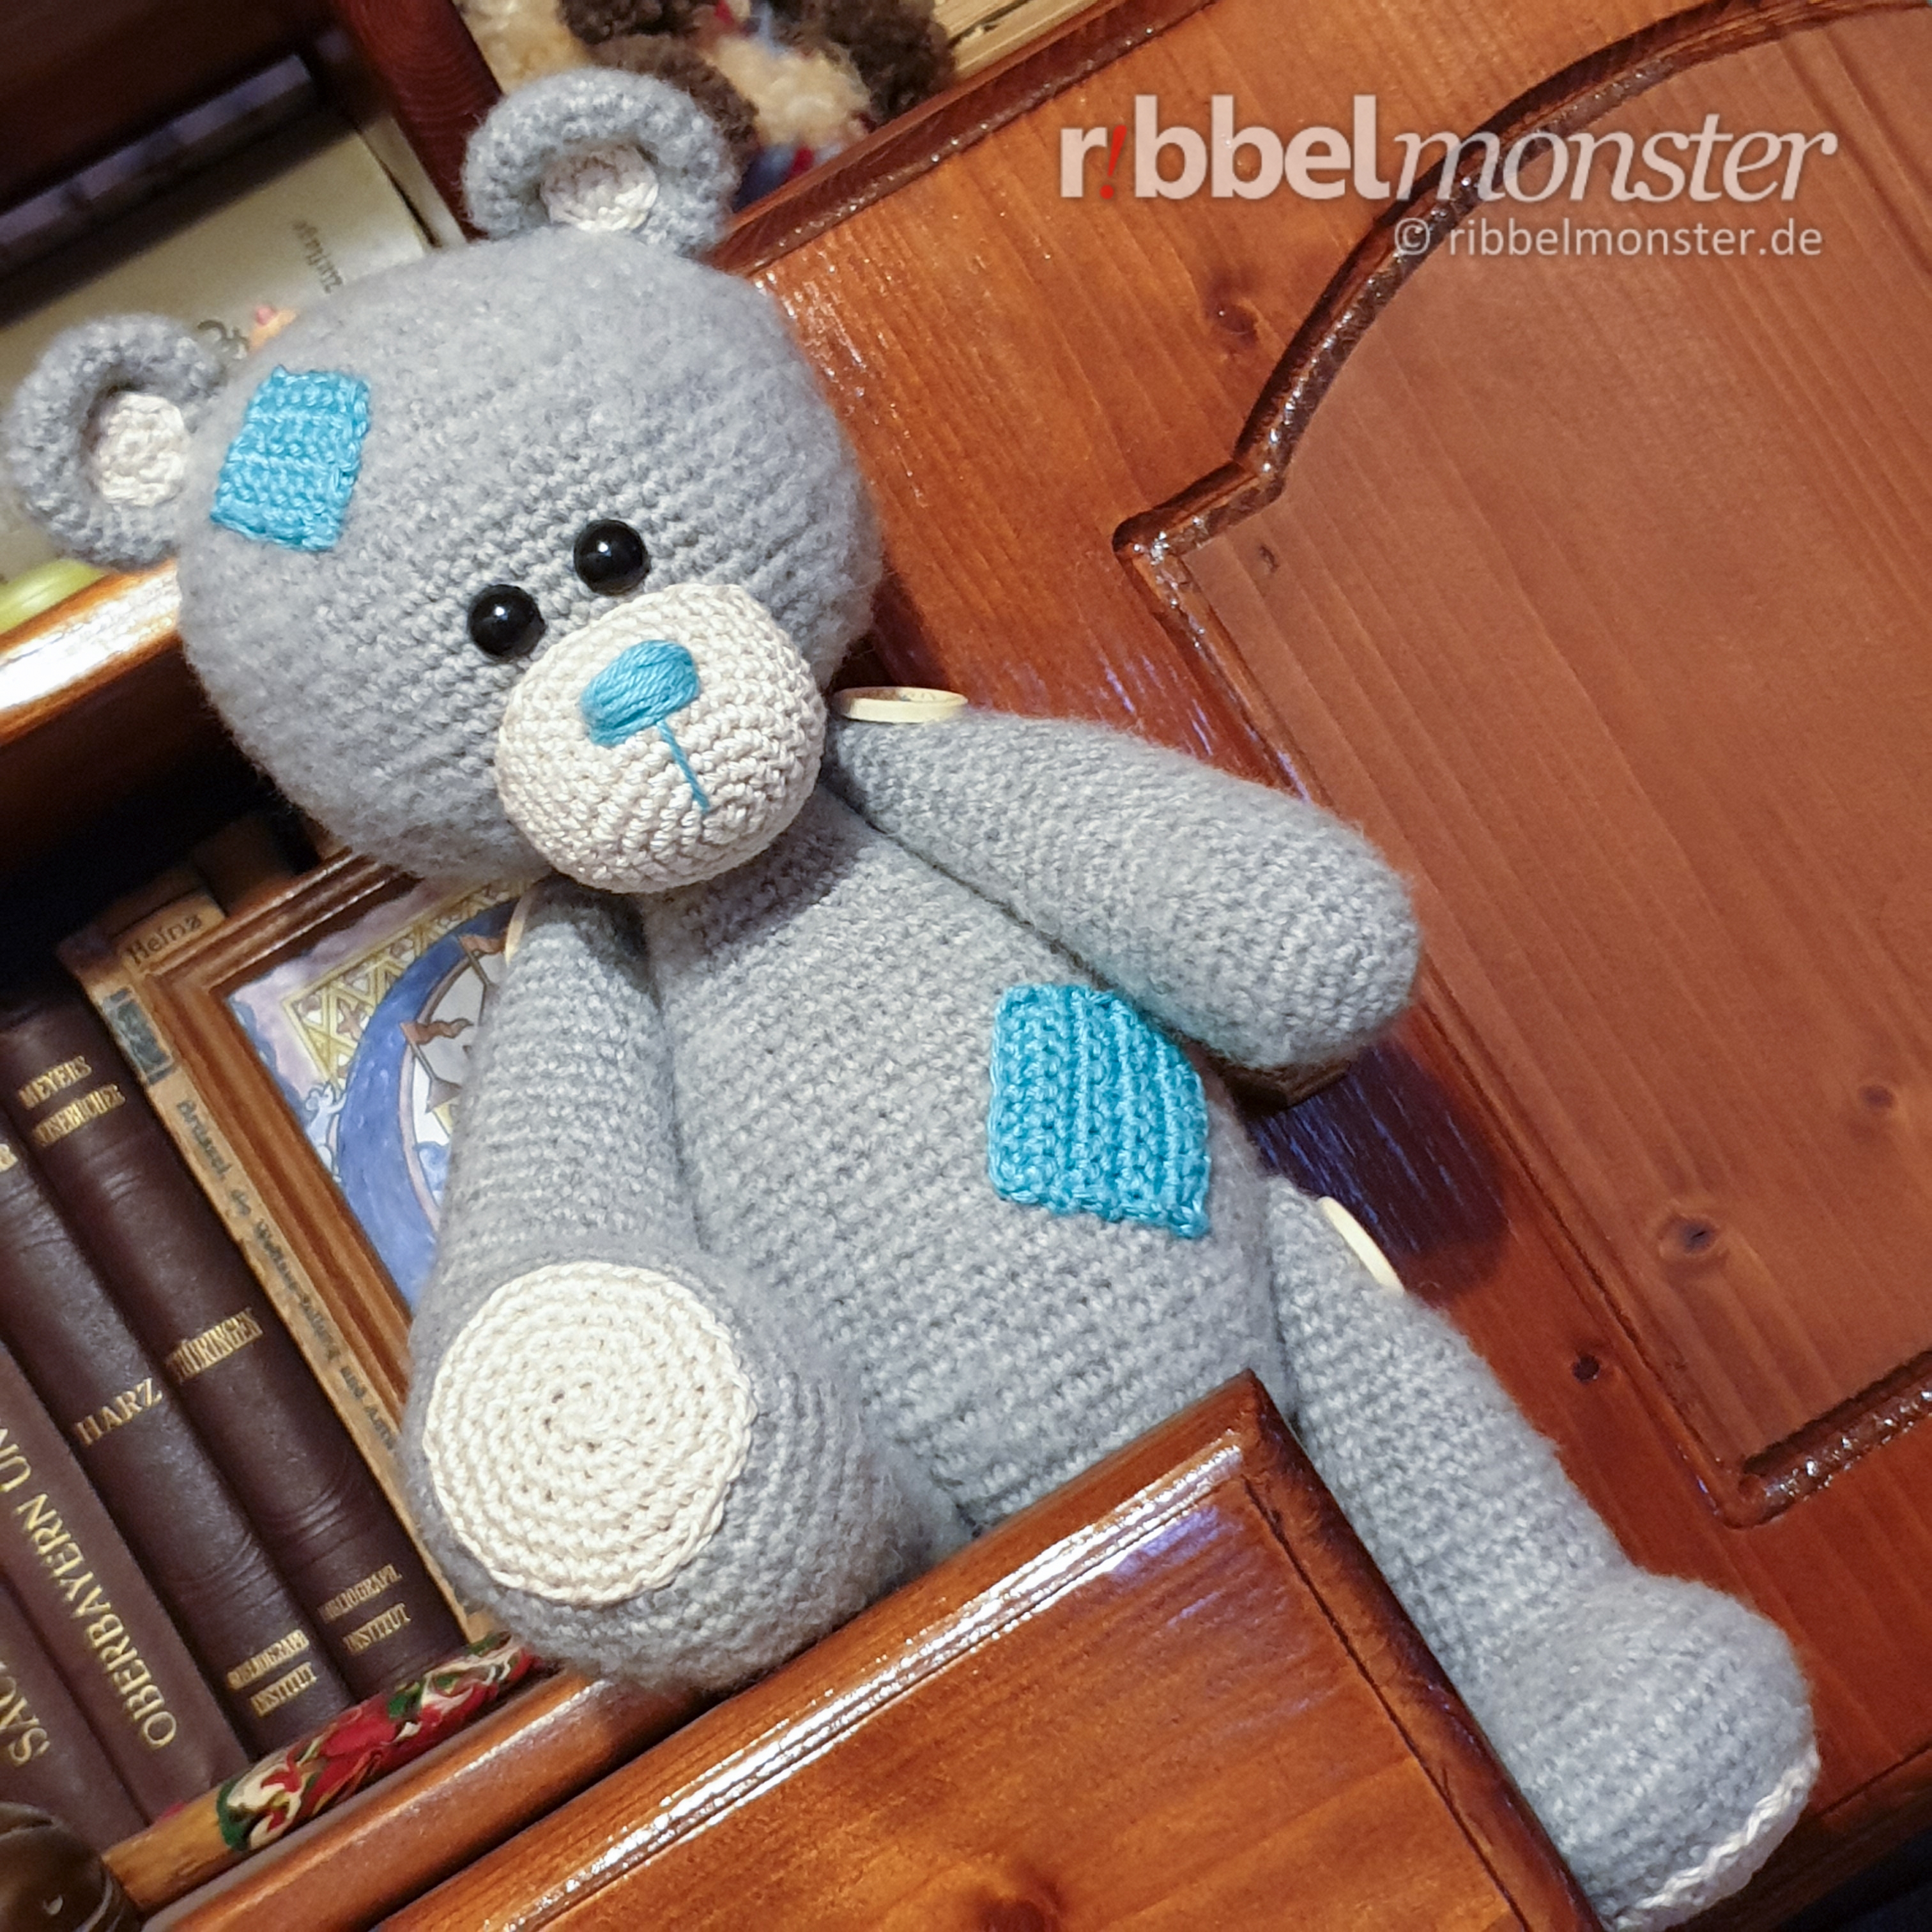
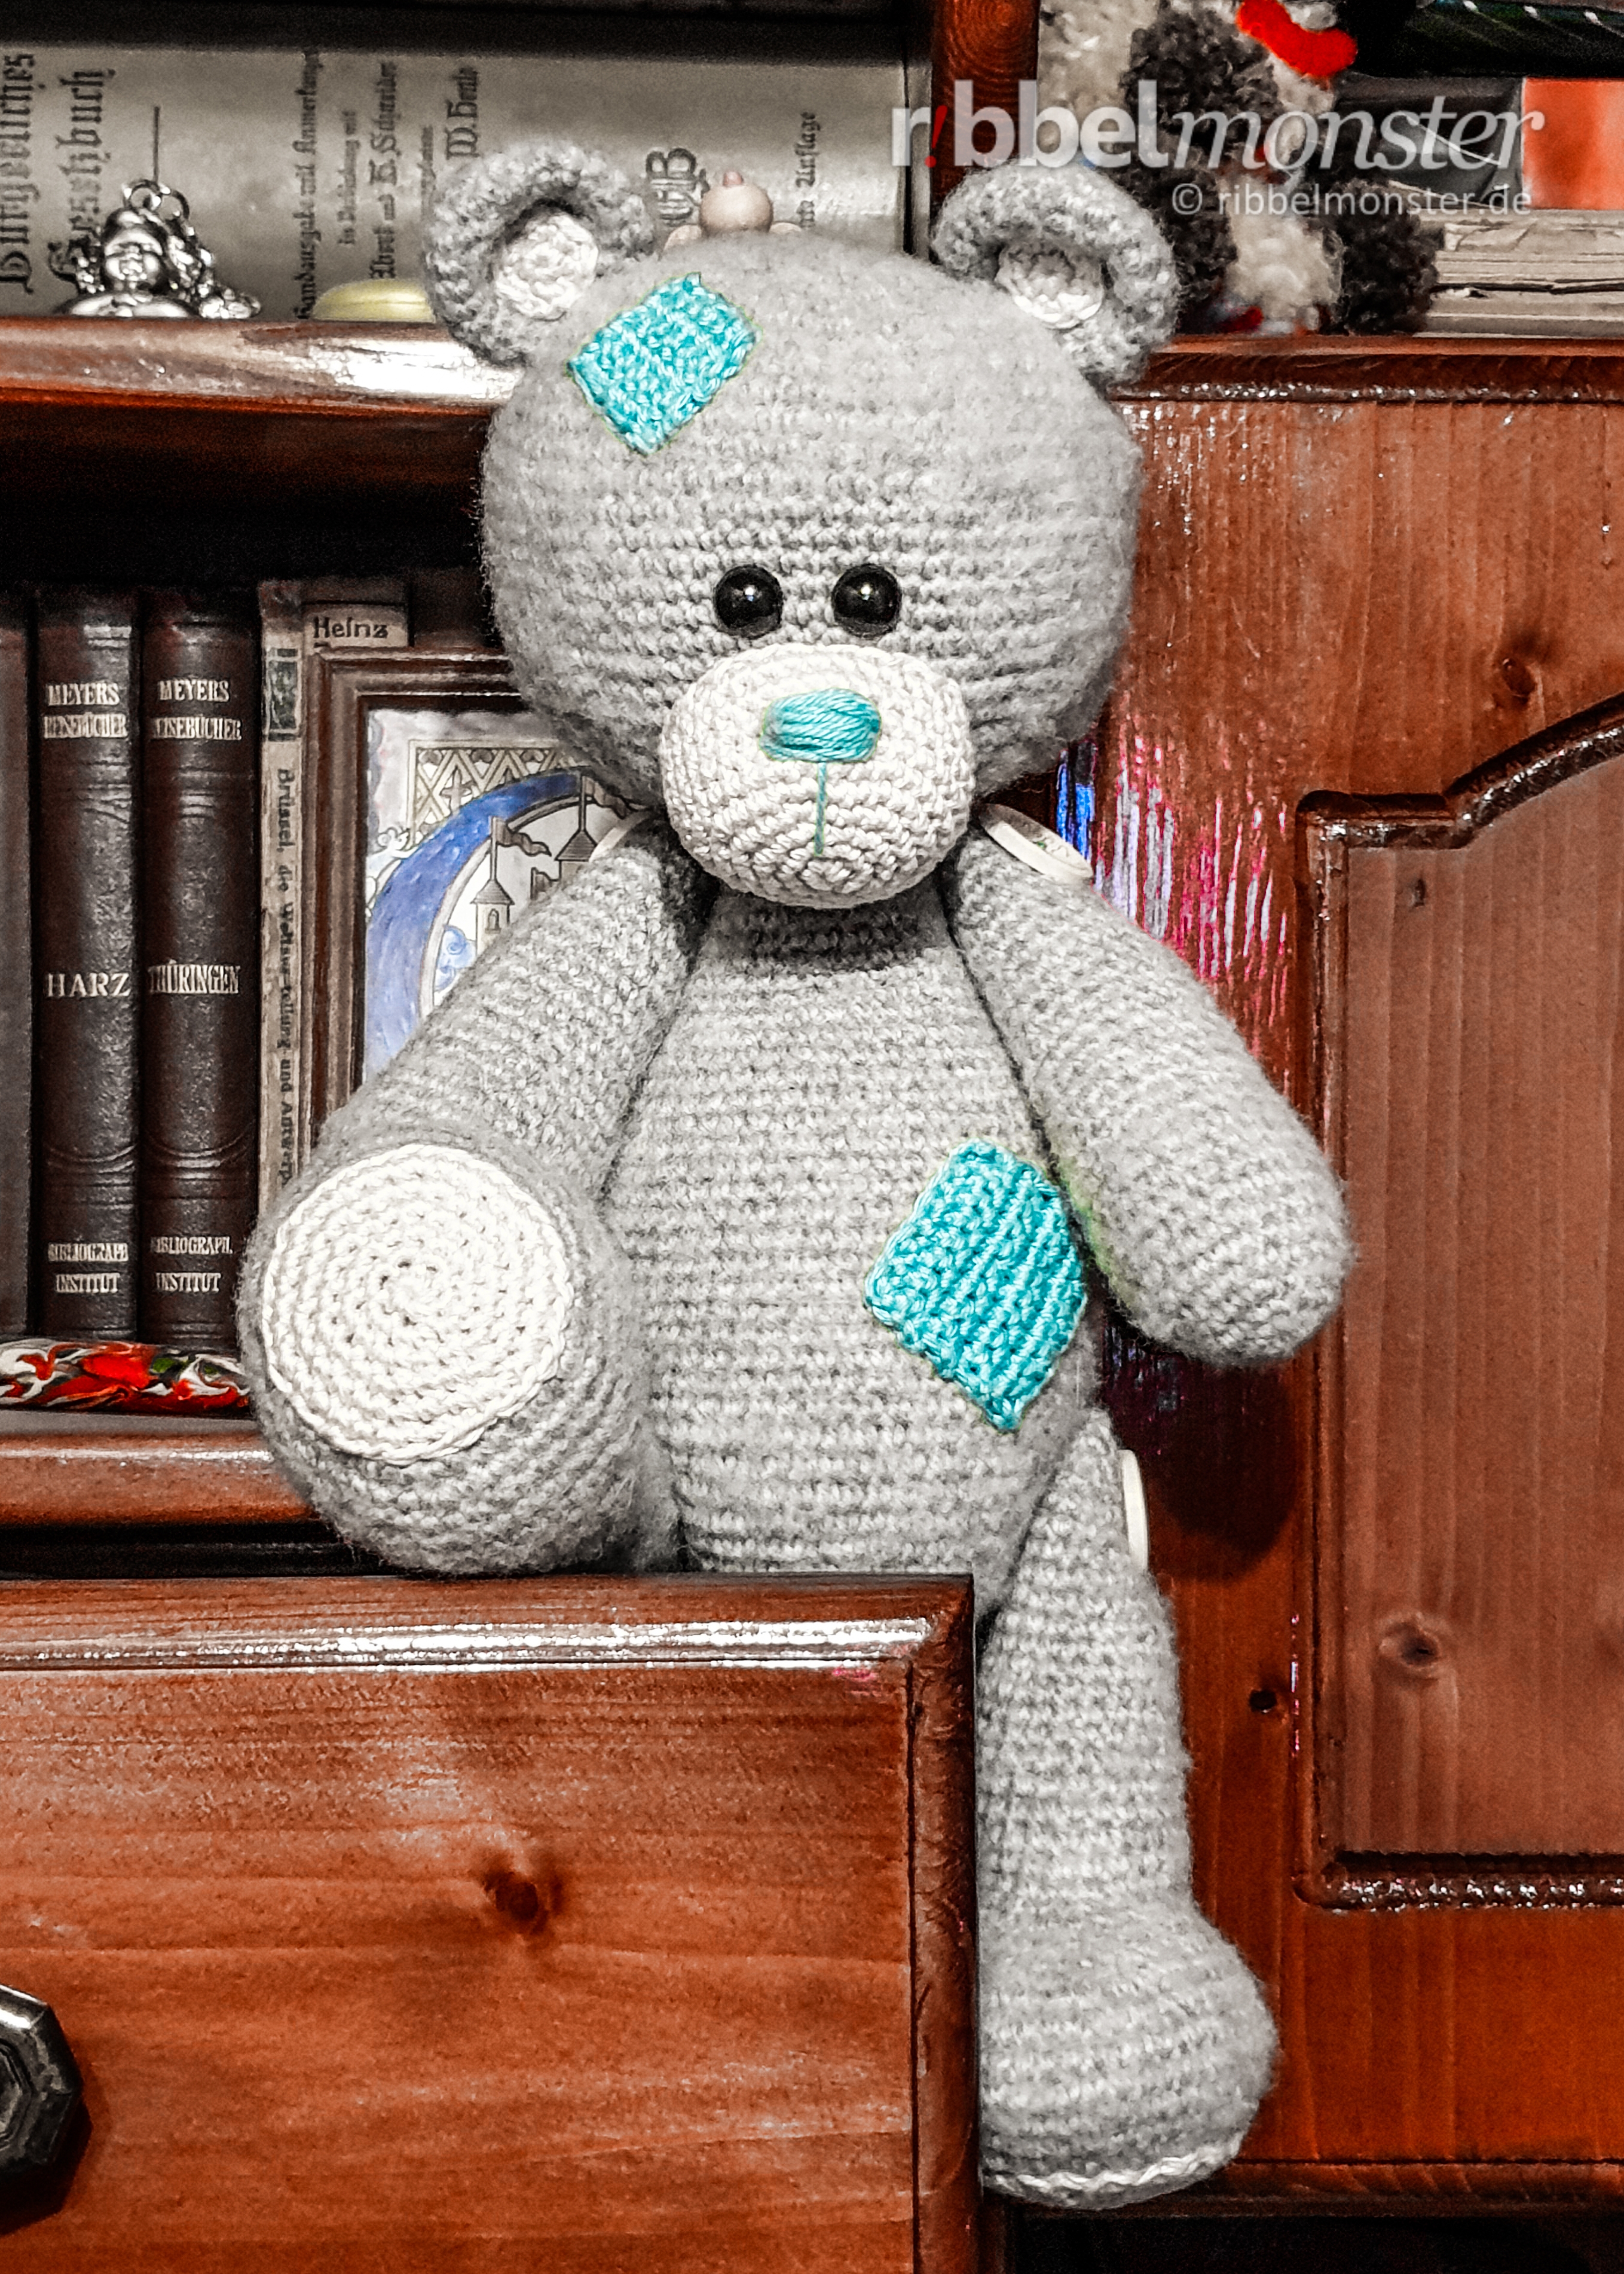
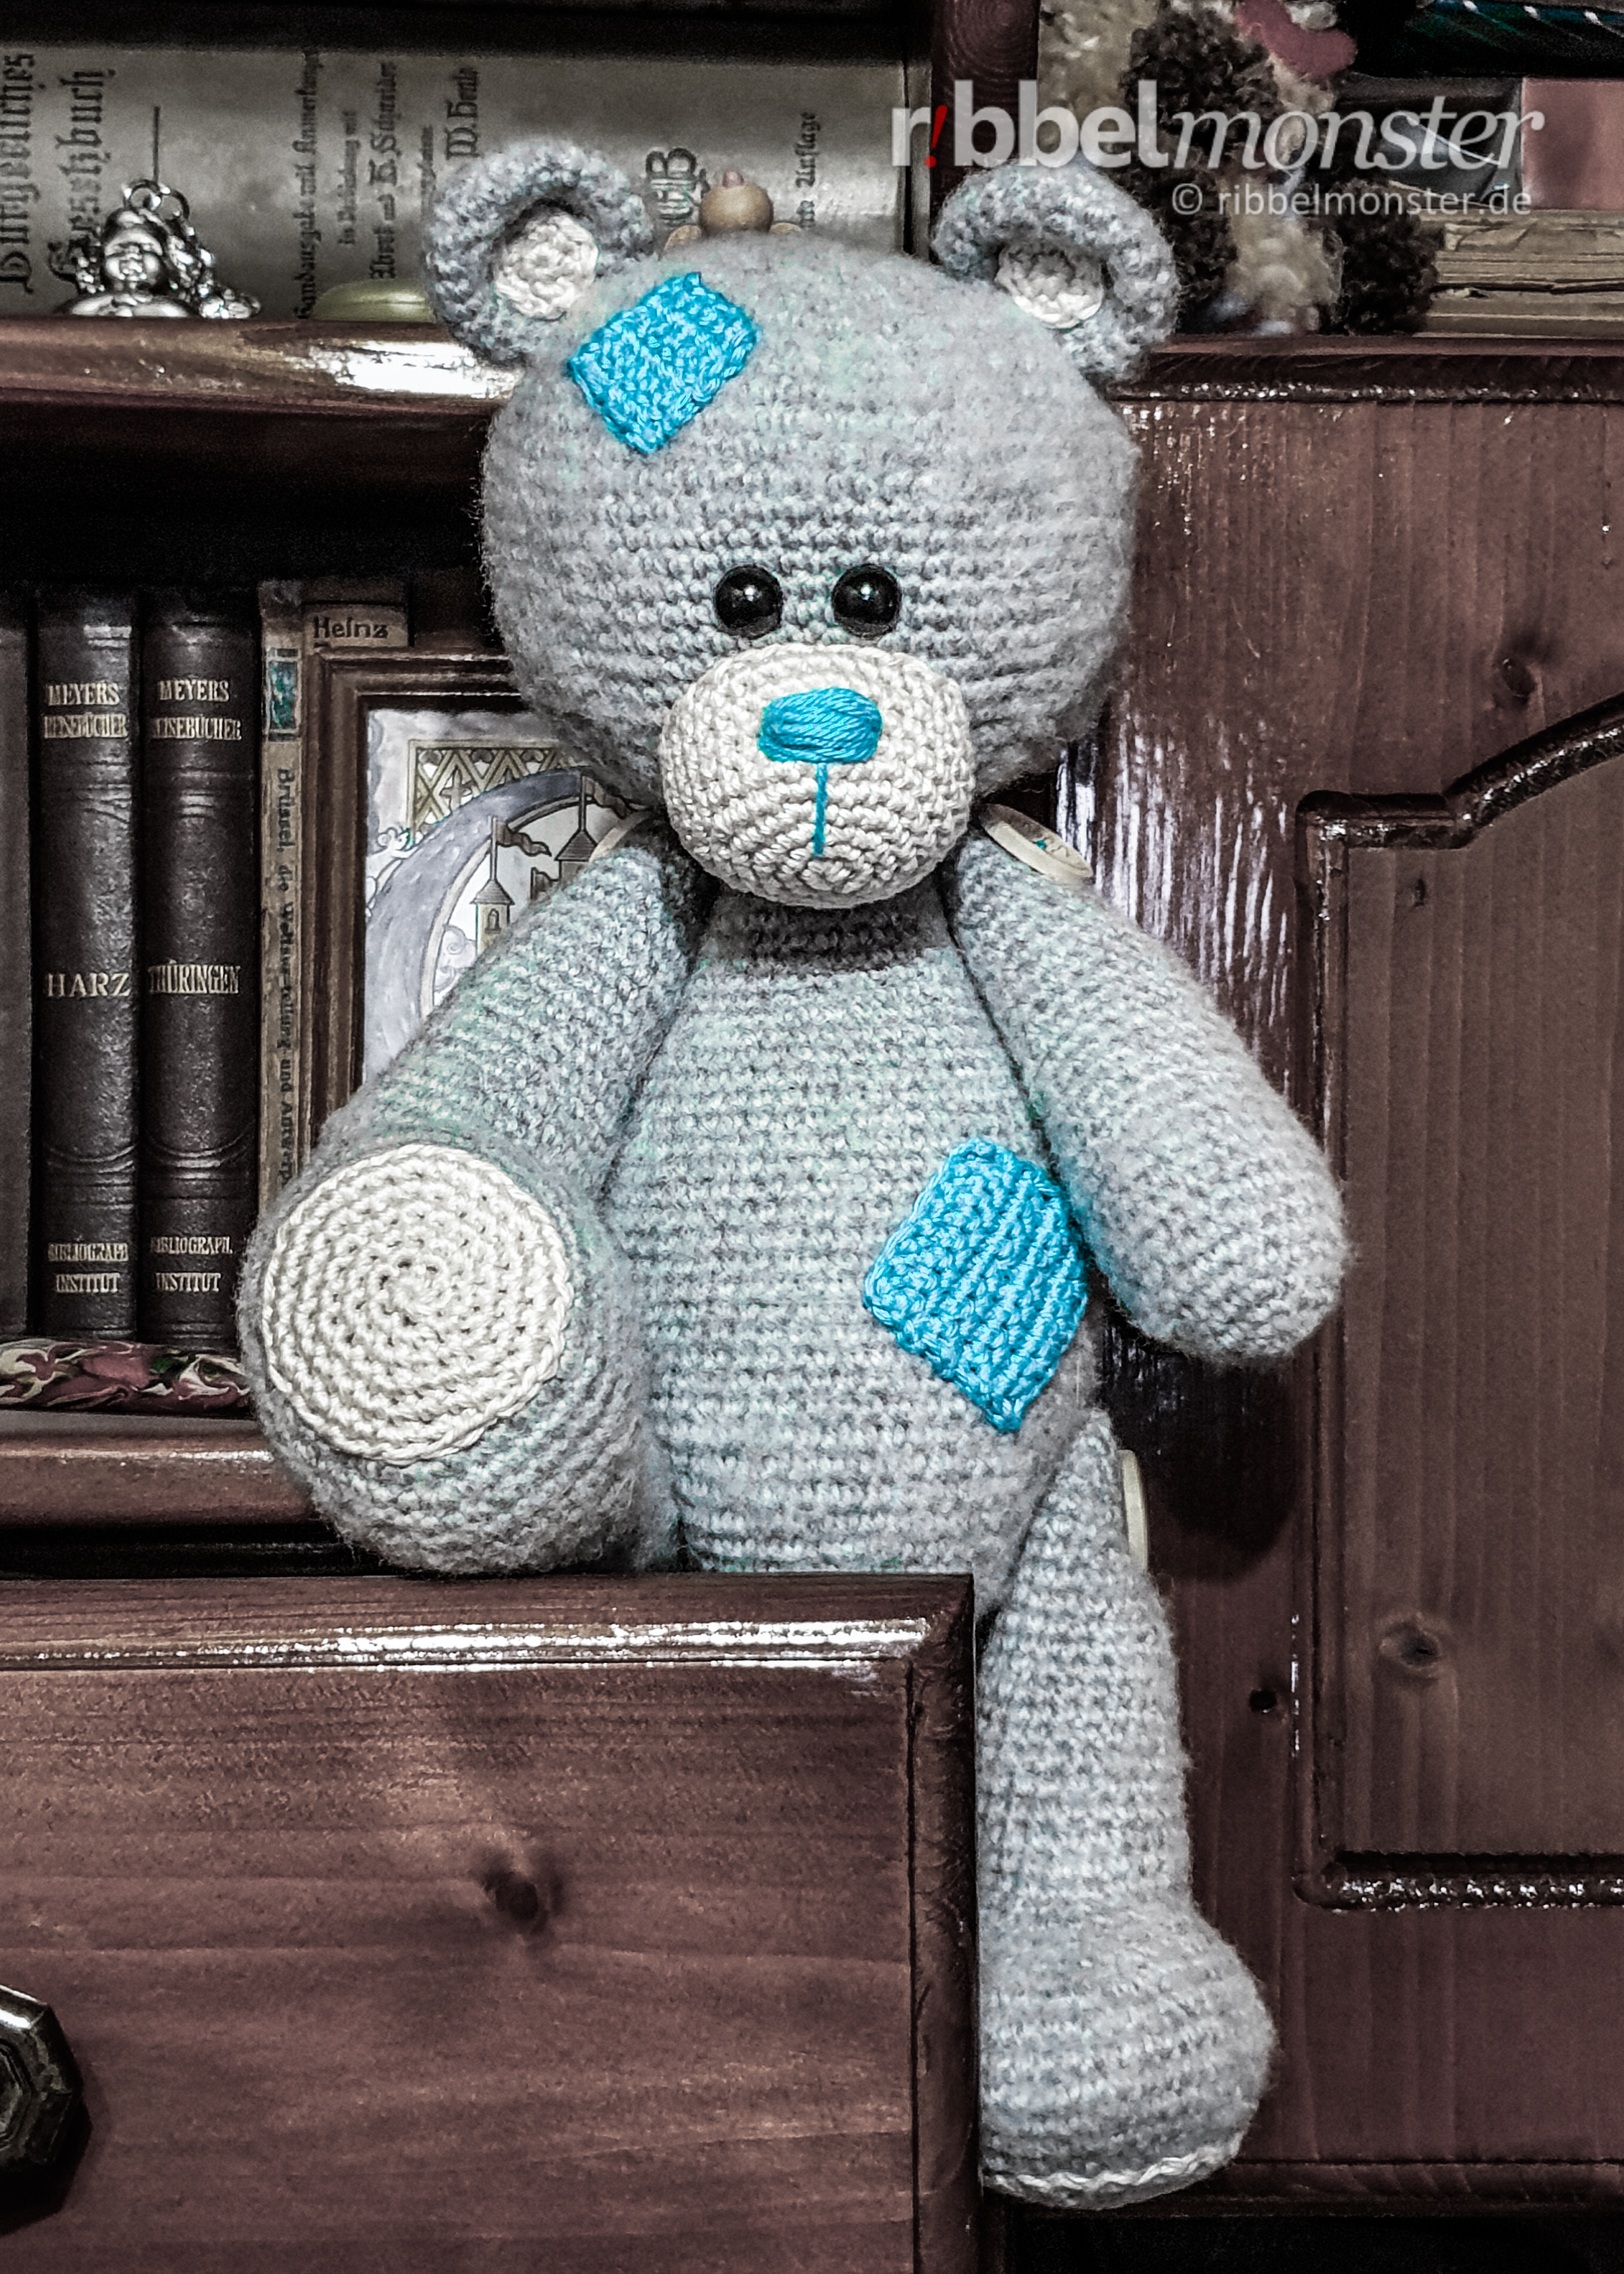
With this simple crochet pattern you can crochet an Amigurumi patched bear. The cocheted Amigurumi patched bear “Felix” is a great plushie for big and small children. This crochet bear can be made with button joints what gives a great nostalgic look and makes it particularly movable.
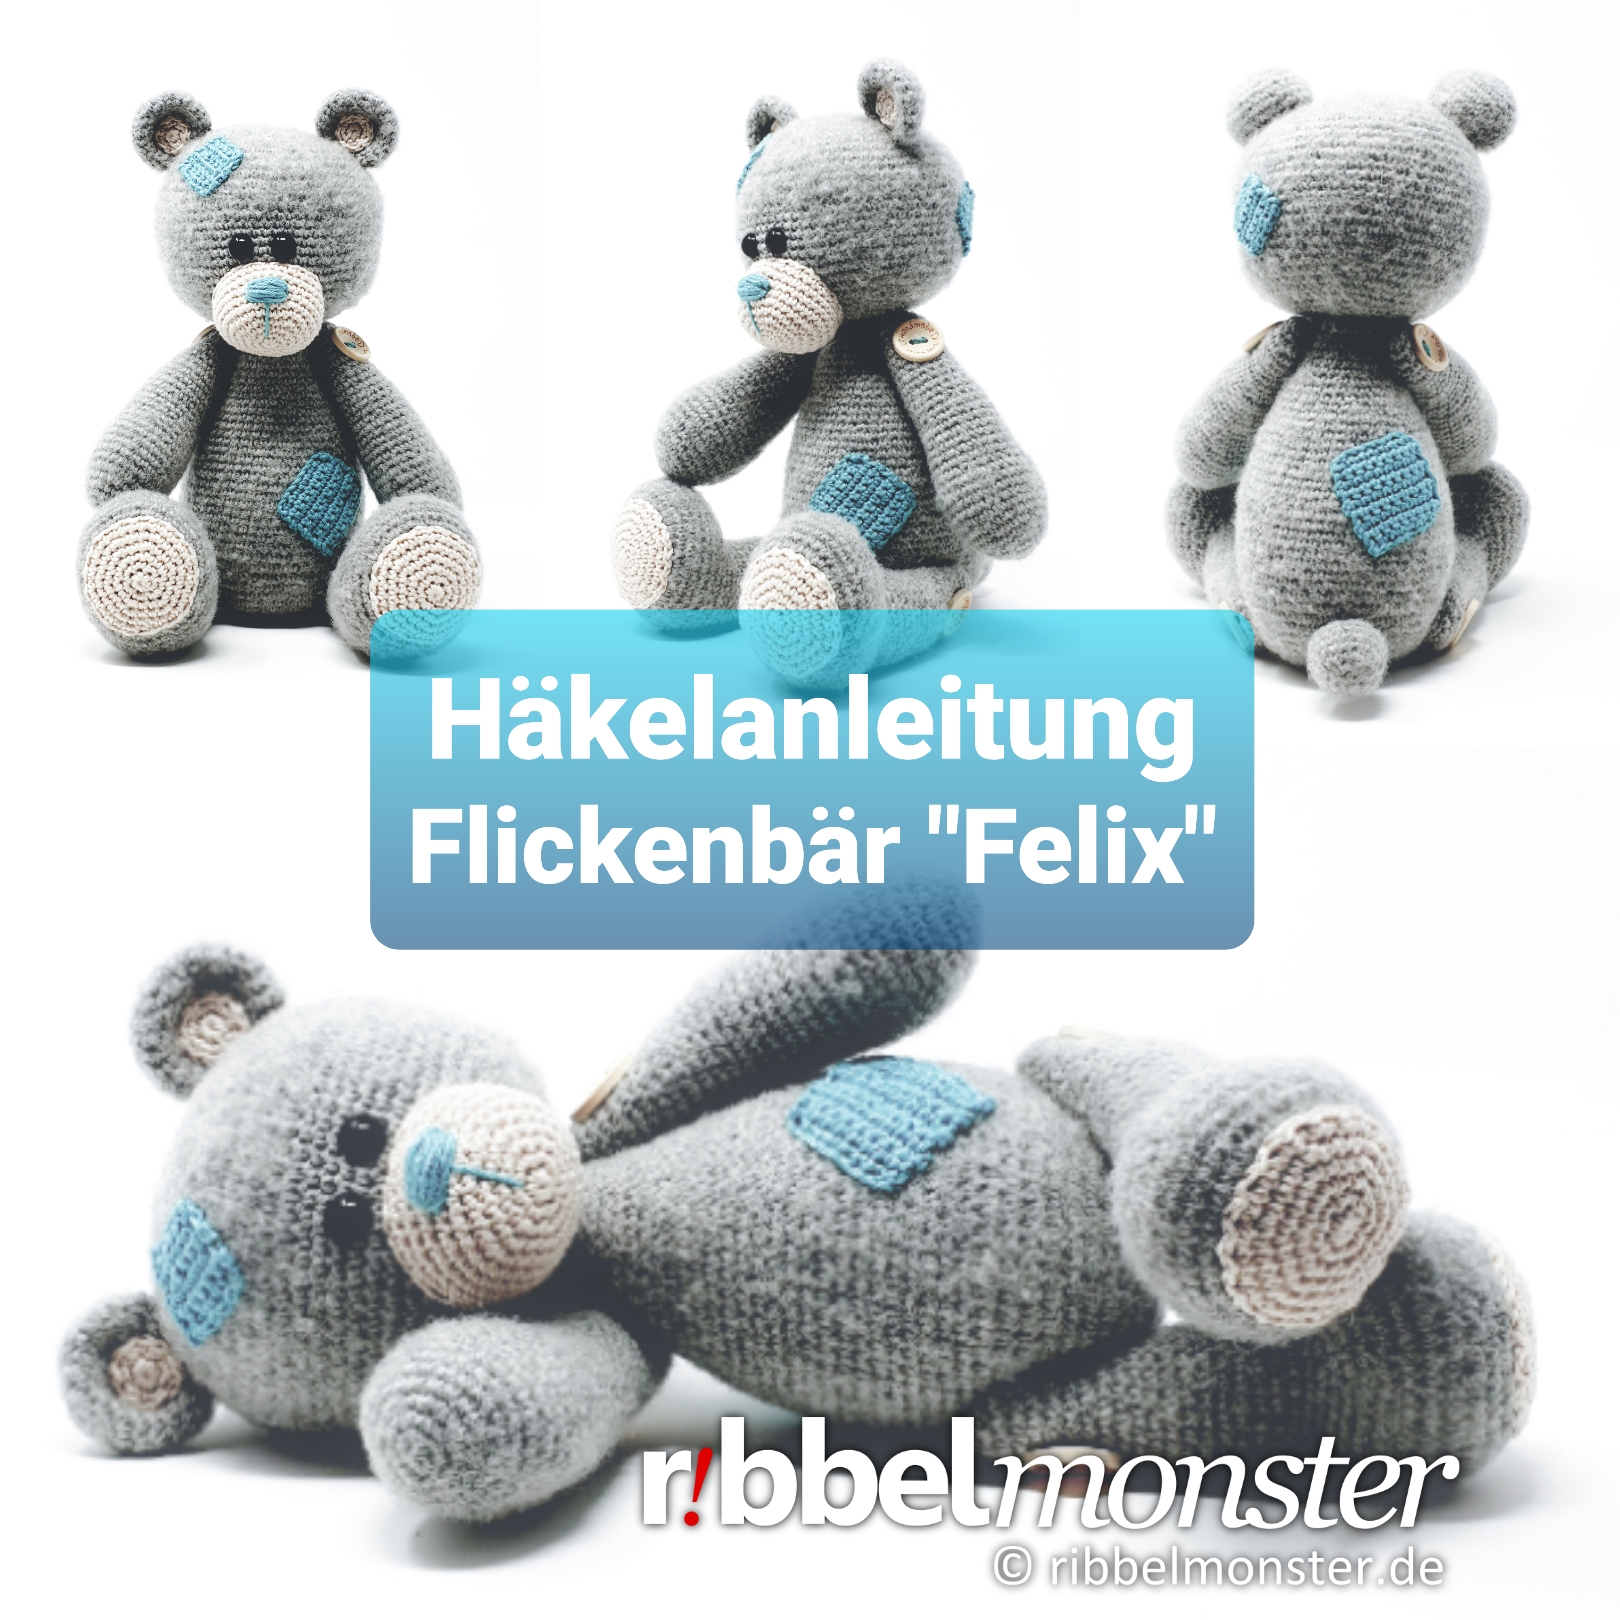
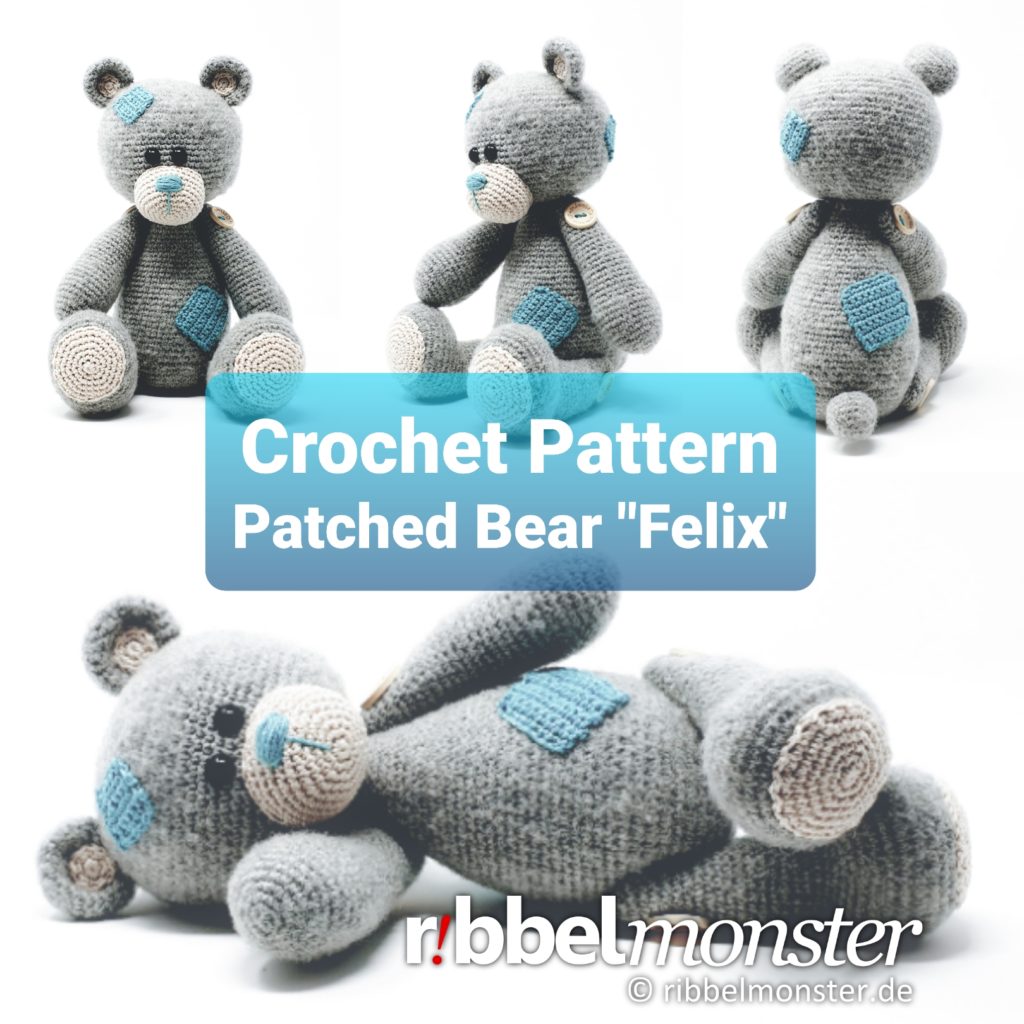

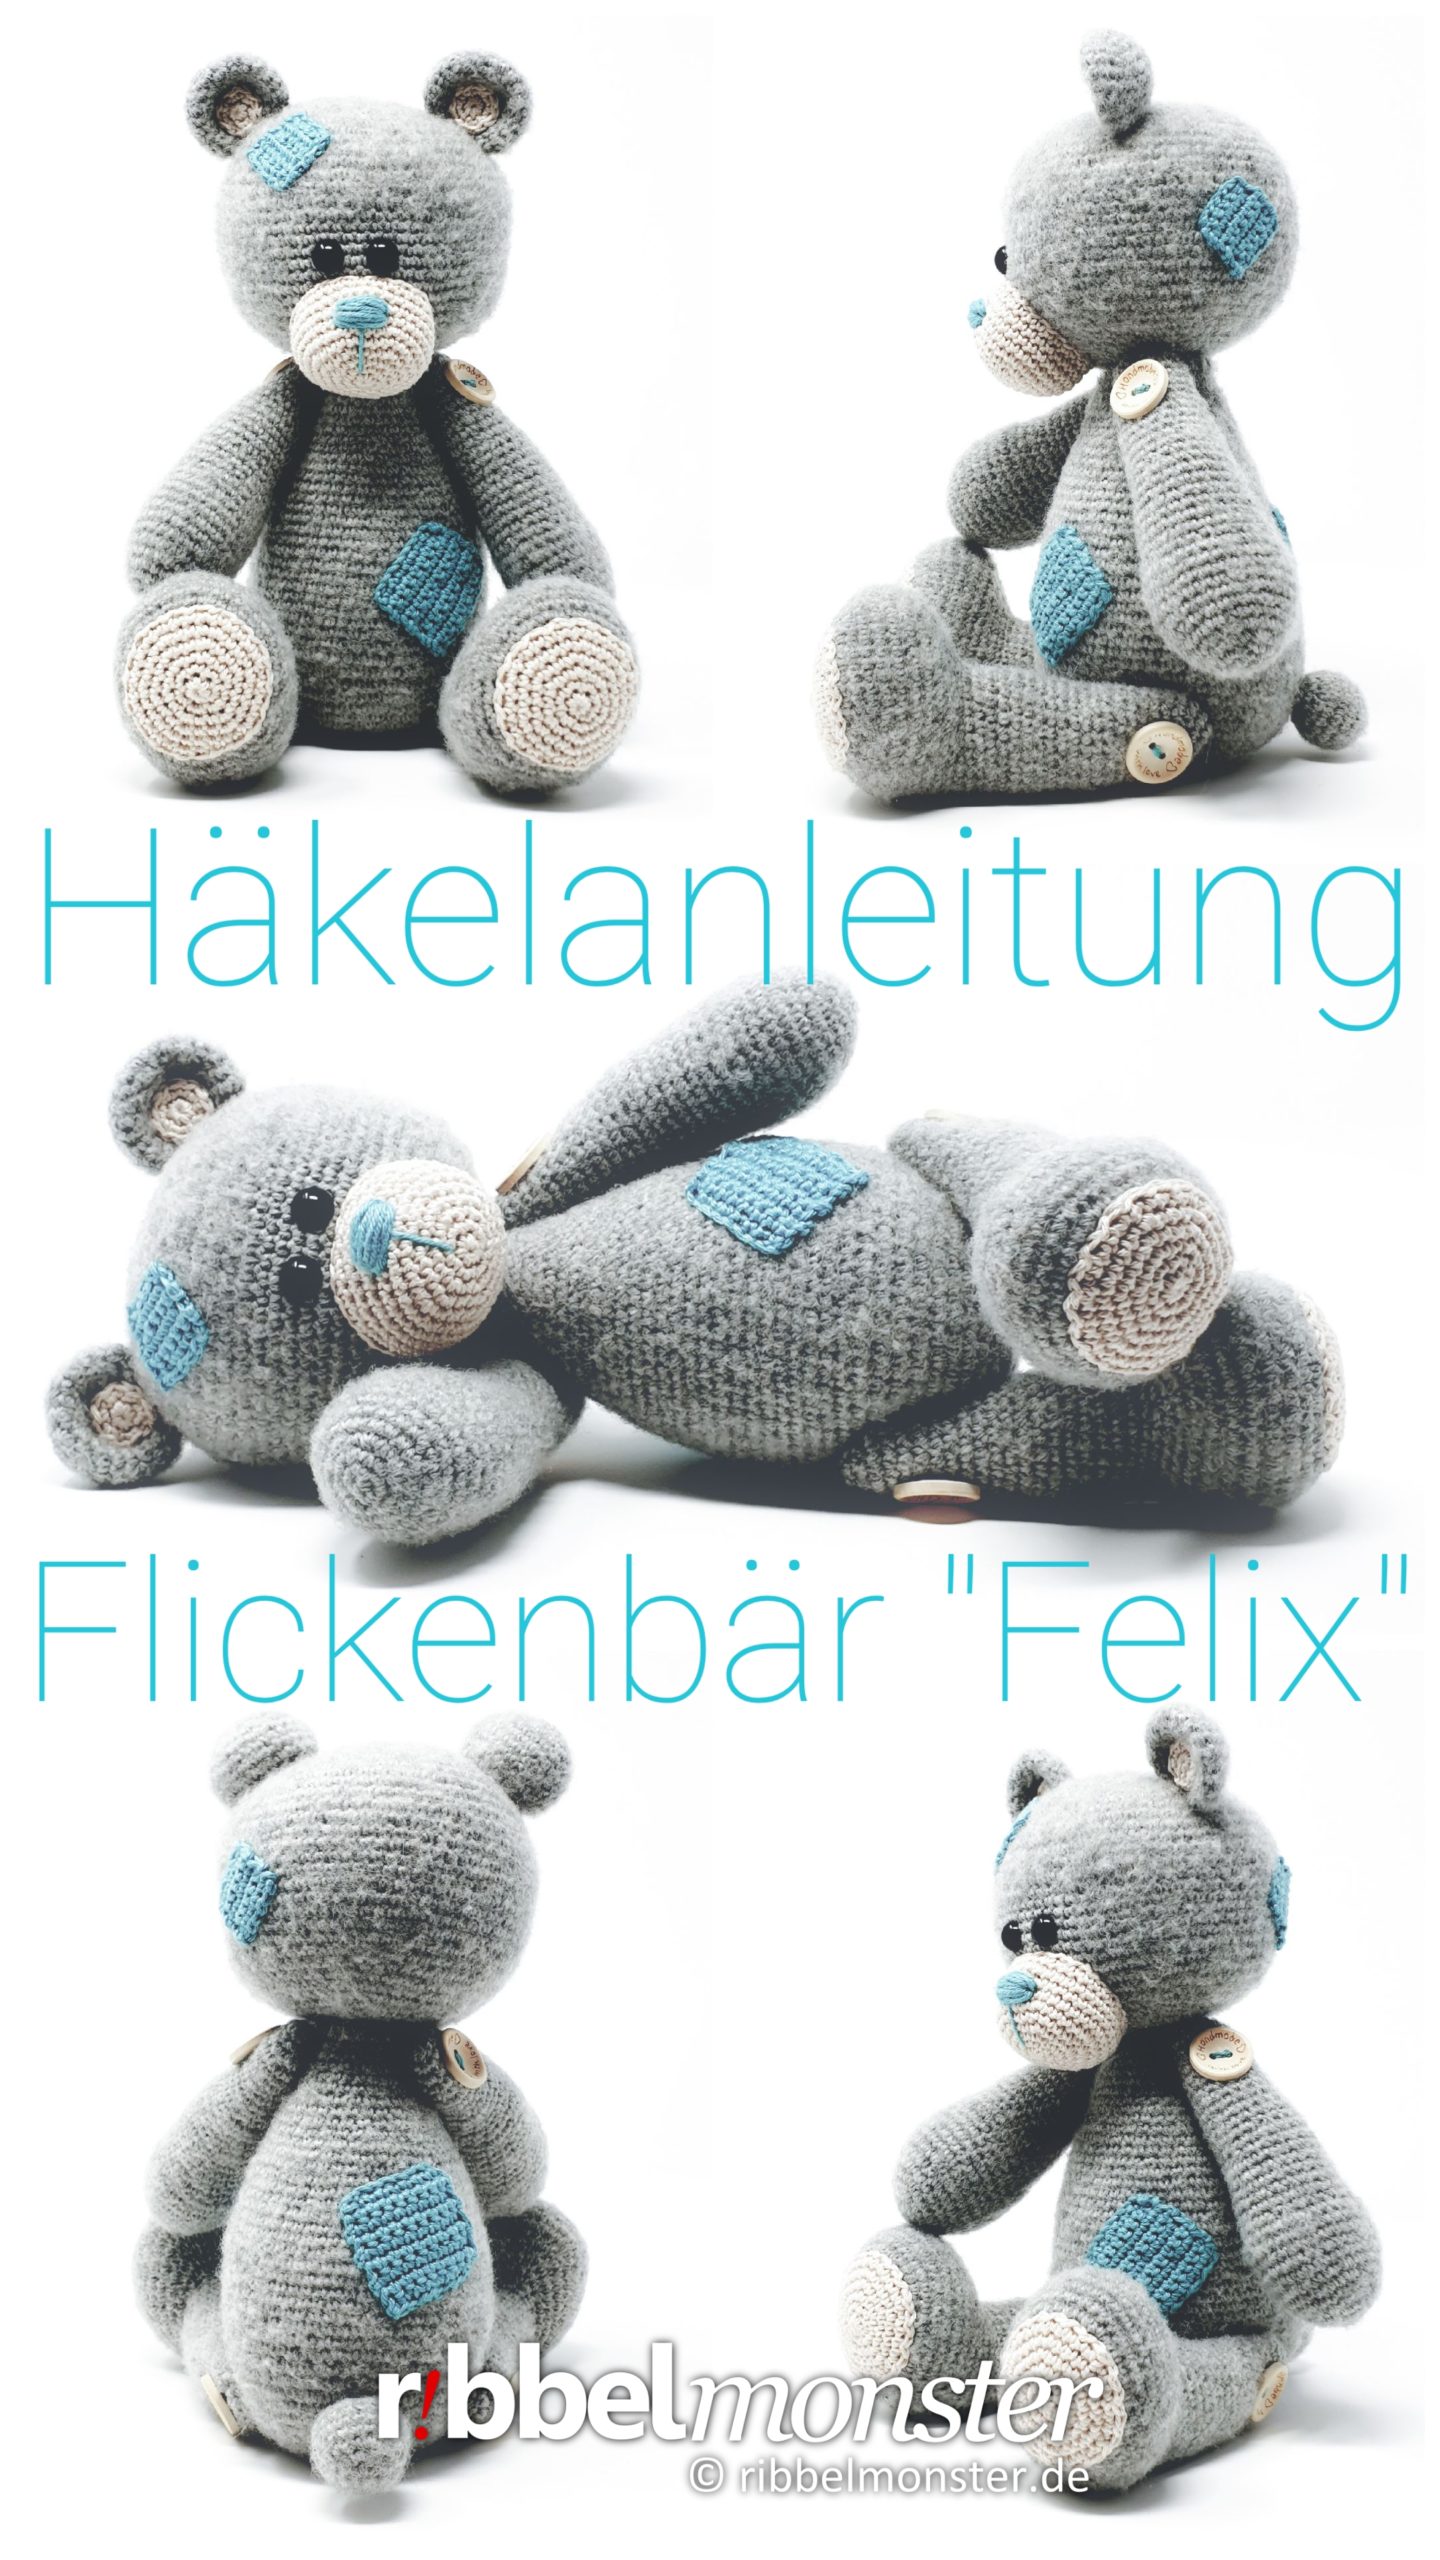

Introduction: Amigurumi – Crochet Patched Bear “Felix”

Knowledge: Amigurumi – Crochet Patched Bear “Felix”
- Double Crochet Stitches (UK!)
- Half Treble Crochet Stitches (UK!)
- Magic Ring
- Slip Stitches
- Spiral Rounds
- Treble Crochet Stitches (UK!)
Note! By offsetting regular increases and decreases, they become almost invisible. You can recognize regular increases by the phrase “double every … stitch,” and regular decreases by the phrase “crochet together every … and … stitch”. The stitch chart for spheres and circles might also be helpful for you.
Note! Using a special technique for invisible decreases makes them nearly invisible. Although this technique requires a bit of practice, it’s worth giving it a try.
Supplies: Amigurumi – Crochet Patched Bear “Felix”
Note! This amigurumi can be made with or without button joints, as per your preference. You can learn about what button joints are and how to make them in the button joint tutorial. If you choose to use button joints, you will need 4 buttons, the size of which should match perfectly. Therefore, it’s advisable to choose them after completing the crochet work.
Filling
For filling, I used synthetic filling made of 100% polyester. However, there are numerous alternatives for filling material. If you’ve run out of filling, I’ve prepared a refill for you here.
Pins
You’ll also need a few pins. The more colorful your collection, the better. If you need more, I’ve found something for you.
Safety Eyes
I used 2 safety eyes with a diameter of 1/2 inches. The eyes are completely black. However, there are countless alternatives for amigurumi eyes. You might prefer other safety eyes as well.
Scissors – any
You’ll need any scissors. It’s best to use your most beautiful scissors because it brings you joy. If you don’t have really nice scissors, I’ve picked out some lovely ones for you.
Wool Needle
You’ll need a wool needle with a blunt tip. The thickness of the wool needle should match the thickness of your yarn. You might like the set of wool needles I’ve picked out for you.
Yarn – Schachenmayr – Catania – 146 – pfau (lichtblau)
I used yarn in the shade Peacock. The material is 100% cotton. The yardage is 137 yds / 1.75 oz. If you want to replenish your supply, I’ve already picked out the matching yarn for you here.
Yarn – Schachenmayr – Catania – 257 – bast (beige)
I used yarn in the shade Bast. The material is 100% cotton. The yardage is 137 yds / 1.75 oz. If you want to replenish your supply, I’ve already picked out the matching yarn for you here.
Yarn – Schachenmayr – Merino Extrafine 120
I used yarn in the shade Light Grey. The material is 100% wool. The yardage is 131 yds / 1.75 oz. If you want to replenish your supply, I’ve already picked out the matching yarn for you here.
Note! The specified yarn was used for the example shown here. In principle, you can use any yarn and an appropriate needle size. However, the quality of the material also affects the quality of the result, so you should avoid cutting corners in the wrong place. Also, the thickness of the yarn and the needle will influence the size of the outcome, which you can, of course, intentionally take advantage of.
Note! For this Amigurumi, brushing the yarn creates a distinctive look. However, this technique may not work with every yarn, so it’s essential to test it on a swatch.
Size: Amigurumi – Crochet Patched Bear “Felix”
Note! If you want to change the size, you can simply use a thicker or thinner yarn with a suitable needle size. Simply doubling the rounds, rows, and stitches, on the other hand, will only result in an uneven outcome.
Here you find the size specifications for the crocheted patched bear “Felix” without ears.
| Needle Size | Yarn | Sitting | Standing |
| 12 (shown example) | 137yds / 1.75oz, 100% cotton | 20cm | 30cm |
Pattern: Amigurumi – Crochet Patched Bear “Felix”

For the patched bear “Felix” we first crochet head, body, ears, arms, legs, snout, tail, inner ears, soles and patches. Then all parts are sewn together and then your patched bear “Felix” is already finished.
Crochet Patched Bear Head (1x)

We crochet the head for the patched bear from top to buttom with double crochet stitches (UK!) in spiral rounds.
- grey:
- 1st round:
- magic ring
- into the magic ring:
- = 30 stitches
- = 6 stitches
- 2nd round:
- double every stitch
- = 12 stitches
- 3rd round:
- double every 2nd stitch
- = 18 stitches
- 4th round:
- double every 3rd stitch
- = 24 stitches
- 5th round:
- double every 4th stitch
- = 30 stitches
- 6th round:
- double every 5th stitch
- = 36 stitches
- 7th round:
- double every 6th stitch
- = 42 stitches
- 8th round:
- double every 7th stitch
- = 48 stitches
- 9th round:
- double every 8th stitch
- = 54 stitches
- 10th round:
- double every 9th stitch
- = 60 stitches
- 11th round:
- double every 10th stitch
- = 66 stitches
- 12th round:
- double every 11th stitch
- = 72 stitches
- 13th – 25th round:
- (= 13 rounds)
- each stitch one stitch
- = 72 stitches
- Attach Safety Eyes, Position:
- after the 20th round
- 3 stitches distance
- 26th round:
- crochet together every 11th and 12th stitch
- = 66 stitches
- 27th round:
- crochet together every 10th and 11th stitch
- = 60 stitches
- 28th round:
- crochet together every 9th and 10th stitch
- = 54 stitches
- 29th round:
- crochet together every 8th and 9th stitch
- = 48 stitches
- 30th round:
- crochet together every 7th and 8th stitch
- = 42 stitches
- 31st round:
- crochet together every 6th and 7th stitch
- = 36 stitches
- 32nd round:
- crochet together every 5th and 6th stitch
- = 30 stitches
- 33rd round:
- crochet together every 4th and 5th stitch
- = 24 stitches
- fill and stuff completely
- cut the thread, pull off the loop
Crochet Patched Bear Body (1x)
Den Körper für den Flickebär häkeln wir von unten nach oben in Spiralrunden mit Festen Maschen. Der Körper wird vollständig gefüllt und gestopft, allerdings nicht ganz geschlossen, sondern später mit dem Fadenende und der Öffnung an den Kopf genäht.
- grey:
- 1st round:
- magic ring
- into the magic ring:
- = 30 stitches
- = 6 stitches
- 2nd round:
- double every stitch
- = 12 stitches
- 3rd round:
- double every 2nd stitch
- = 18 stitches
- 4th round:
- double every 3rd stitch
- = 24 stitches
- 5th round:
- double every 4th stitch
- = 30 stitches
- 6th round:
- double every 5th stitch
- = 36 stitches
- 7th round:
- double every 6th stitch
- = 42 stitches
- 8th round:
- double every 7th stitch
- = 48 stitches
- 9th round:
- double every 8th stitch
- = 54 stitches
- 10th round:
- double every 9th stitch
- = 60 stitches
- 11th – 25th round:
- (= 15 rounds)
- each stitch one stitch
- = 60 stitches
- 26th round:
- crochet together every 29th and 30th stitch
- = 58 stitches
- 27th round:
- crochet together every 28th and 29th stitch
- = 56 stitches
- 28th round:
- crochet together every 27th and 28th stitch
- = 54 stitches
- 29th round:
- crochet together every 26th and 27th stitch
- = 52 stitches
- 30th round:
- crochet together every 25th and 26th stitch
- = 50 stitches
- 31st round:
- crochet together every 24th and 25th stitch
- = 48 stitches
- 32nd round:
- crochet together every 23rd and 24th stitch
- = 46 stitches
- 33rd round:
- crochet together every 22nd and 23rd stitch
- = 44 stitches
- 34th round:
- crochet together every 21st and 22nd stitch
- = 42 stitches
- 35th round:
- crochet together every 20th and 21st stitch
- = 40 stitches
- 36th round:
- crochet together every 19th and 20th stitch
- = 38 stitches
- 37th round:
- crochet together every 18th and 19th stitch
- = 36 stitches
- 38th round:
- crochet together every 17th and 18th stitch
- = 34 stitches
- 39th round:
- crochet together every 16th and 17th stitch
- = 32 stitches
- 40th round:
- crochet together every 15th and 16th stitch
- = 30 stitches
- 41st round:
- crochet together every 14th and 15th stitch
- = 28 stitches
- 42nd round:
- crochet together every 13th and 14th stitch
- = 26 stitches
- 43rd round:
- crochet together every 12th and 13th stitch
- = 24 stitches
- 44th round:
- 3x 1 half treble crochet stitch (UK!) into one stitch
- 6x 1 treble crochet stitch (UK!) into one stitch
- 3x 1 half treble crochet stitch (UK!) into one stitch
- 11x 1 double crochet stitch (UK!) into one stitch
- 1x 1 slip stitch into one stitch
- = 24 stitches
- fill and stuff completely
- cut the thread generous, pull off the loop, DONT cut the thread end, will be needed for sewing later
Crochet Patched Bear Ears (2x)
Die Ohren für den Flickenbär häkeln wir von der Spitze zum Ansatz in Spiralrunden mit Festen Maschen. Die Ohren werden nicht gefüllt, sondern nur flach gefaltet und später mit dem Fadenende an der Öffnung an den Kopf genäht.
Note! If you want to create several nearly identical parts, it’s advisable to work on them consecutively on the same day. For larger parts, it’s even recommended to work on them simultaneously in stages. Our tension and tightness can vary from day to day, leading to visible differences.
- grey:
- 1st round:
- magic ring
- into the magic ring:
- = 30 stitches
- = 6 stitches
- 2nd round:
- double every stitch
- = 12 stitches
- 3rd round:
- double every 2nd stitch
- = 18 stitches
- 4th round:
- double every 3rd stitch
- = 24 stitches
- 5th – 9th round:
- (= 5 rounds)
- each stitch one stitch
- = 24 stitches
- 10th round:
- crochet together every 1st and 2nd stitch
- = 12 stitches
- cut the thread generous, pull off the loop, DONT cut the thread end, will be needed for sewing later
Crochet Patched Bear Tail (1x)

Den Schwanz für den Flickenbär häkeln wir von der Spitze zum Ansatz in Spiralrunden mit Festen Maschen.
- grey:
- 1st round:
- magic ring
- into the magic ring:
- = 30 stitches
- = 6 stitches
- 2nd round:
- double every stitch
- = 12 stitches
- 3rd round:
- double every 2nd stitch
- = 18 stitches
- 4th – 7th round:
- (= 4 rounds)
- each stitch one stitch
- = 18 stitches
- 8th round:
- crochet together every 2nd and 3rd stitch
- = 12 stitches
- fill and stuff completely
- 9th round:
- crochet together every 1st and 2nd stitch
- = 6 stitches
- cut the thread generous, pull off the loop, DONT cut the thread end, will be needed for sewing later
Crochet Patched Bear Arms (2x)
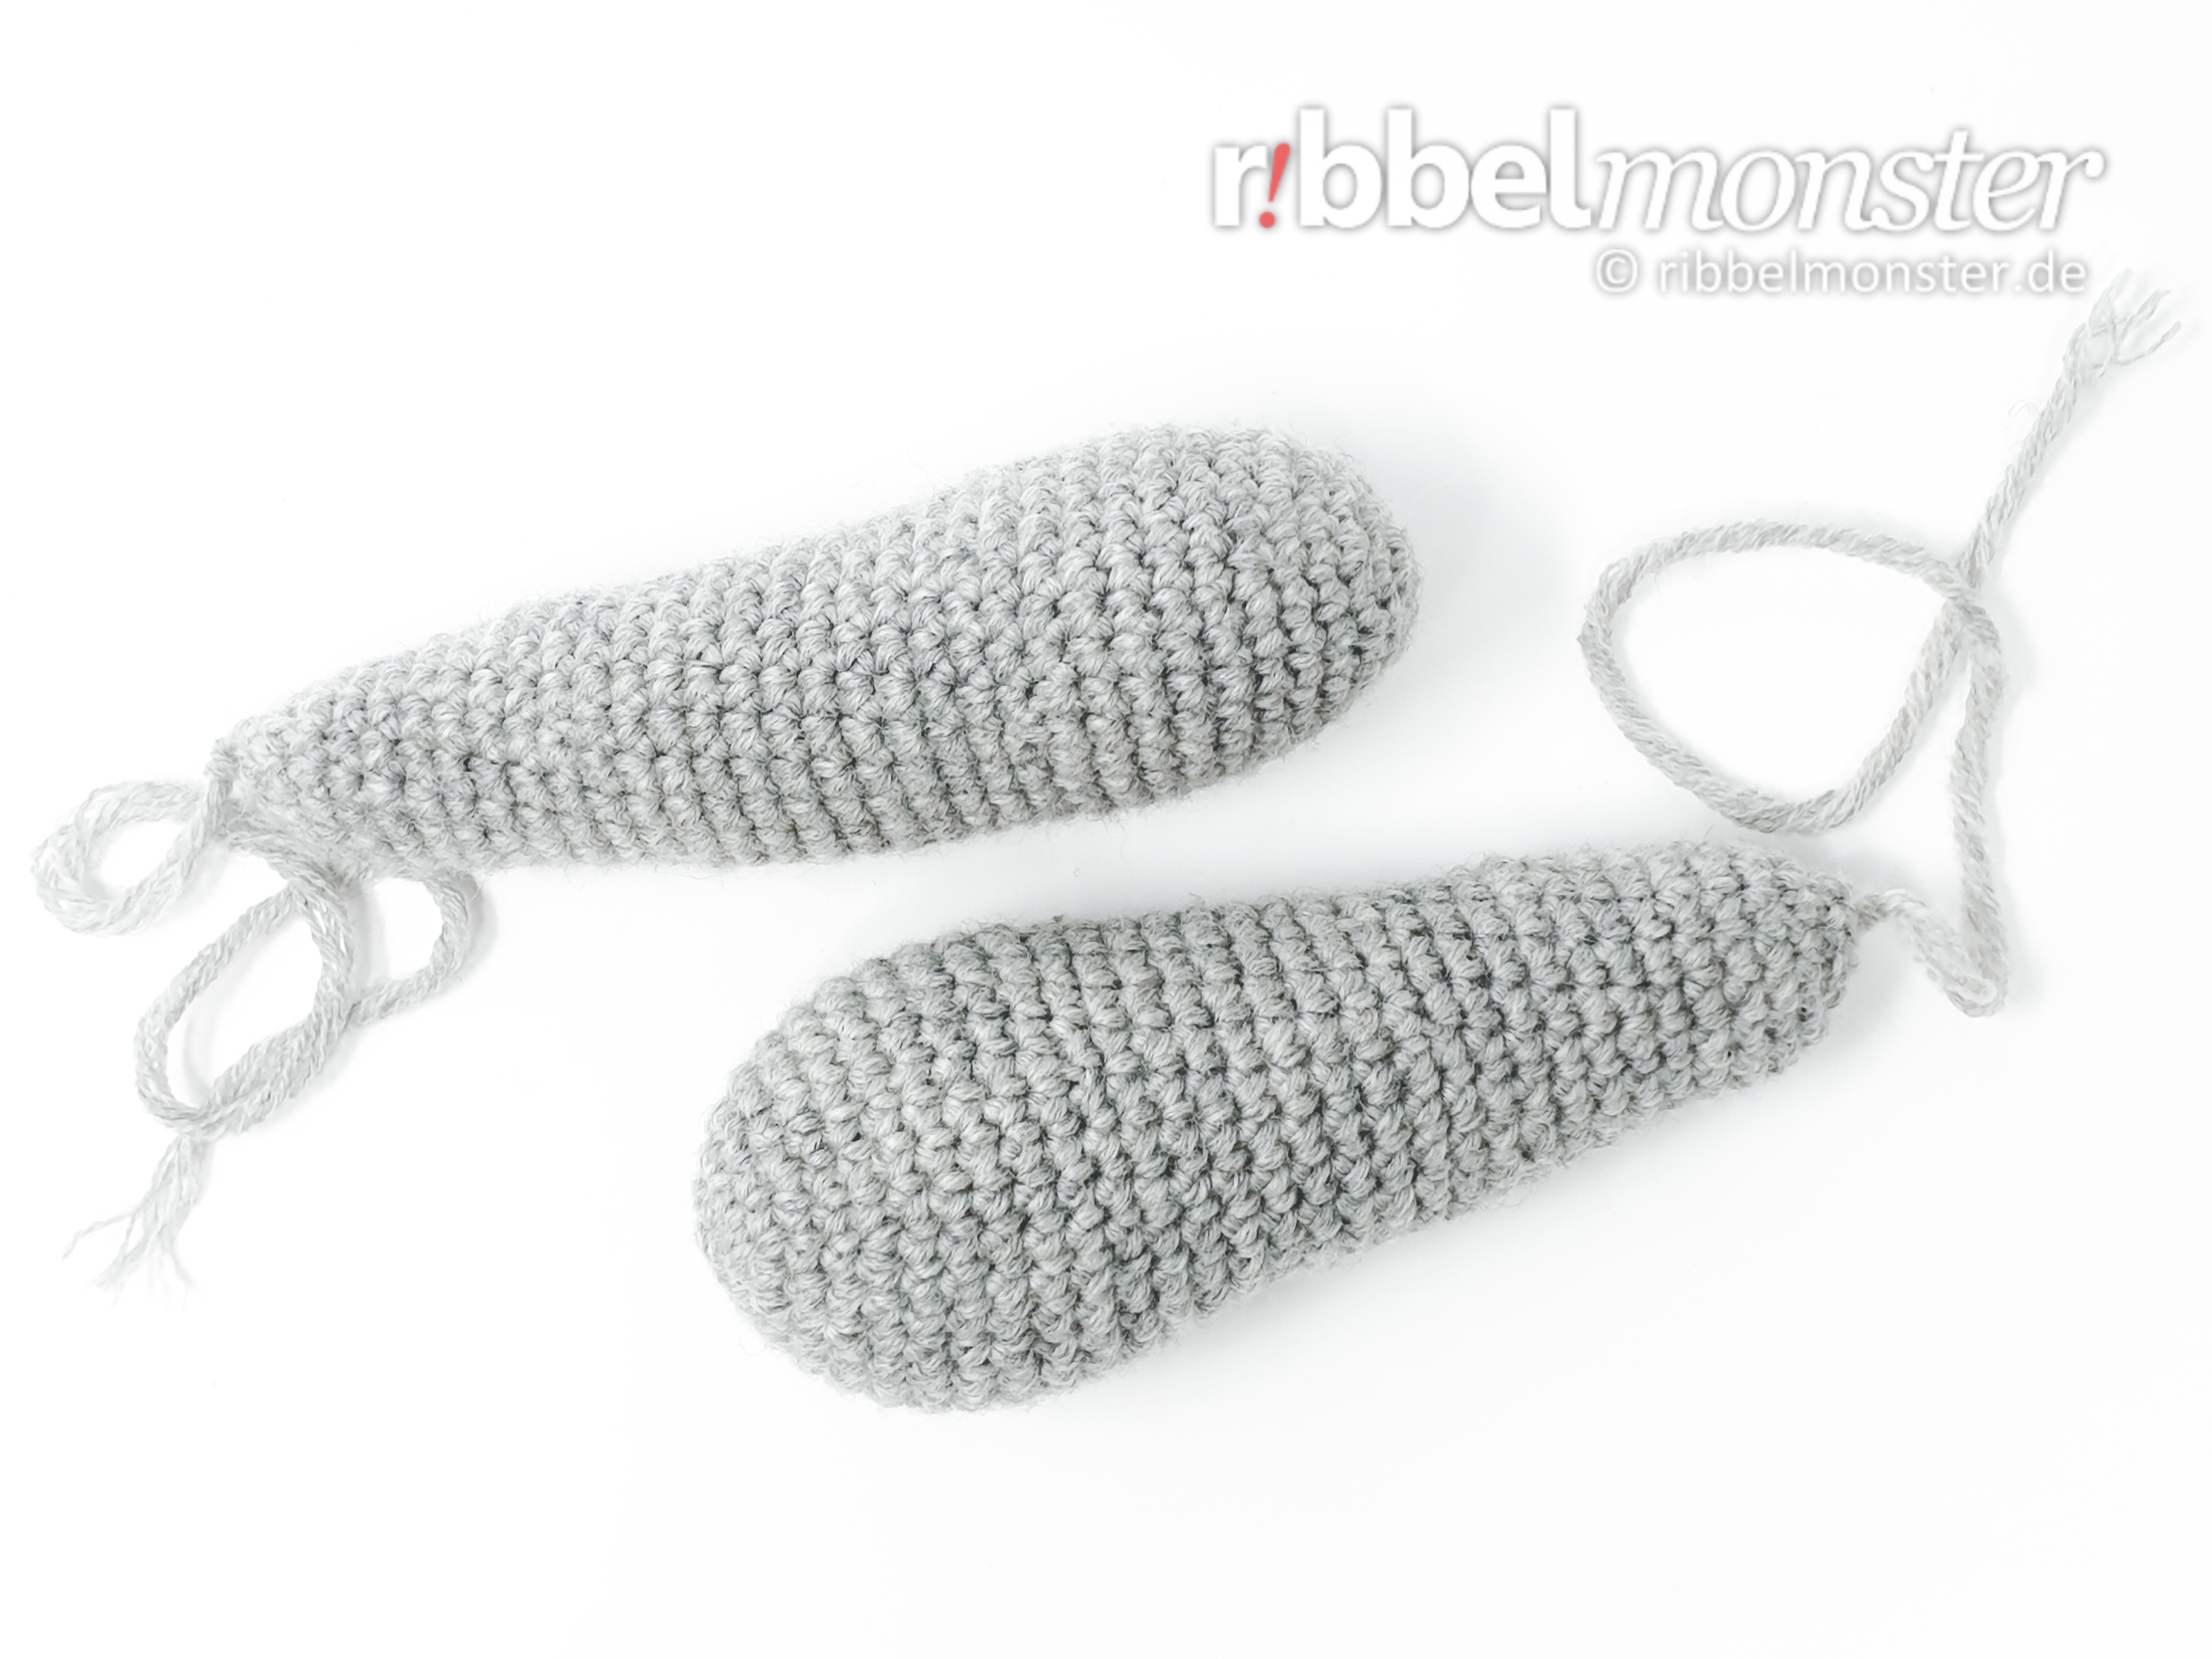
Die Arme für den Flickenbär häkeln wir von den Fingerspitzen zur Schulter in Spiralrunden mit Festen Maschen. Die Arme werden gefüllt und gestopft und später mit dem Fadenende an den Körper genäht oder verschlossen und mit Knopfgelenken am Körper befestigt.
Note! If you want to create several nearly identical parts, it’s advisable to work on them consecutively on the same day. For larger parts, it’s even recommended to work on them simultaneously in stages. Our tension and tightness can vary from day to day, leading to visible differences.
- grey:
- 1st round:
- magic ring
- into the magic ring:
- = 30 stitches
- = 6 stitches
- 2nd round:
- double every stitch
- = 12 stitches
- 3rd round:
- double every 2nd stitch
- = 18 stitches
- 4th round:
- double every 6th stitch
- = 21 stitches
- 5th round:
- double every 7th stitch
- = 24 stitches
- 6th round:
- double every 8th stitch
- = 27 stitches
- 7th round:
- double every 9th stitch
- = 30 stitches
- 8th – 12th round:
- (= 5 rounds)
- each stitch one stitch
- = 30 stitches
- 13th round:
- crochet together every 4th and 5th stitch
- = 24 stitches
- 14th round:
- each stitch one stitch
- = 24 stitches
- 15th round:
- crochet together every 23rd and 24th stitch
- = 23 stitches
- 16th round:
- each stitch one stitch
- = 23 stitches
- 17th round:
- crochet together every 22nd and 23rd stitch
- = 22 stitches
- 18th round:
- each stitch one stitch
- = 22 stitches
- 19th round:
- crochet together every 21st and 22nd stitch
- = 21 stitches
- 20th round:
- each stitch one stitch
- = 21 stitches
- 21st round:
- crochet together every 20th and 21st stitch
- = 20 stitches
- 22nd round:
- each stitch one stitch
- = 20 stitches
- 23rd round:
- crochet together every 19th and 20th stitch
- = 19 stitches
- 24th round:
- each stitch one stitch
- = 19 stitches
- 25th round:
- crochet together every 18th and 19th stitch
- = 18 stitches
- 26th round:
- each stitch one stitch
- = 18 stitches
- 27th round:
- crochet together every 17th and 18th stitch
- = 17 stitches
- 28th round:
- each stitch one stitch
- = 17 stitches
- 29th round:
- crochet together every 16th and 17th stitch
- = 16 stitches
- 30th round:
- each stitch one stitch
- = 16 stitches
- 31st round:
- crochet together every 15th and 16th stitch
- = 15 stitches
- 32nd round:
- each stitch one stitch
- = 15 stitches
- fill and stuff completely
- 33rd round:
- crochet together every 4th and 5th stitch
- = 12 stitches
- without button joints:
- cut the thread generous, pull off the loop, DONT cut the thread end, will be needed for sewing later
- with button joints:
- 34th round:
- crochet together every 1st and 2nd stitch
- = 6 stitches
- cut the thread generous, pull off the loop, close remaining opening, secure and weave in the thread end
- 34th round:
Crochet Patched Bear Legs (2x)
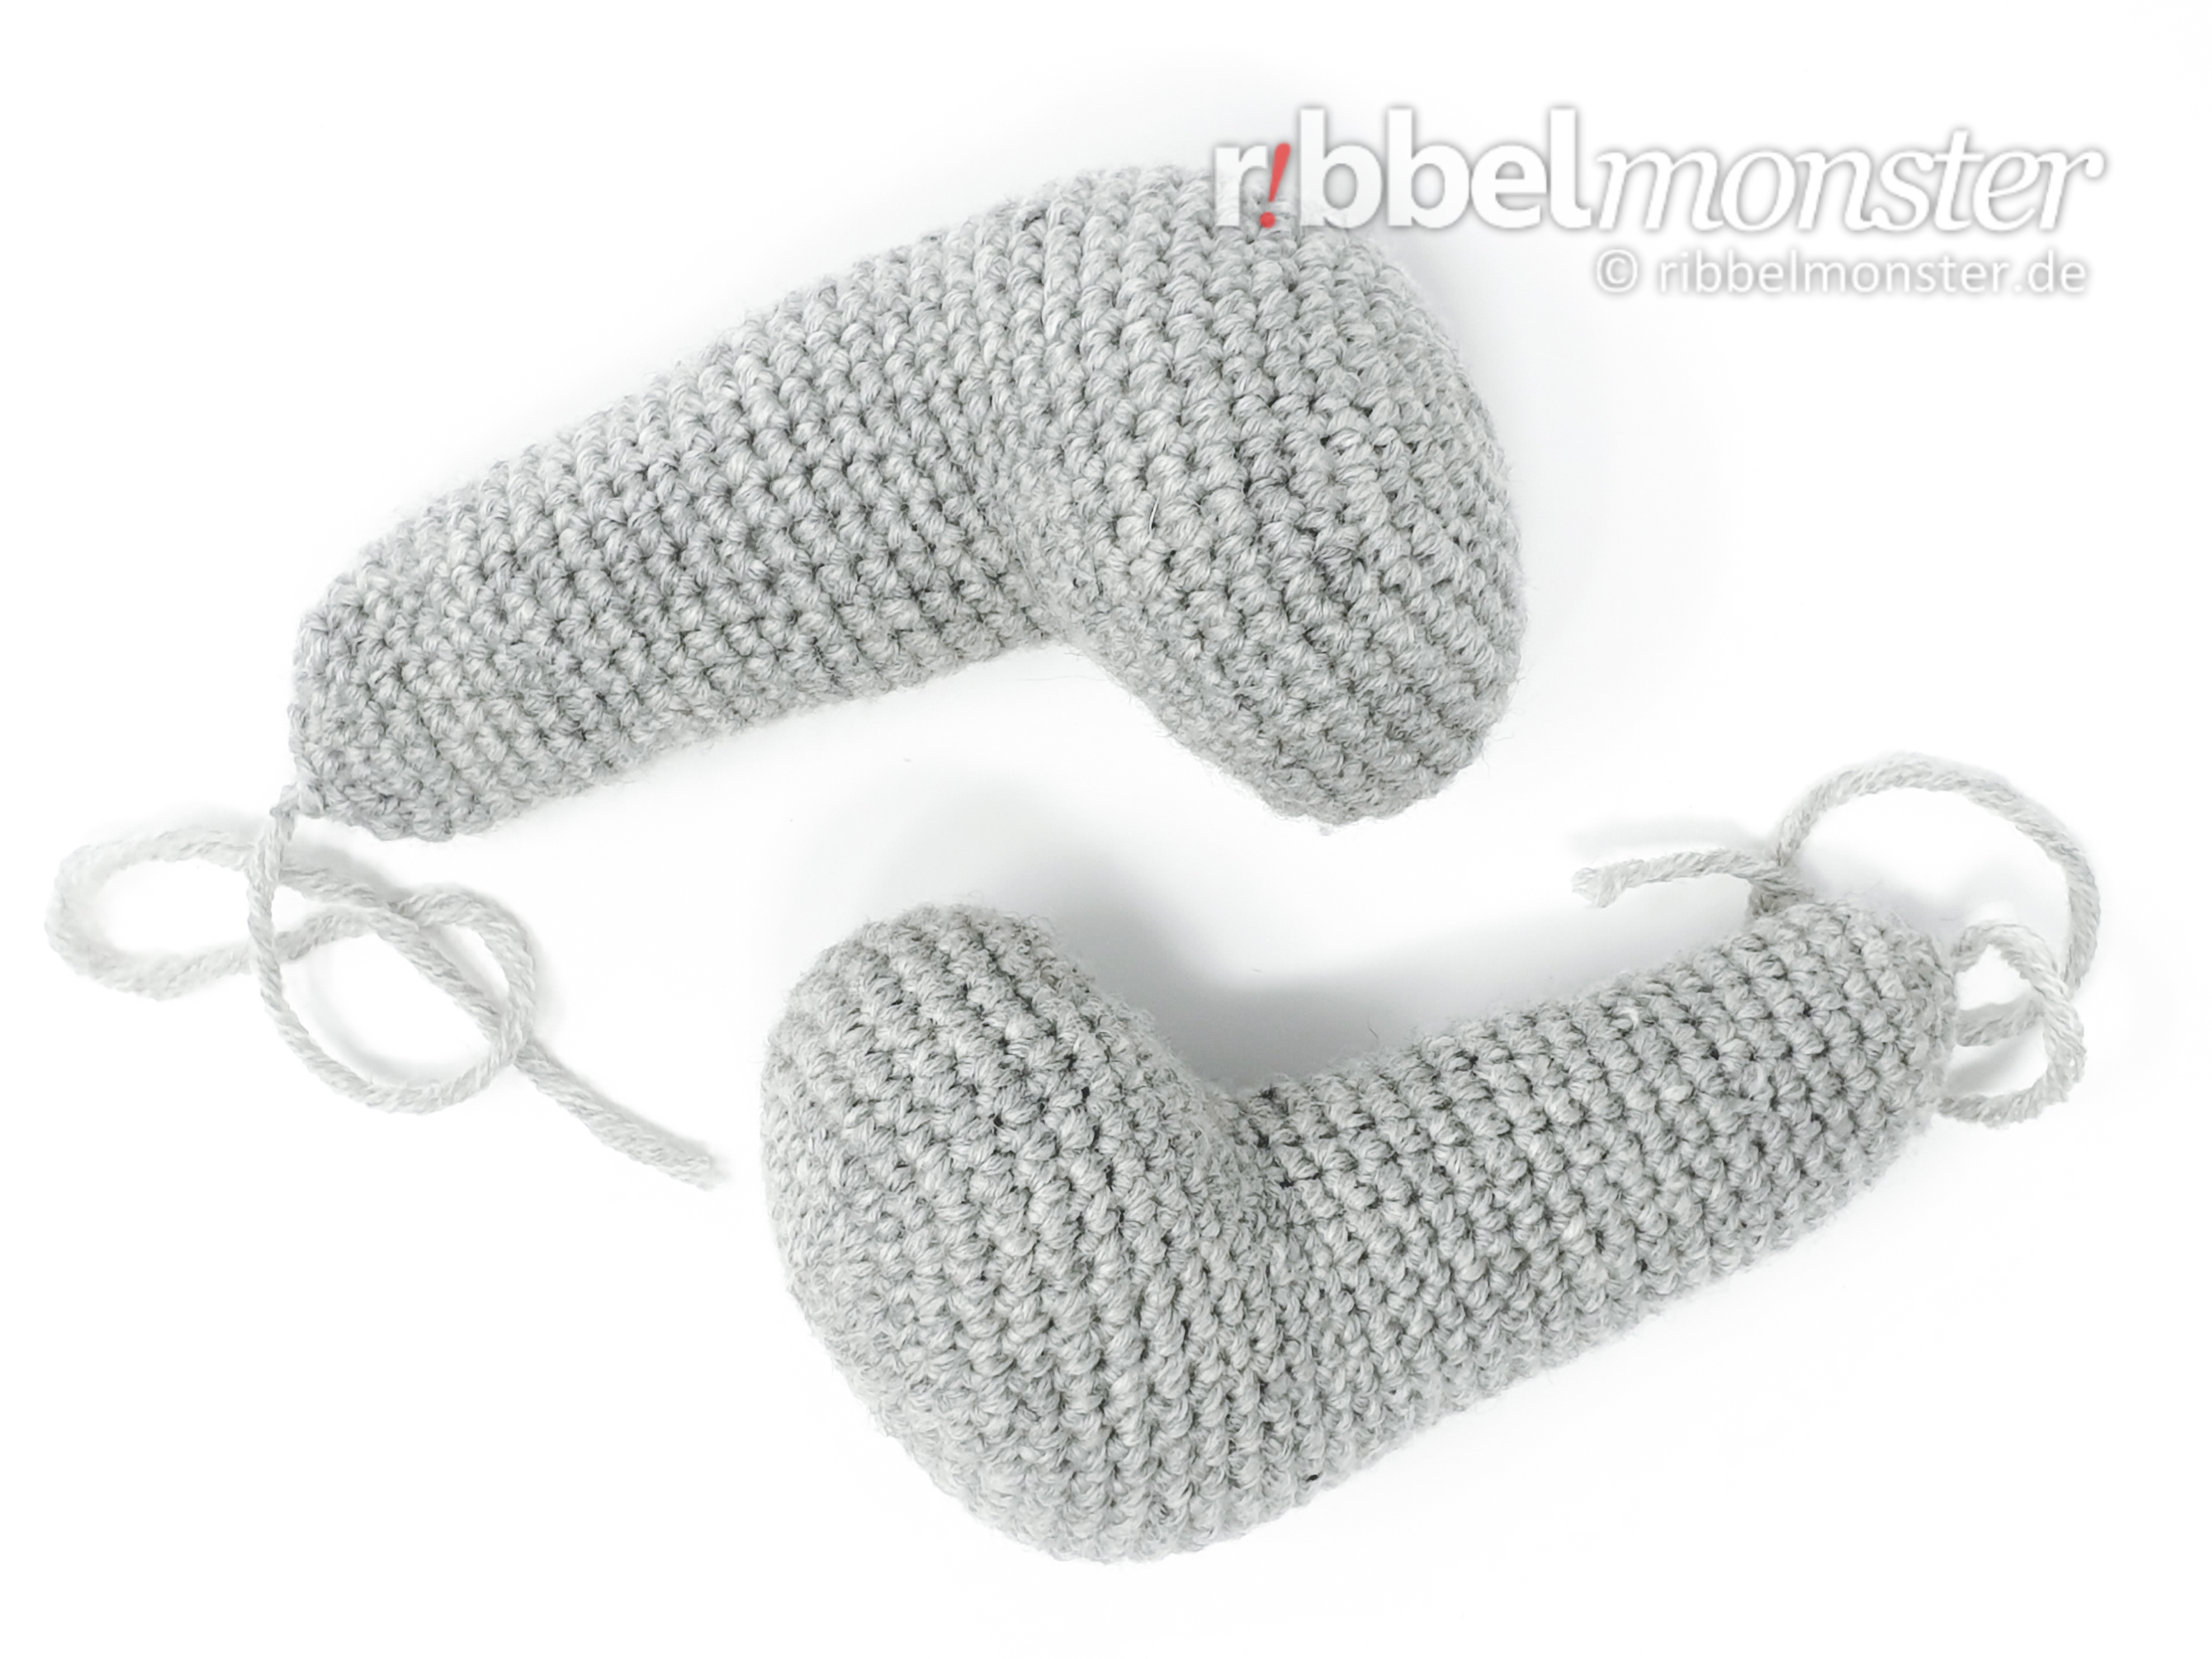
Die Beine für den Flickenbär häkeln wir von den Zehenspitzen zur Hüfte mit Festen Maschen in Spiralrunden. Die Beine werden gefüllt und später mit dem Fadenende an den Körper genäht oder verschlossen und mit Knopfgelenken am Körper befestigt
Note! If you want to create several nearly identical parts, it’s advisable to work on them consecutively on the same day. For larger parts, it’s even recommended to work on them simultaneously in stages. Our tension and tightness can vary from day to day, leading to visible differences.
- grey:
- 1st round:
- magic ring
- into the magic ring:
- = 30 stitches
- = 6 stitches
- 2nd round:
- double every stitch
- = 12 stitches
- 3rd round:
- double every 2nd stitch
- = 18 stitches
- 4th round:
- double every 3rd stitch
- = 24 stitches
- 5th round:
- double every 4th stitch
- = 30 stitches
- 6th round:
- double every 5th stitch
- = 36 stitches
- 7th round:
- double every 6th stitch
- = 42 stitches
- 8th round:
- double every 7th stitch
- = 48 stitches
- 9th – 13th round:
- (= 5 rounds)
- each stitch one stitch
- = 48 stitches
- 14th round:
- 18x 1 double crochet stitch (UK!) into one stitch
- 6x crochet together two stitches with 1 double crochet stitch (UK!)
- 15x 1 double crochet stitch (UK!) into one stitch
- = 42 stitches
- 15th round:
- 15x 1 double crochet stitch (UK!) into one stitch
- 6x crochet together two stitches with 1 double crochet stitch (UK!)
- 15x 1 double crochet stitch (UK!) into one stitch
- = 36 stitches
- 16th round:
- 12x 1 double crochet stitch (UK!) into one stitch
- 6x crochet together two stitches with 1 double crochet stitch (UK!)
- 12x 1 double crochet stitch (UK!) into one stitch
- = 30 stitches
- 17th round:
- 9x 1 double crochet stitch (UK!) into one stitch
- 6x crochet together two stitches with 1 double crochet stitch (UK!)
- 9x 1 double crochet stitch (UK!) into one stitch
- = 24 stitches
- 18th – 24th round:
- (= 7 rounds)
- each stitch one stitch
- = 24 stitches
- 25th round:
- crochet together every 23rd and 24th stitch
- = 23 stitches
- 26th round:
- each stitch one stitch
- = 23 stitches
- 27th round:
- crochet together every 22nd and 23rd stitch
- = 22 stitches
- 28th round:
- each stitch one stitch
- = 22 stitches
- 29th round:
- crochet together every 21st and 22nd stitch
- = 21 stitches
- 30th round:
- each stitch one stitch
- = 21 stitches
- 31st round:
- crochet together every 20th and 21st stitch
- = 20 stitches
- 32nd round:
- each stitch one stitch
- = 20 stitches
- 33rd round:
- crochet together every 19th and 20th stitch
- = 19 stitches
- 34th round:
- each stitch one stitch
- ERROR
- 35th round:
- crochet together every 18th and 19th stitch
- = 18 stitches
- 36th round:
- each stitch one stitch
- = 18 stitches
- fill and stuff completely
- 37th round:
- crochet together every 2nd and 3rd stitch
- = 12 stitches
- without button joints:
- cut the thread generous, pull off the loop, DONT cut the thread end, will be needed for sewing later
- with button joints:
- 38th round:
- crochet together every 1st and 2nd stitch
- = 6 stitches
- cut the thread generous, pull off the loop, close remaining opening, secure and weave in the thread end
- 38th round:
Crochet Patched Bear Snout (1x)
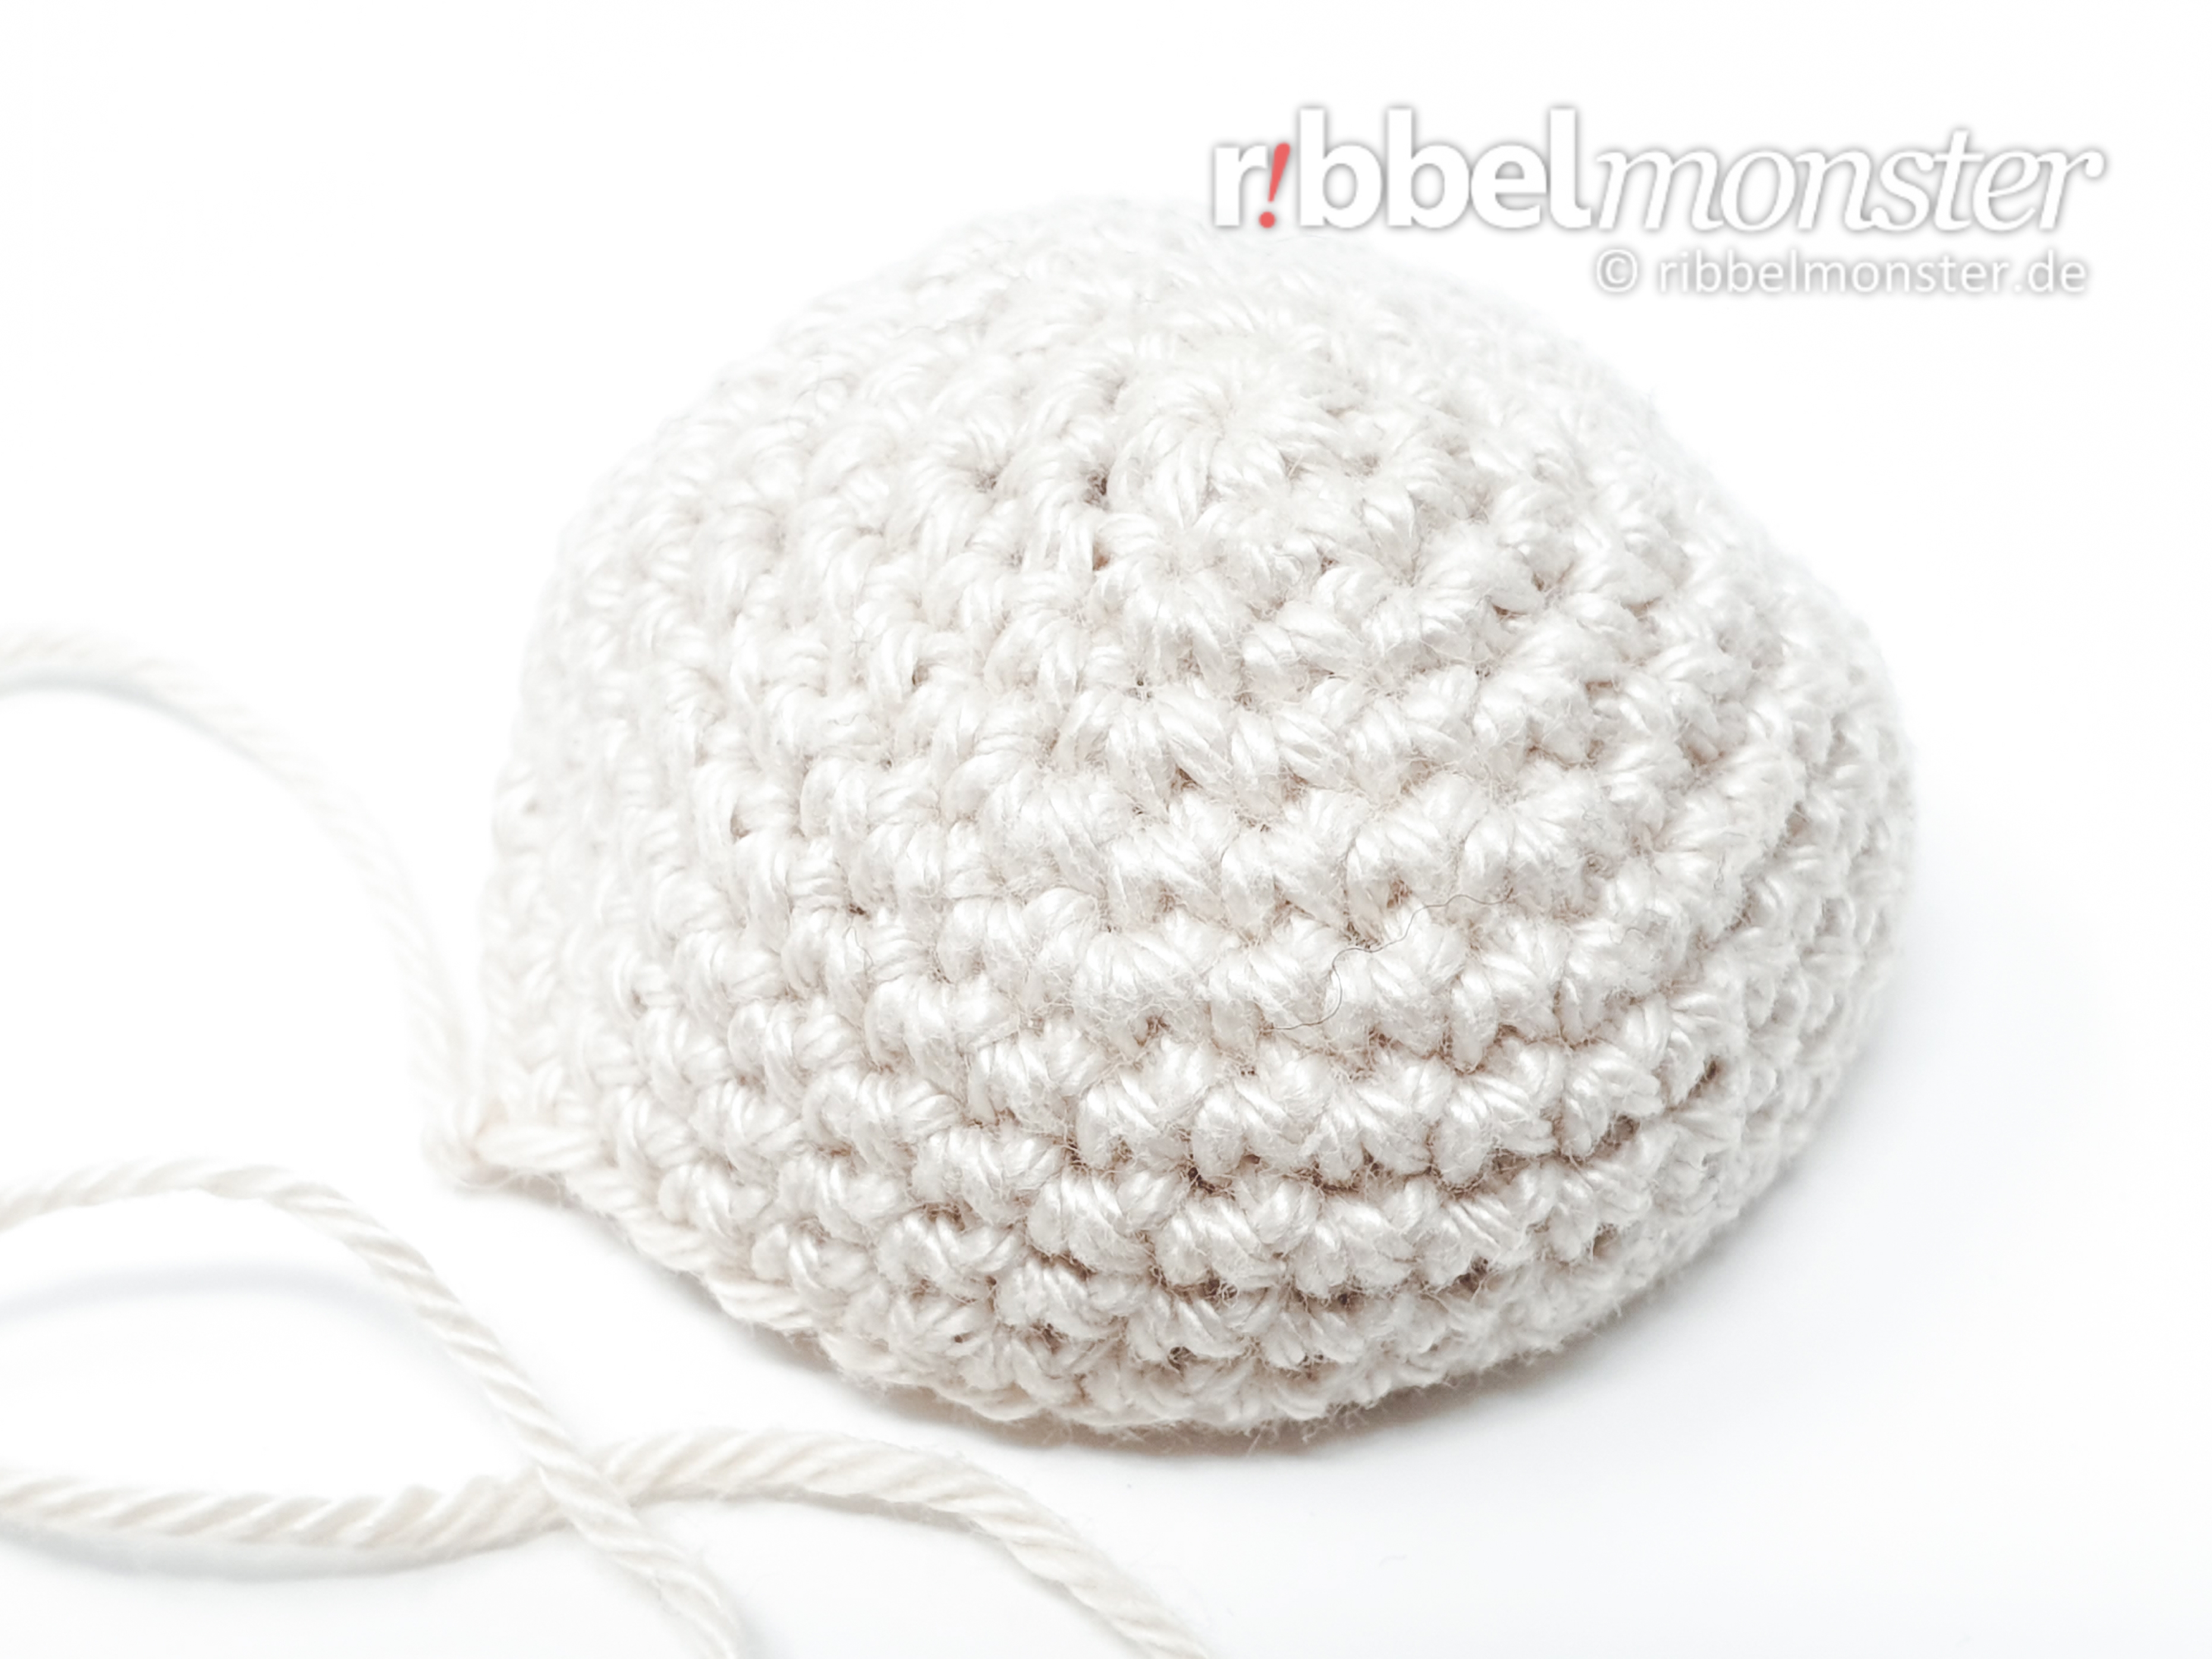
Die Schnauze für den Flickenbär häkeln wir von der Nasenspitze nach außen mit Festen Maschen in Spiralrunden. Später wird die Schnauze ringsherum an den Kopf genäht und erst kurz vor Schluss gefüllt.
- beige:
- 1st round:
- magic ring
- into the magic ring:
- = 30 stitches
- = 6 stitches
- 2nd round:
- double every stitch
- = 12 stitches
- 3rd round:
- double every 2nd stitch
- = 18 stitches
- 4th round:
- double every 3rd stitch
- = 24 stitches
- 5th round:
- double every 4th stitch
- = 30 stitches
- 6th round:
- double every 5th stitch
- = 36 stitches
- 7th – 10th round:
- (= 4 rounds)
- each stitch one stitch
- = 36 stitches
- beyond the end of the round:
- 1x 1 slip stitch into one stitch
- cut the thread generous, pull off the loop, DONT cut the thread end, will be needed for sewing later
Crochet Patched Bear Soles (2x)

Die Sohlen für den Flickenbär häkeln wir von innen nach außen mit Festen Maschen in Spiralrunden.
Note! If you want to create several nearly identical parts, it’s advisable to work on them consecutively on the same day. For larger parts, it’s even recommended to work on them simultaneously in stages. Our tension and tightness can vary from day to day, leading to visible differences.
- beige:
- 1st round:
- magic ring
- into the magic ring:
- = 30 stitches
- = 6 stitches
- 2nd round:
- double every stitch
- = 12 stitches
- 3rd round:
- double every 2nd stitch
- = 18 stitches
- 4th round:
- double every 3rd stitch
- = 24 stitches
- 5th round:
- double every 4th stitch
- = 30 stitches
- 6th round:
- double every 5th stitch
- = 36 stitches
- beyond the end of the round:
- 1x 1 slip stitch into one stitch
- cut the thread generous, pull off the loop, DONT cut the thread end, will be needed for sewing later
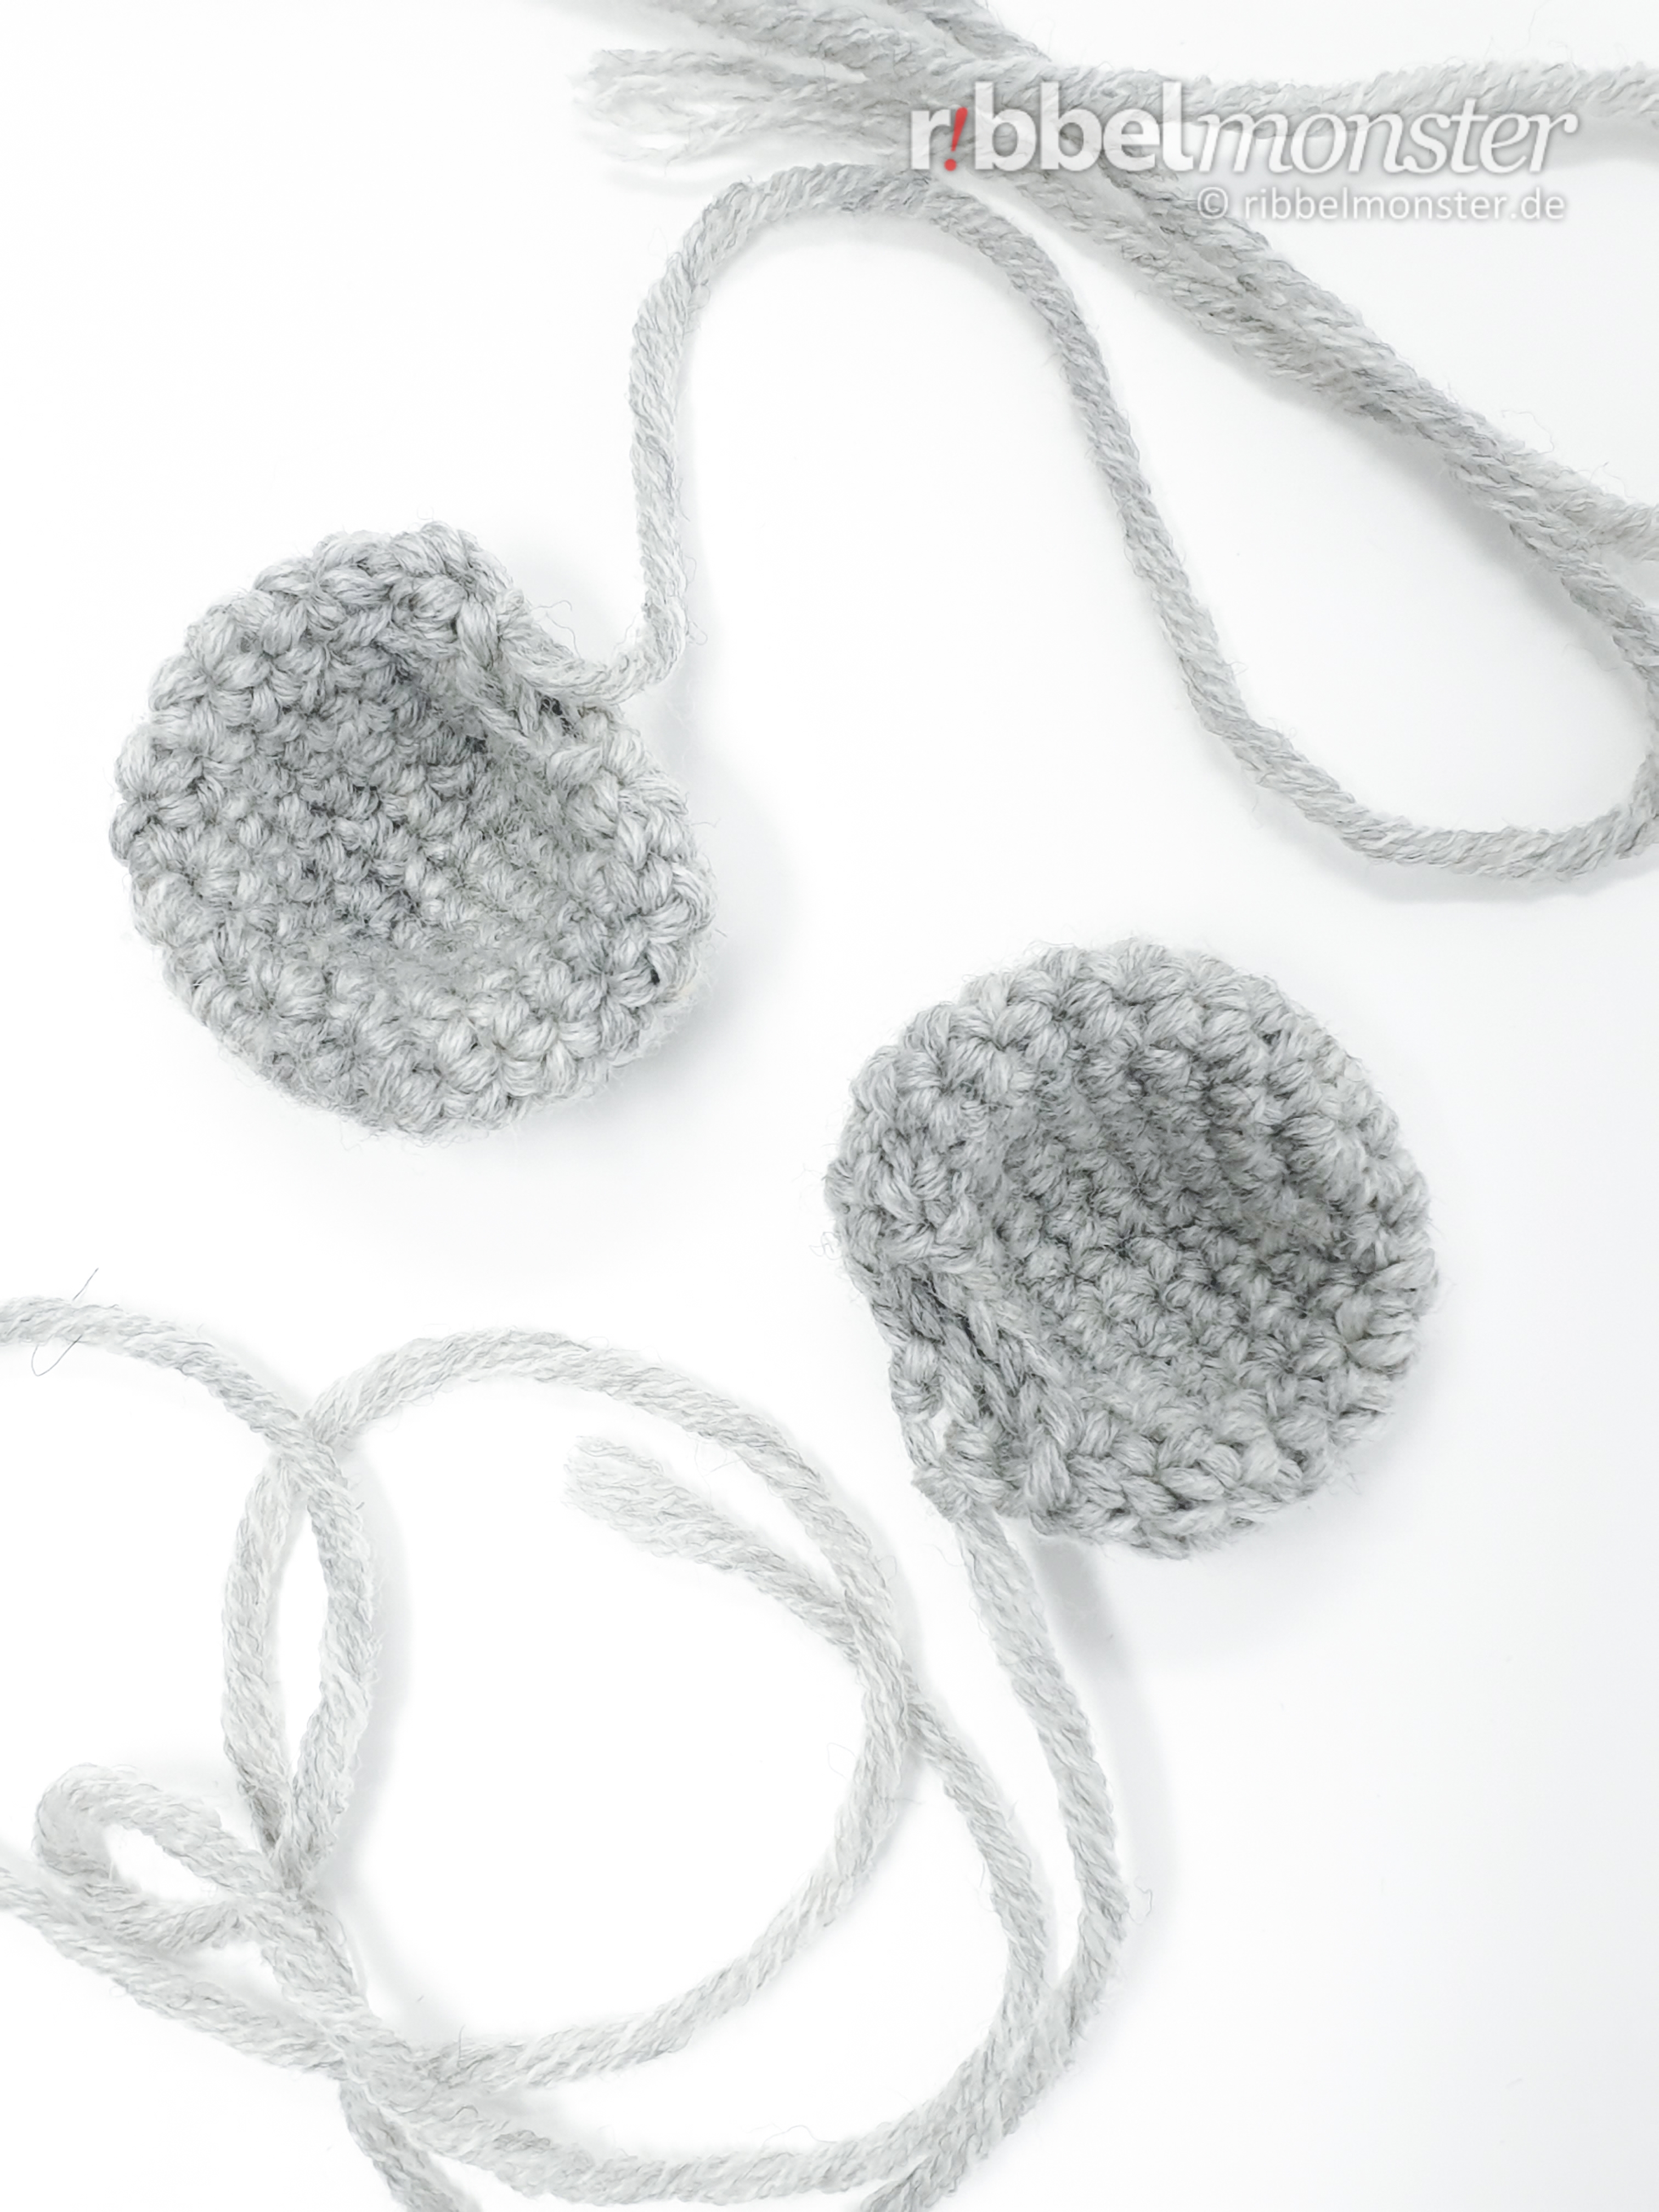
Crochet Patched Bear Inner Ears (2x)
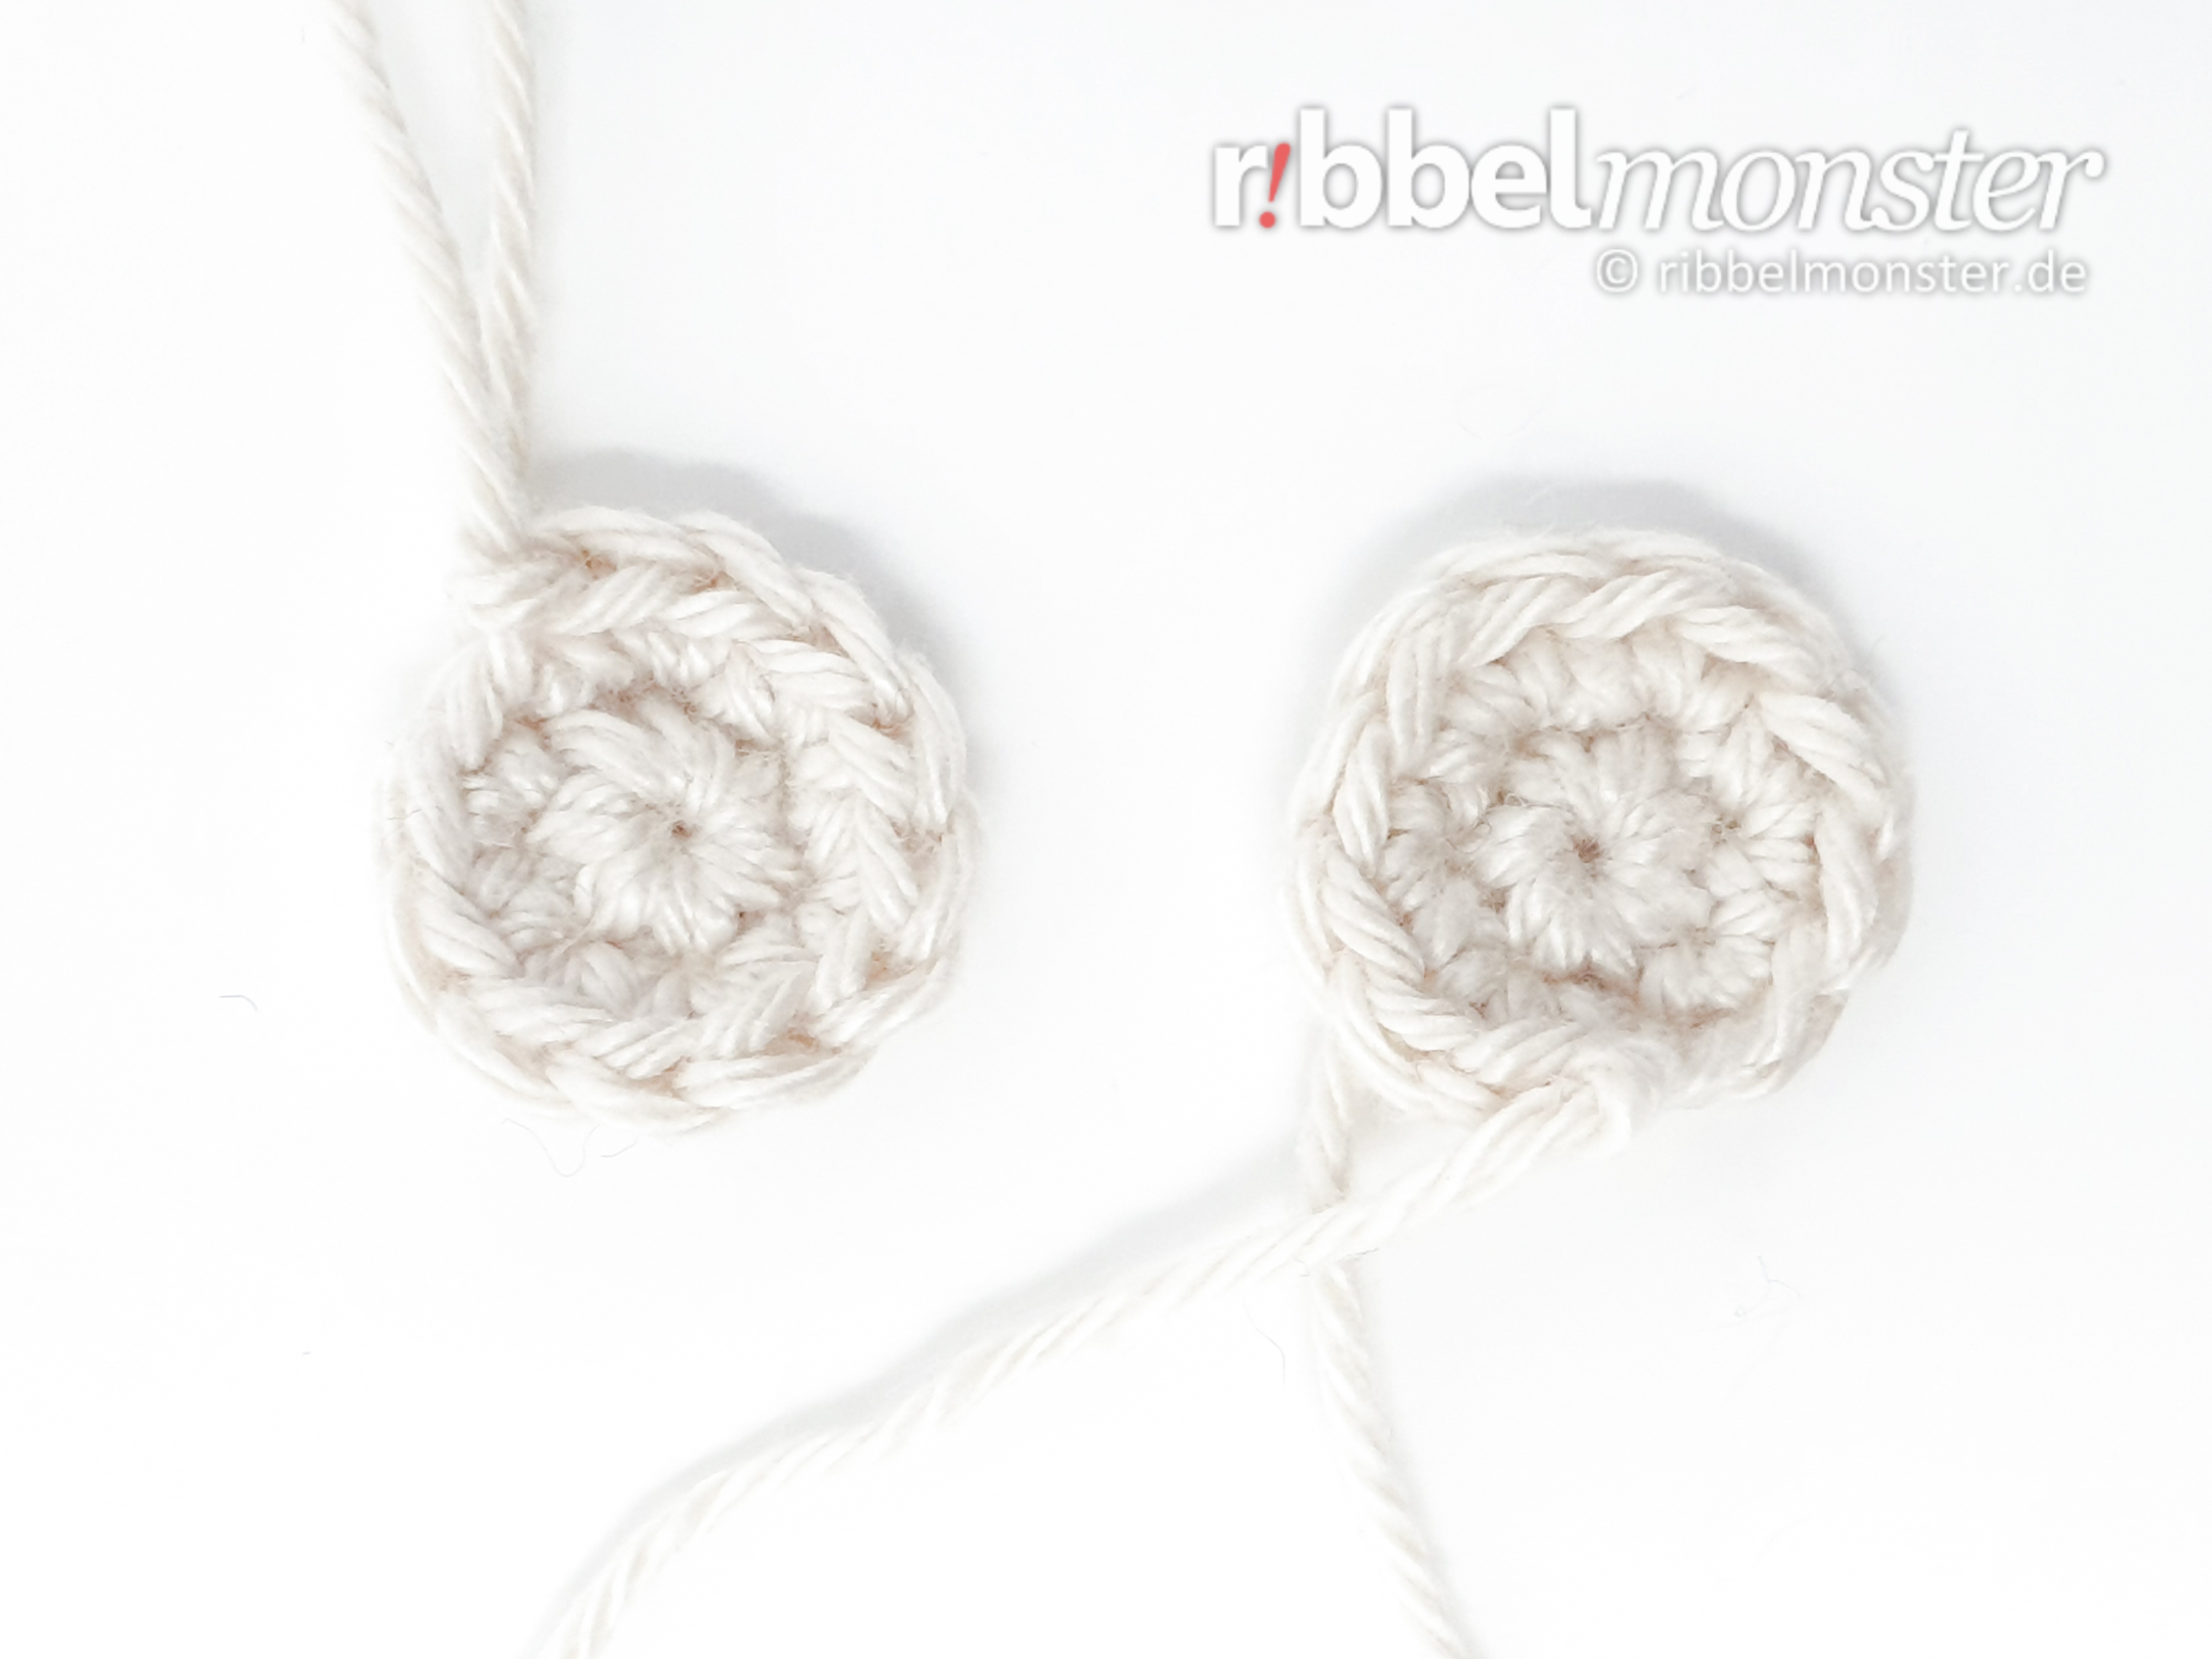
Die Handflächen für den Flickenbär häkeln wir von innen nach außen mit Festen Maschen in Spiralrunden.
Note! If you want to create several nearly identical parts, it’s advisable to work on them consecutively on the same day. For larger parts, it’s even recommended to work on them simultaneously in stages. Our tension and tightness can vary from day to day, leading to visible differences.
- beige:
- 1st round:
- magic ring
- into the magic ring:
- = 30 stitches
- = 6 stitches
- 2nd round:
- double every stitch
- = 12 stitches
- 3rd round:
- double every 2nd stitch
- = 18 stitches
- 4th round:
- double every 3rd stitch
- = 24 stitches
- beyond the end of the round:
- 1x 1 slip stitch into one stitch
- cut the thread generous, pull off the loop, DONT cut the thread end, will be needed for sewing later
Crochet Patched Bear Small Patches (2x)
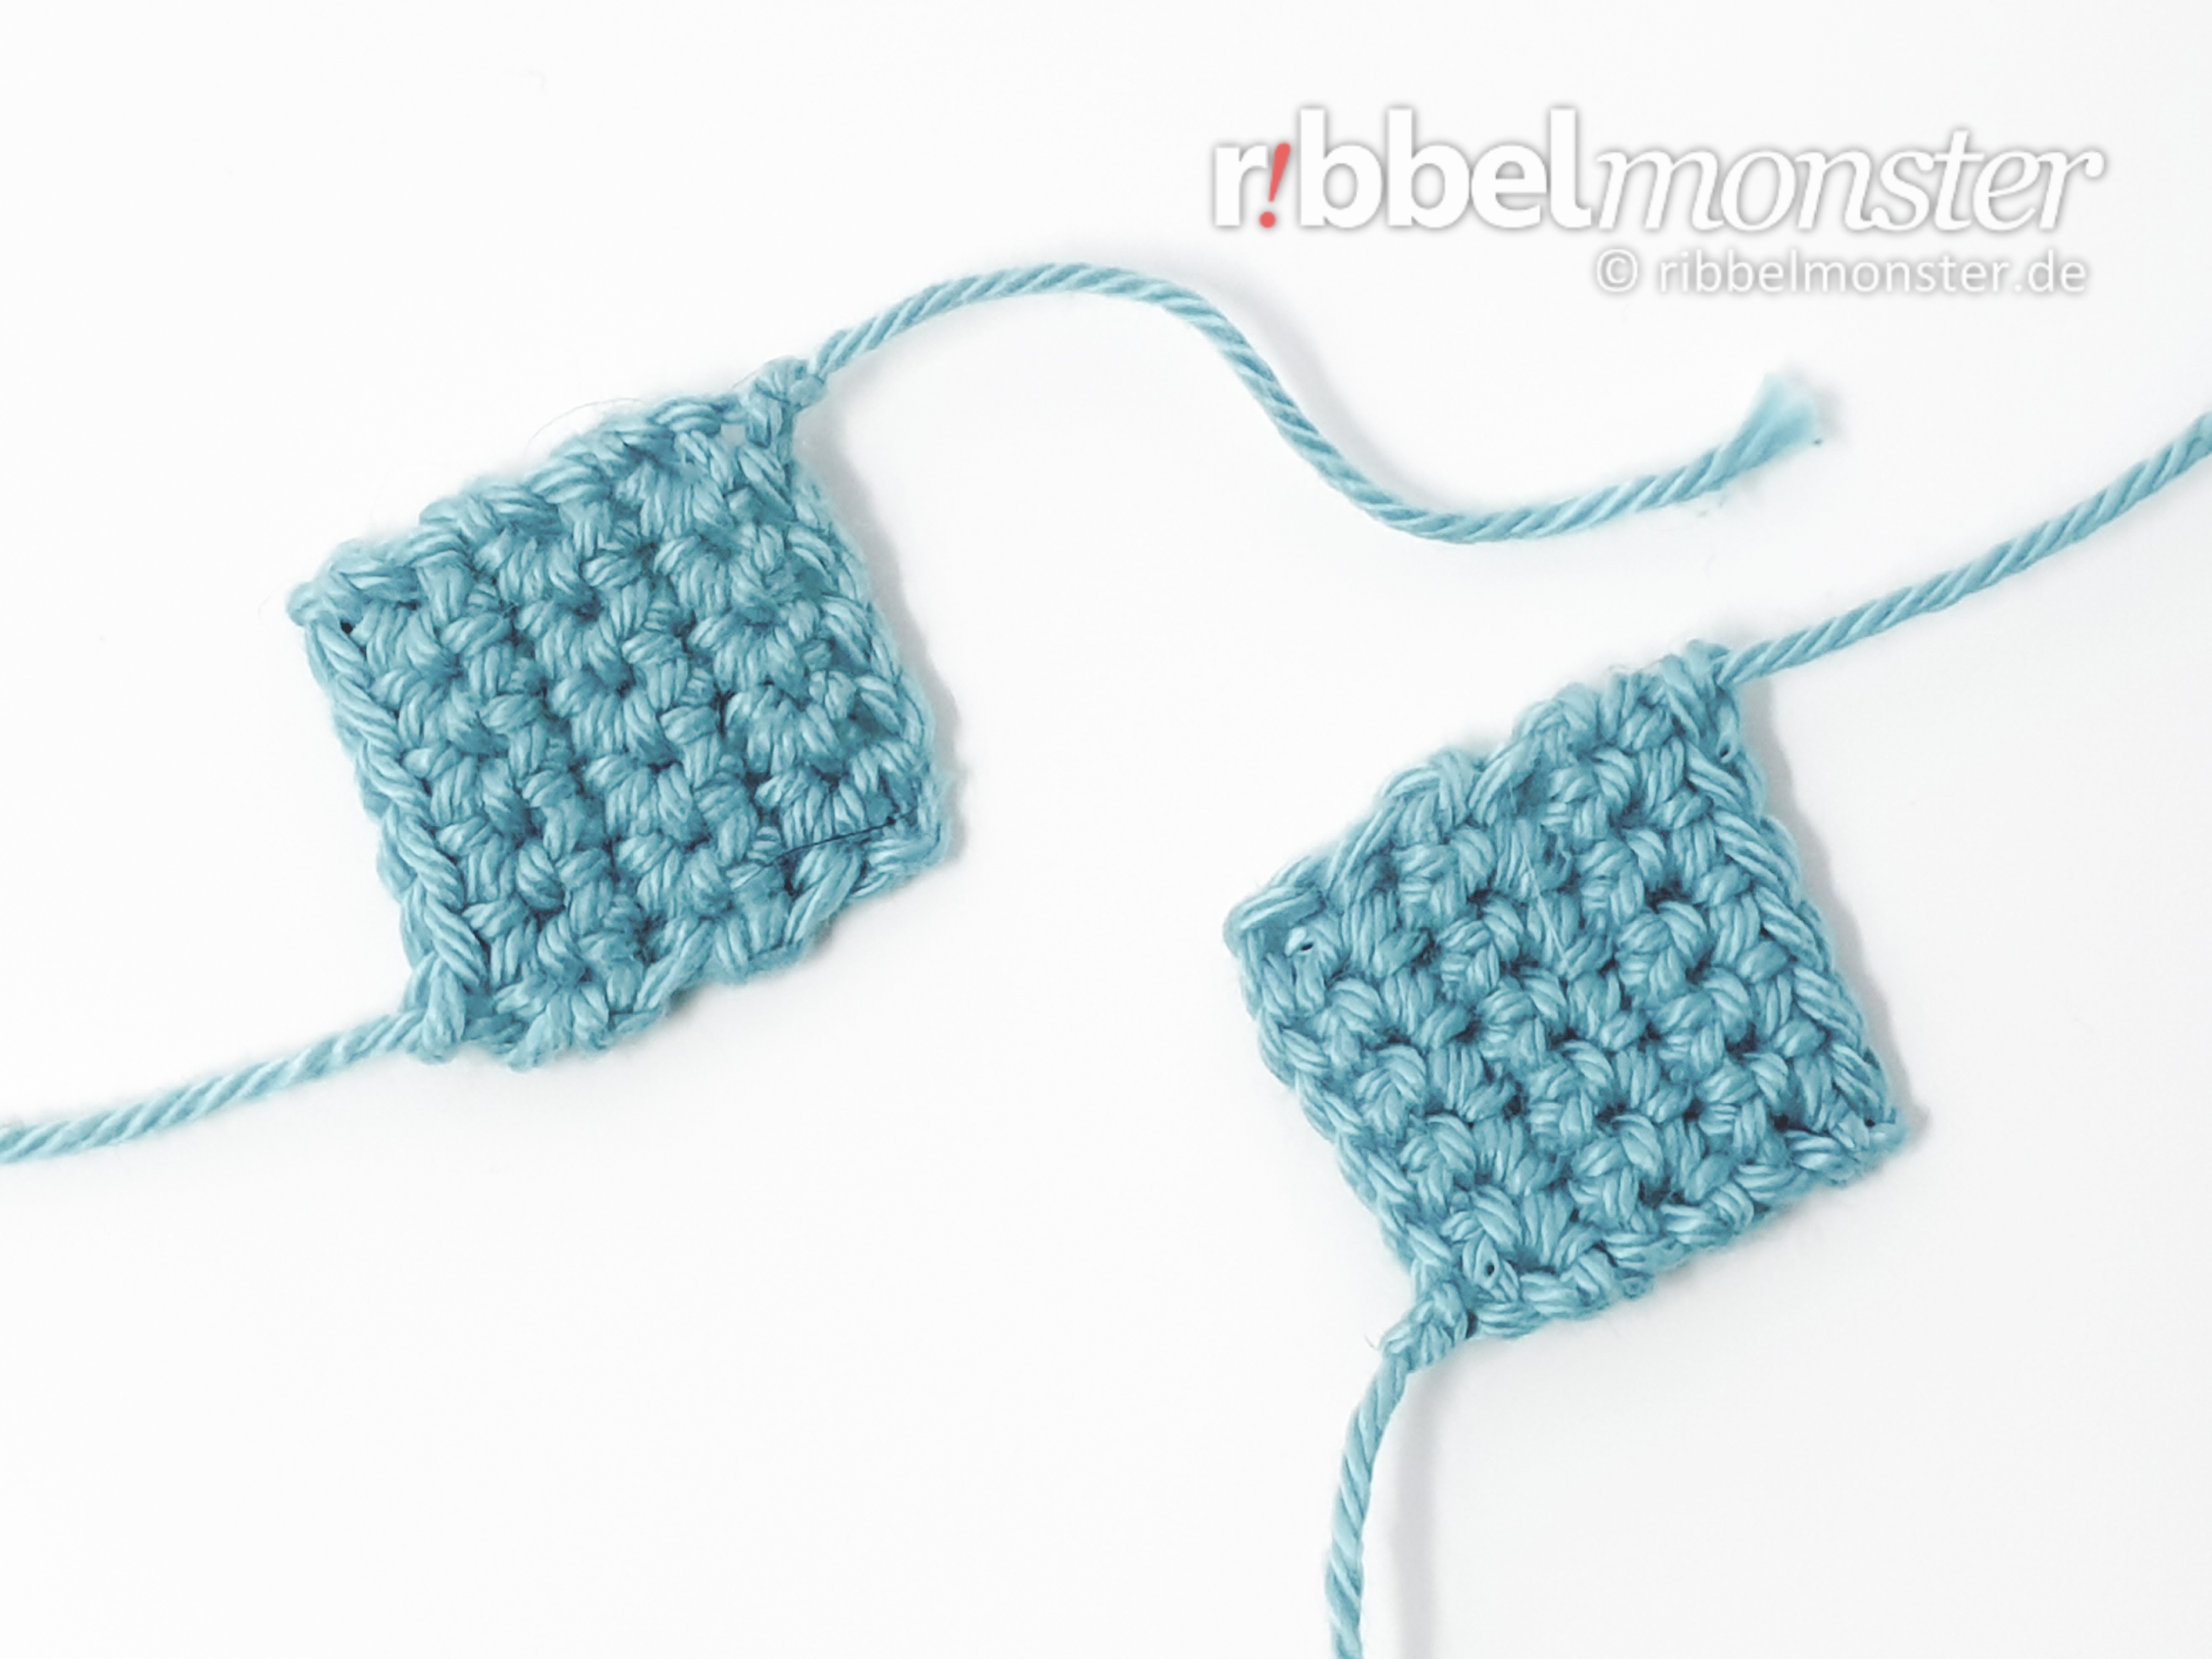
Die Flicken für den Flickenbär häkeln wir in Reihen mit Luftmaschen und Festen Maschen. Die Flicken werden später mit dem Fadenende ringsherum angenäht.
- blue:
- 1st row:
- 6 chain stitches
- 1 lifting-chain stitch
- = 6 stitches
- 2nd row:
- 6x 1 double crochet stitch (UK!) into one stitch
- turn
- = 6 stitches
- 3rd – 7th round:
- (= 5 rows)
- 1 lifting-chain stitch
- 6x 1 double crochet stitch (UK!) into one stitch
- turn
- = 6 stitches
- cut the thread generous, pull off the loop, DONT cut the thread end, will be needed for sewing later
Crochet Patched Bear Big Patches (2x)
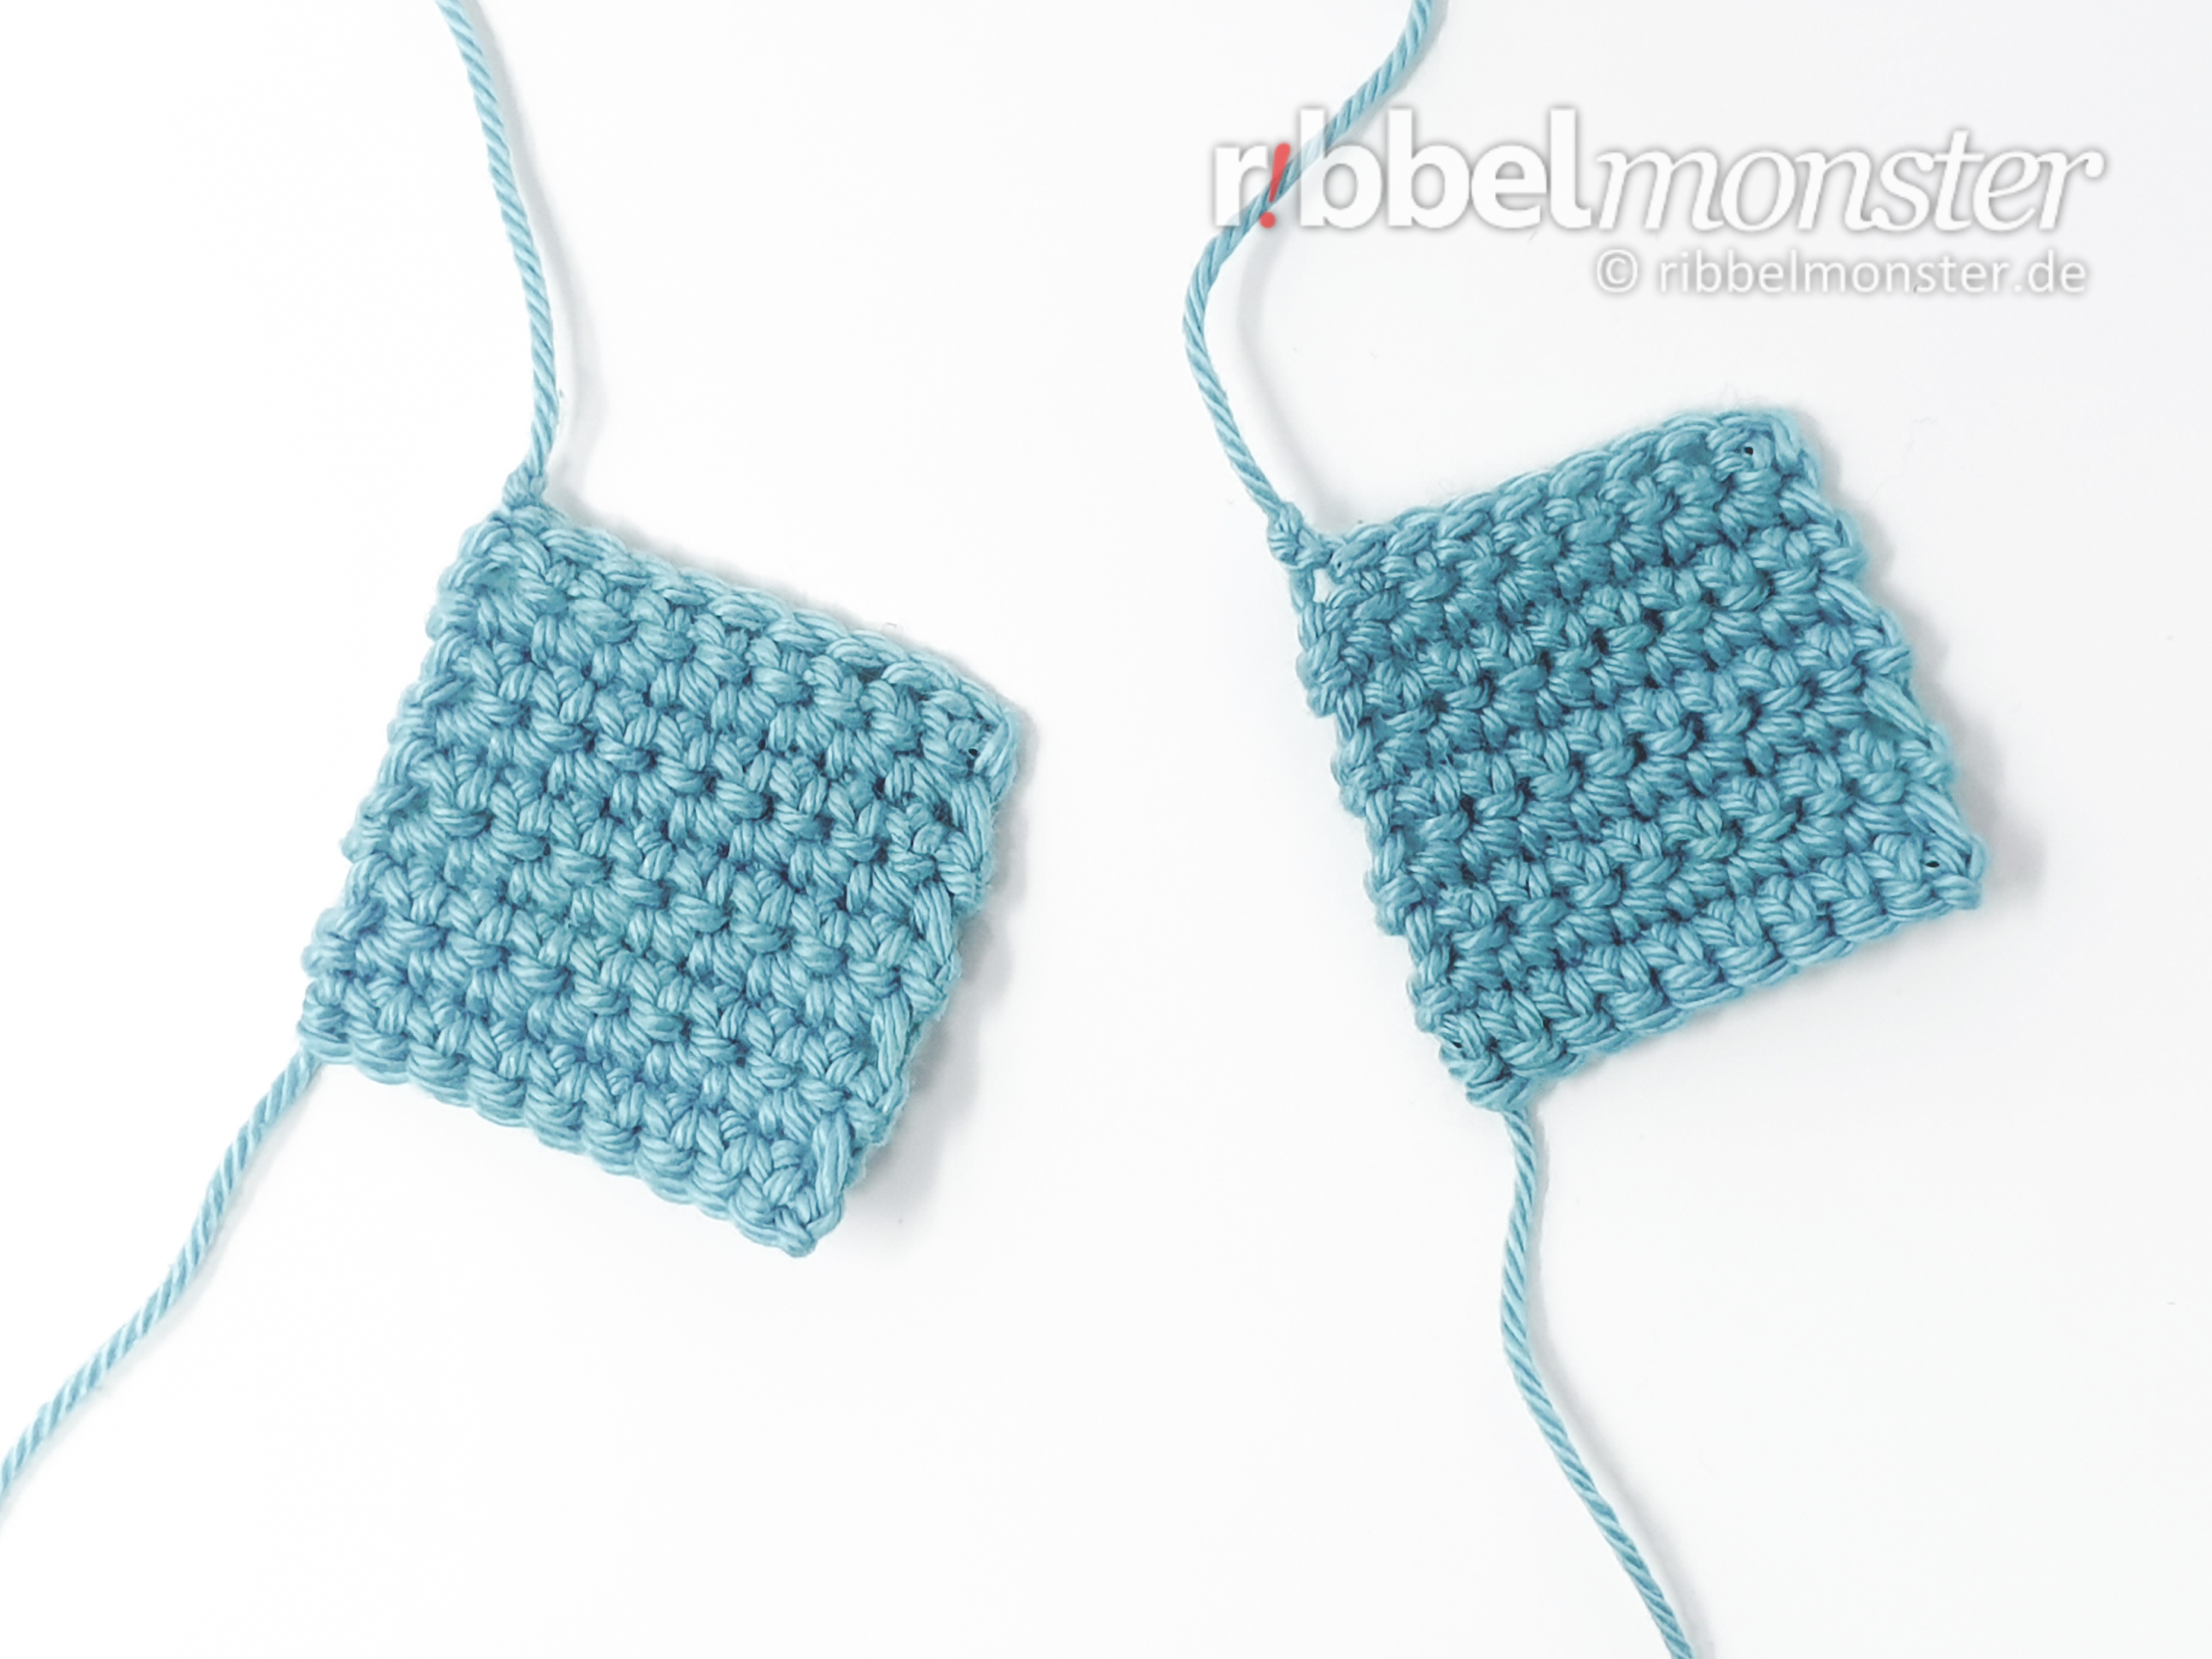
Die Flicken für den Flickenbär häkeln wir in Reihen mit Luftmaschen und Festen Maschen. Die Flicken werden später mit dem Fadenende ringsherum angenäht.
- blue:
- 1st row:
- 9 chain stitches
- 1 lifting-chain stitch
- = 6 stitches
- 2nd row:
- 9x 1 double crochet stitch (UK!) into one stitch
- turn
- = 9 stitches
- 3rd – 10th row:
- (= 8 rows)
- 1 lifting-chain stitch
- 9x 1 double crochet stitch (UK!) into one stitch
- turn
- = 9 stitches
- cut the thread generous, pull off the loop, DONT cut the thread end, will be needed for sewing later
Finish Patched Bear “Felix”
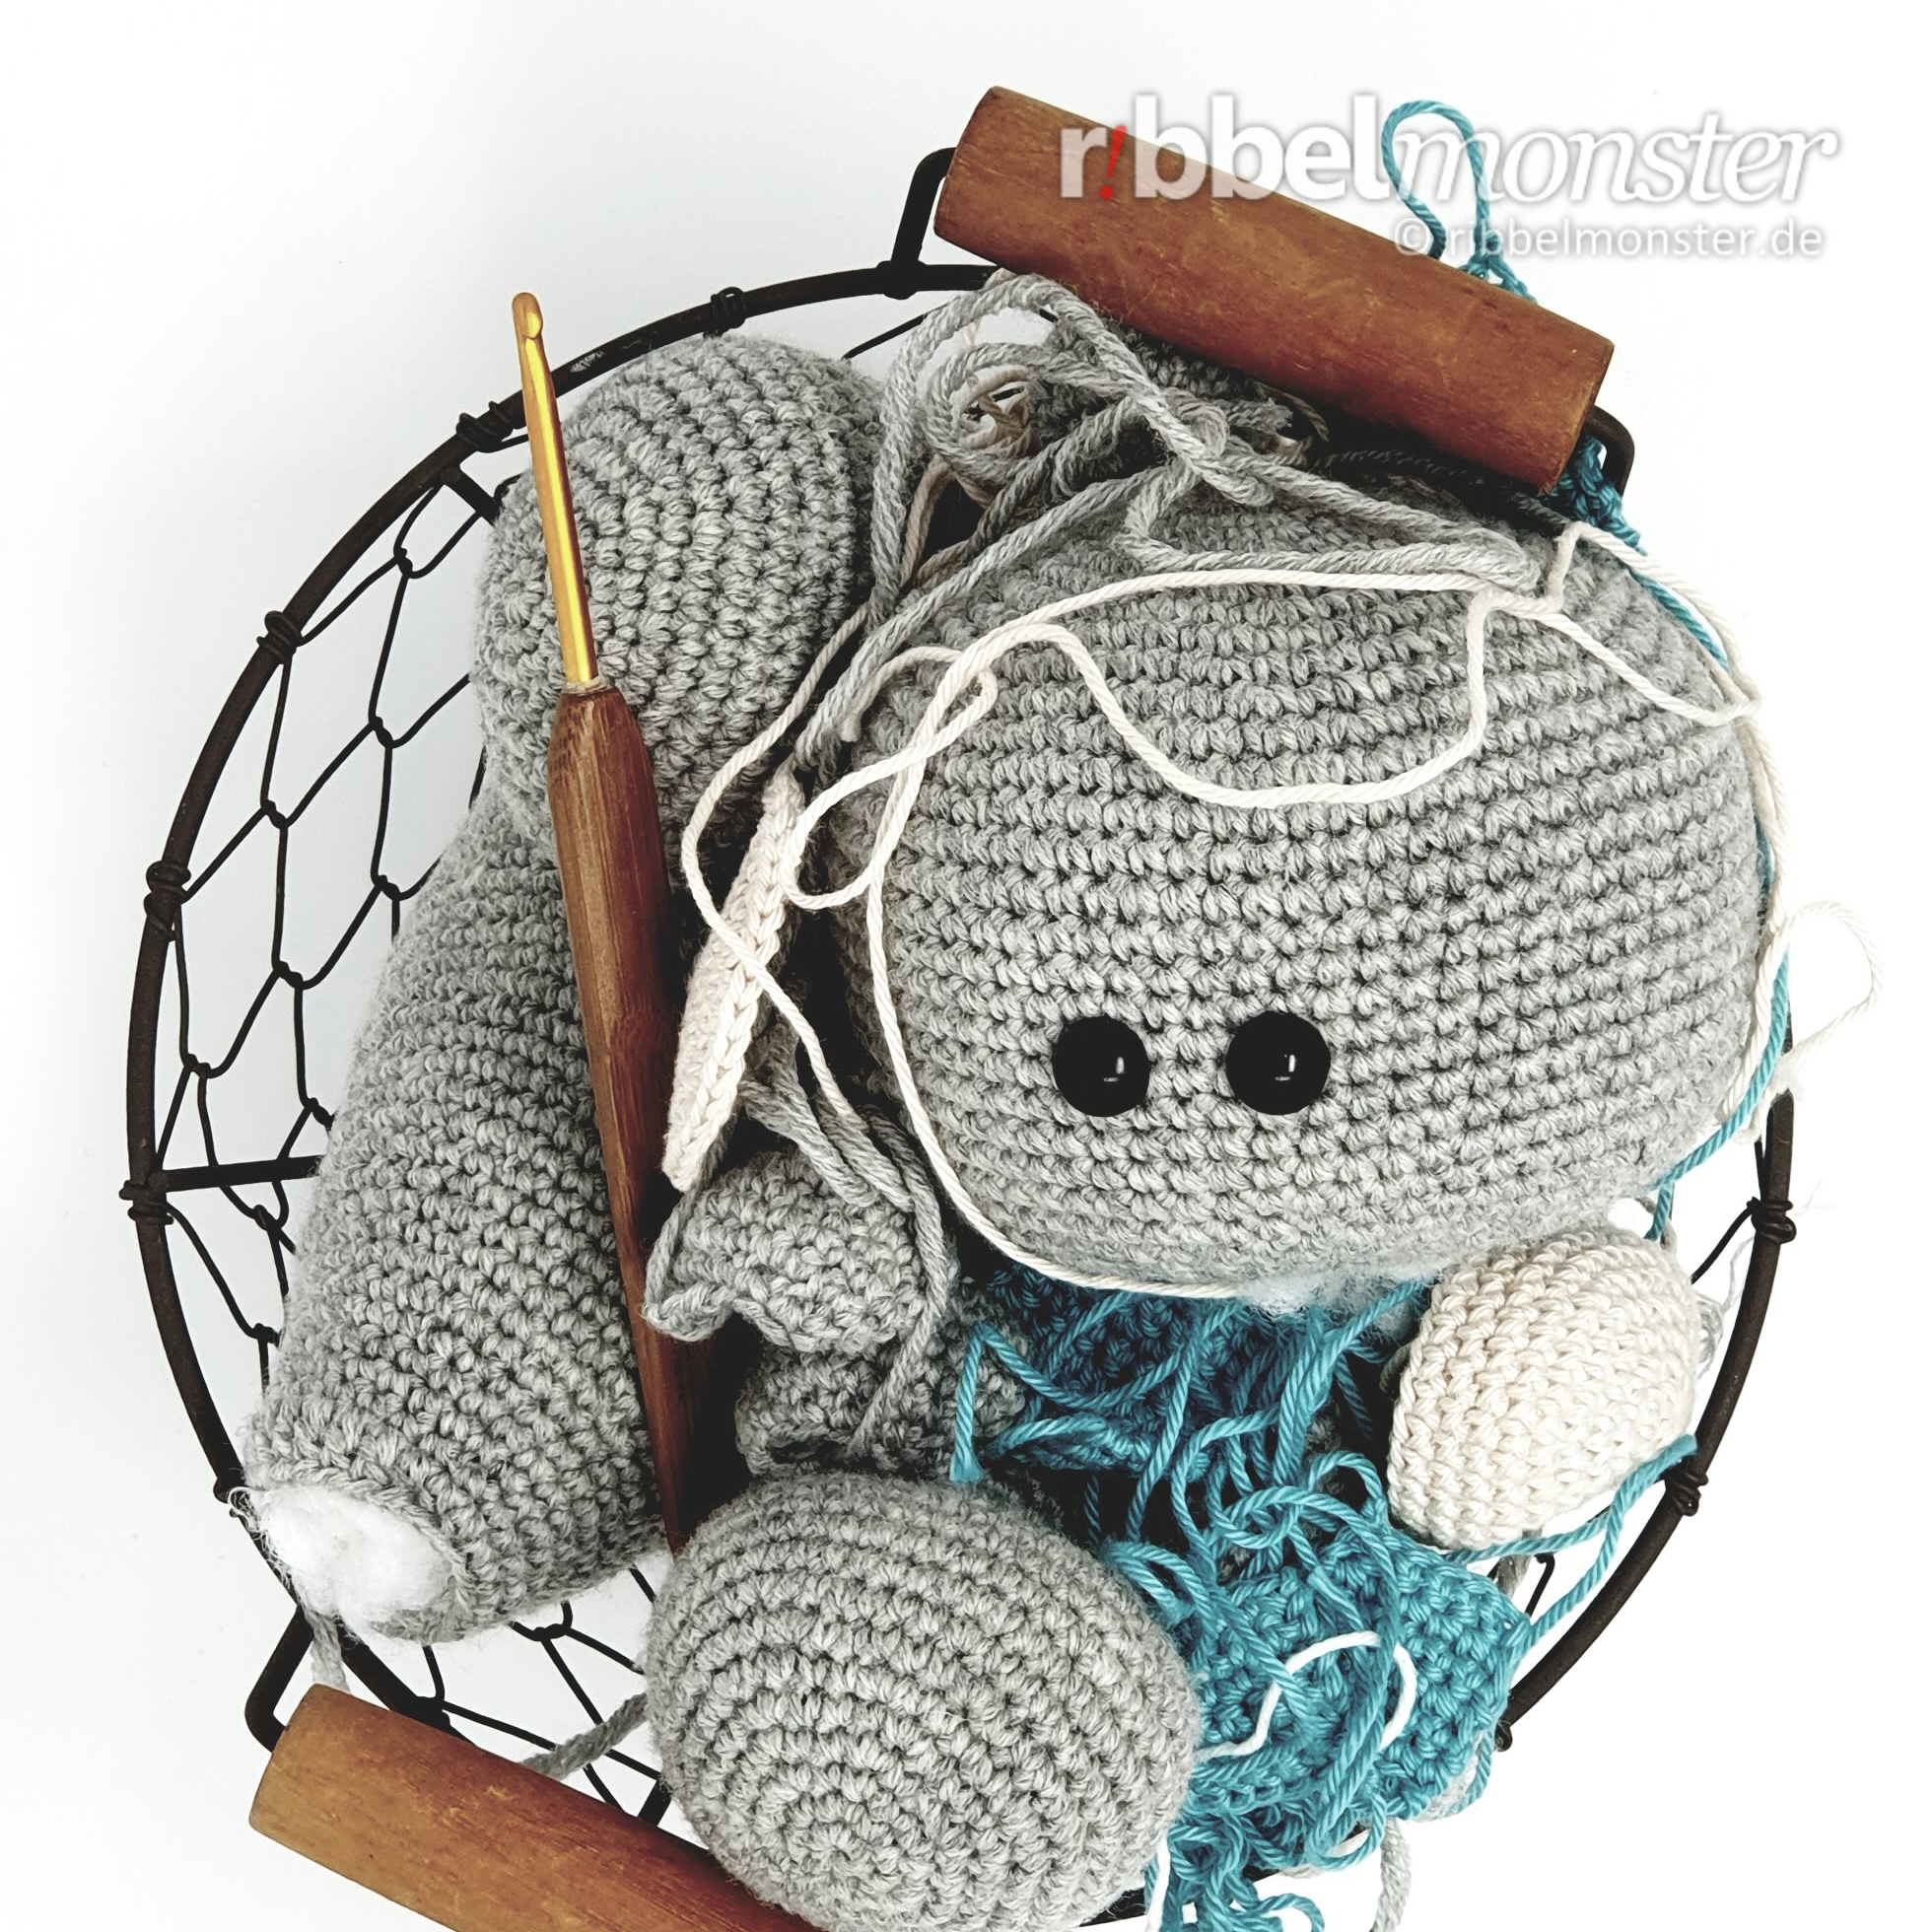
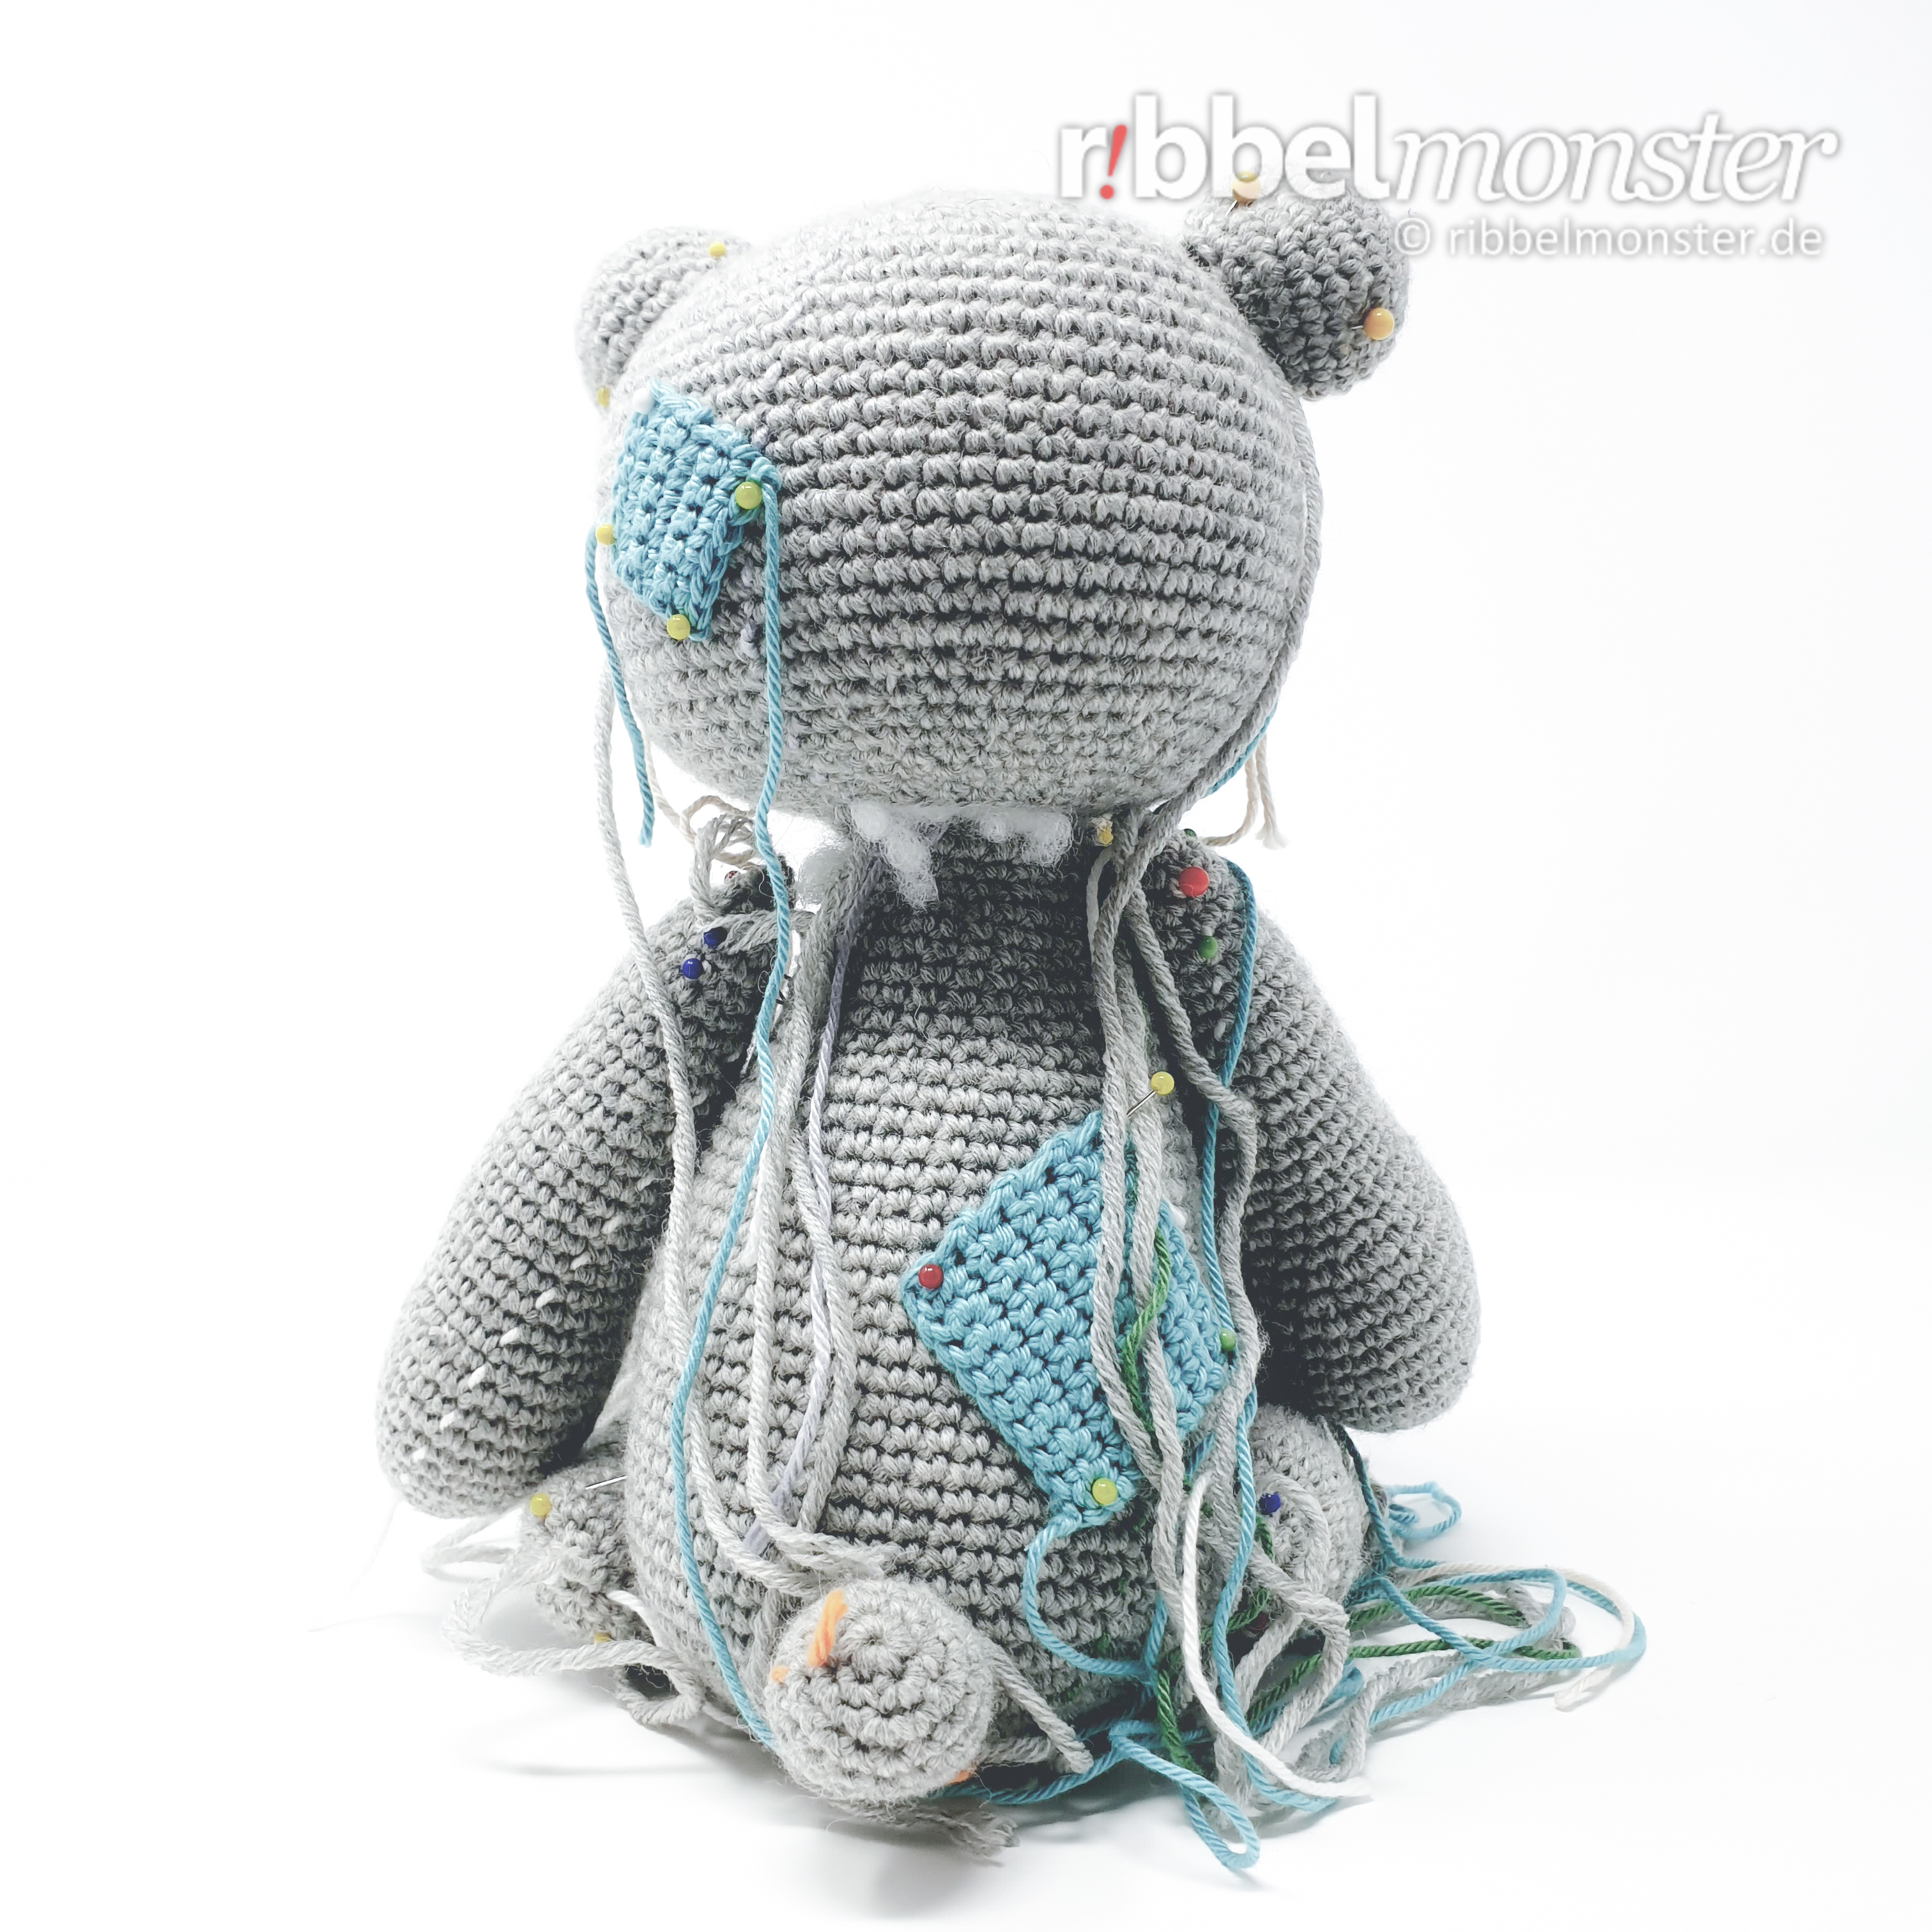
Nachdem du alle Teile fertig gehäkelt hast, kannst du deinen Flickenbär zusammen nähen. Dazu steckst du erst einmal alle Teile mit Stecknadeln zusammen. So siehst du ob die Positionen Stimmen und kannst noch leicht Veränderungen vornehmen.
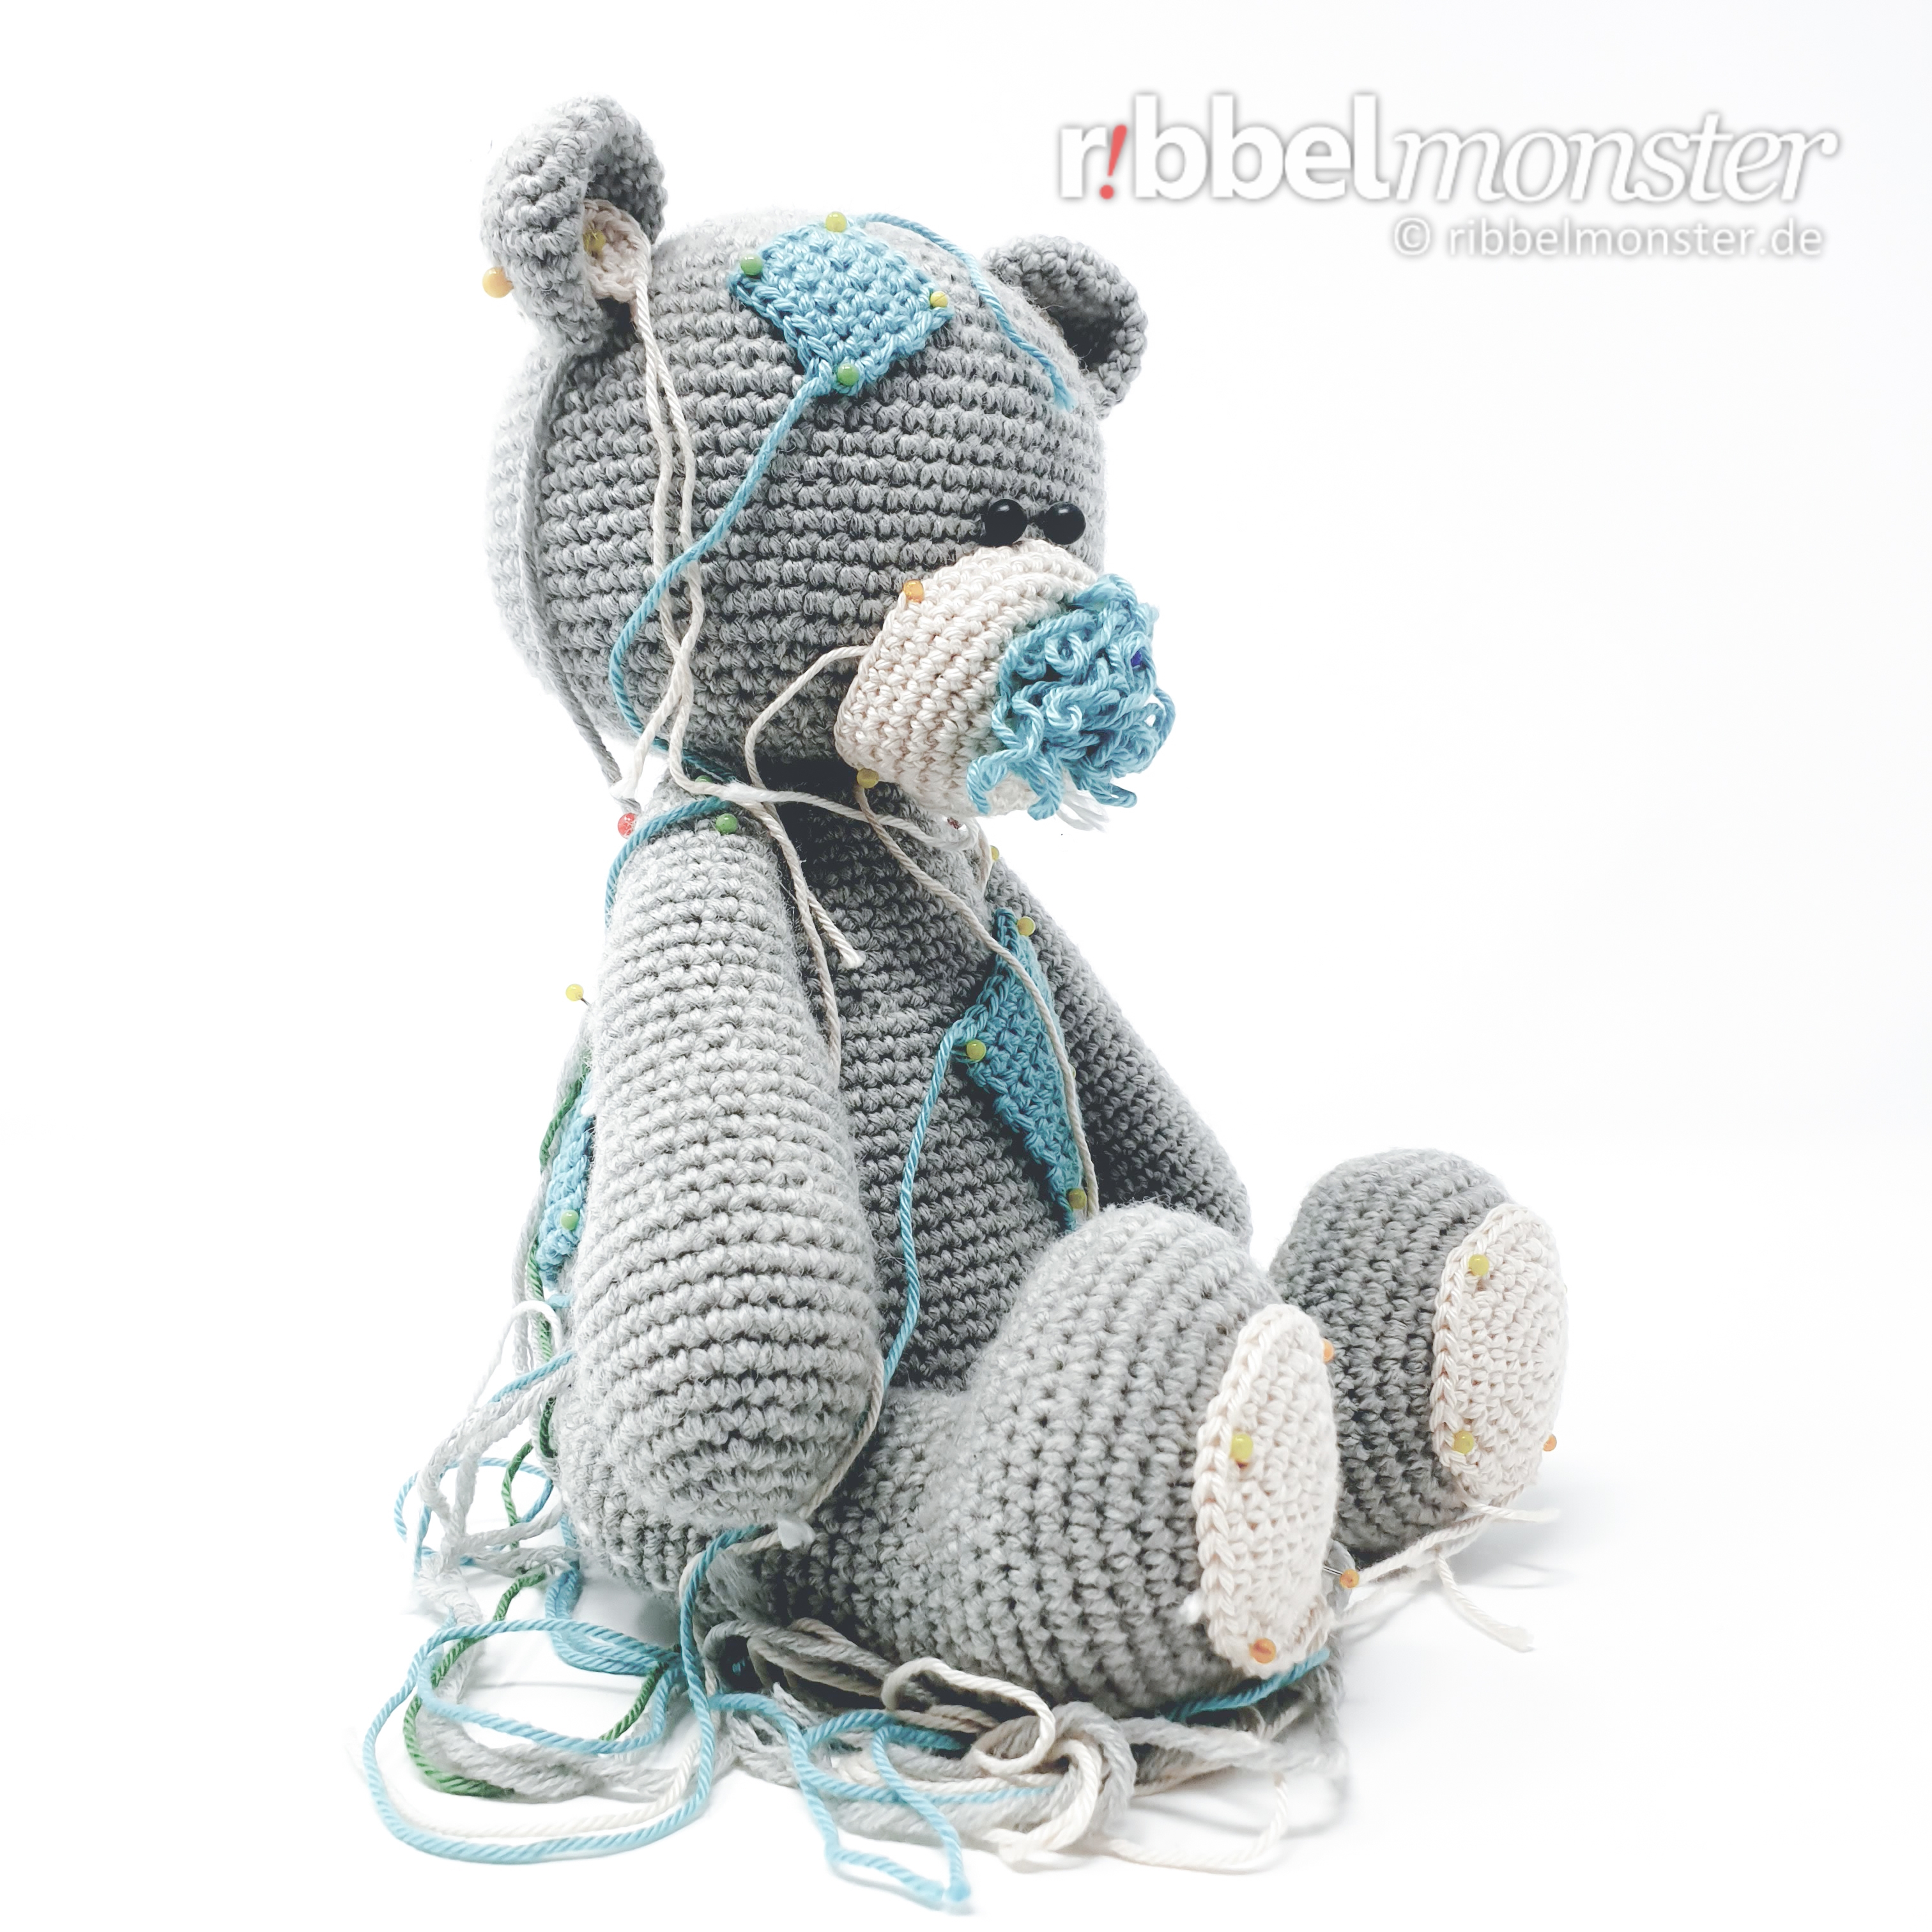
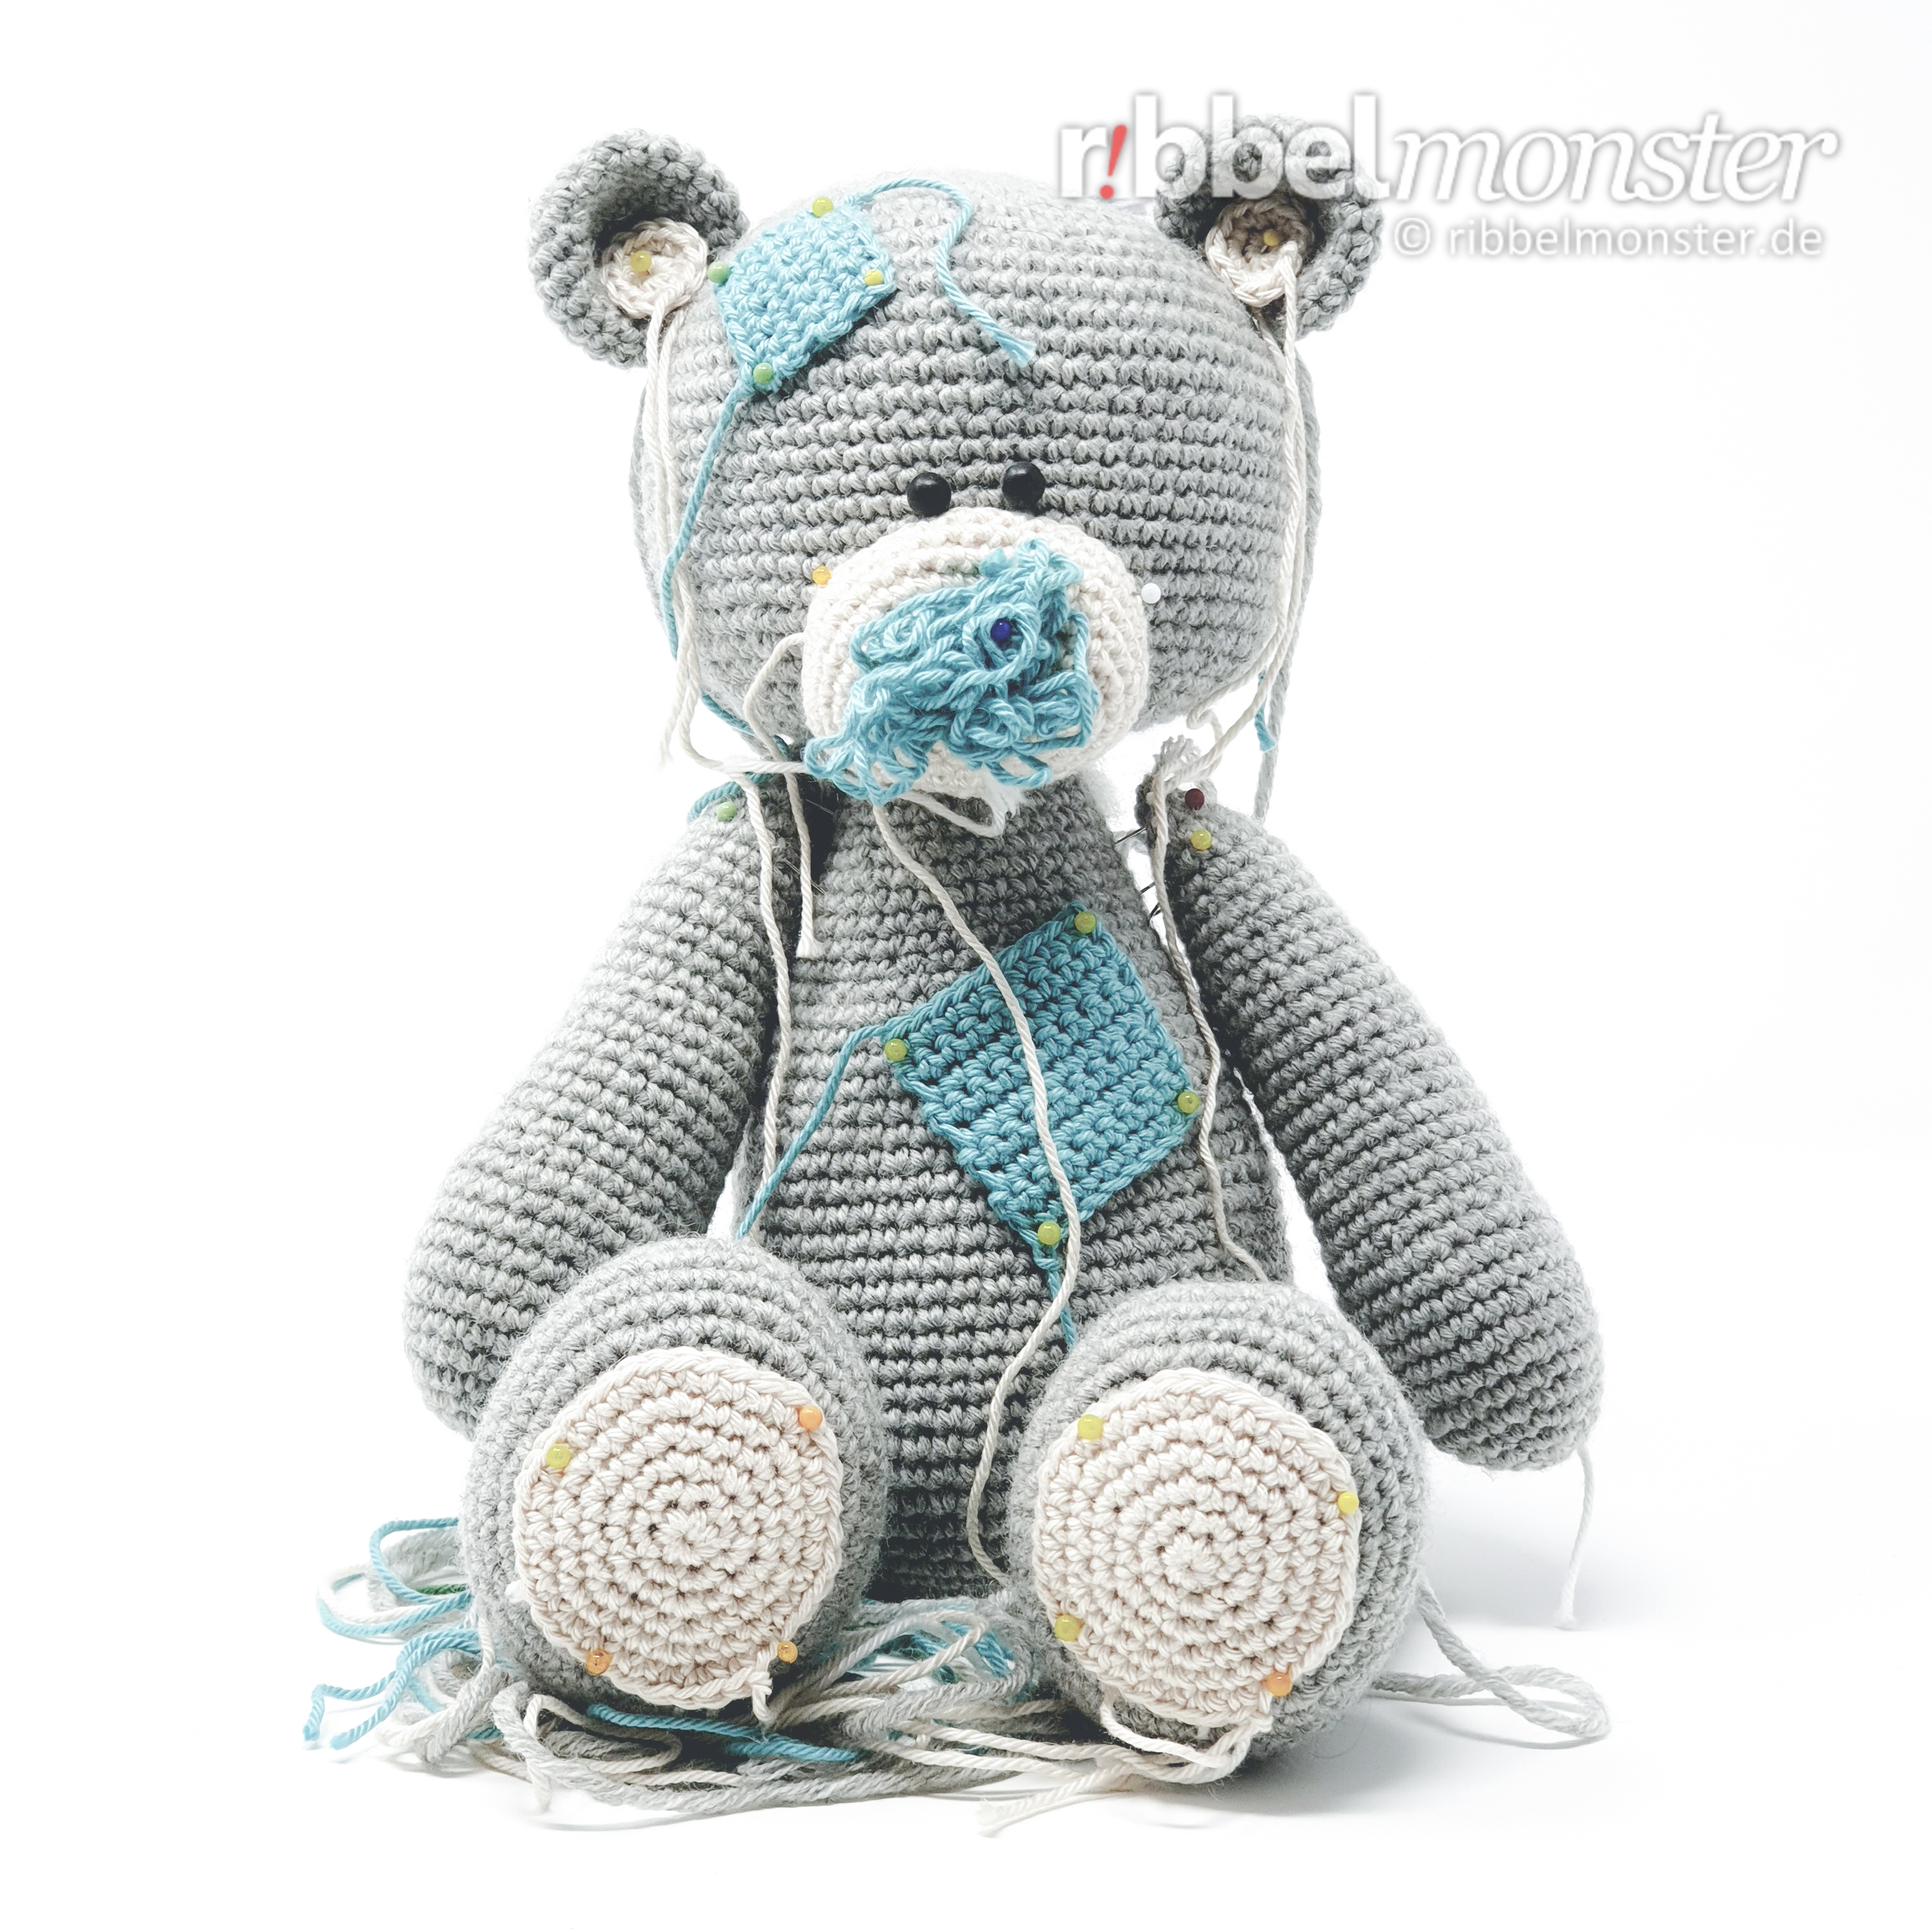
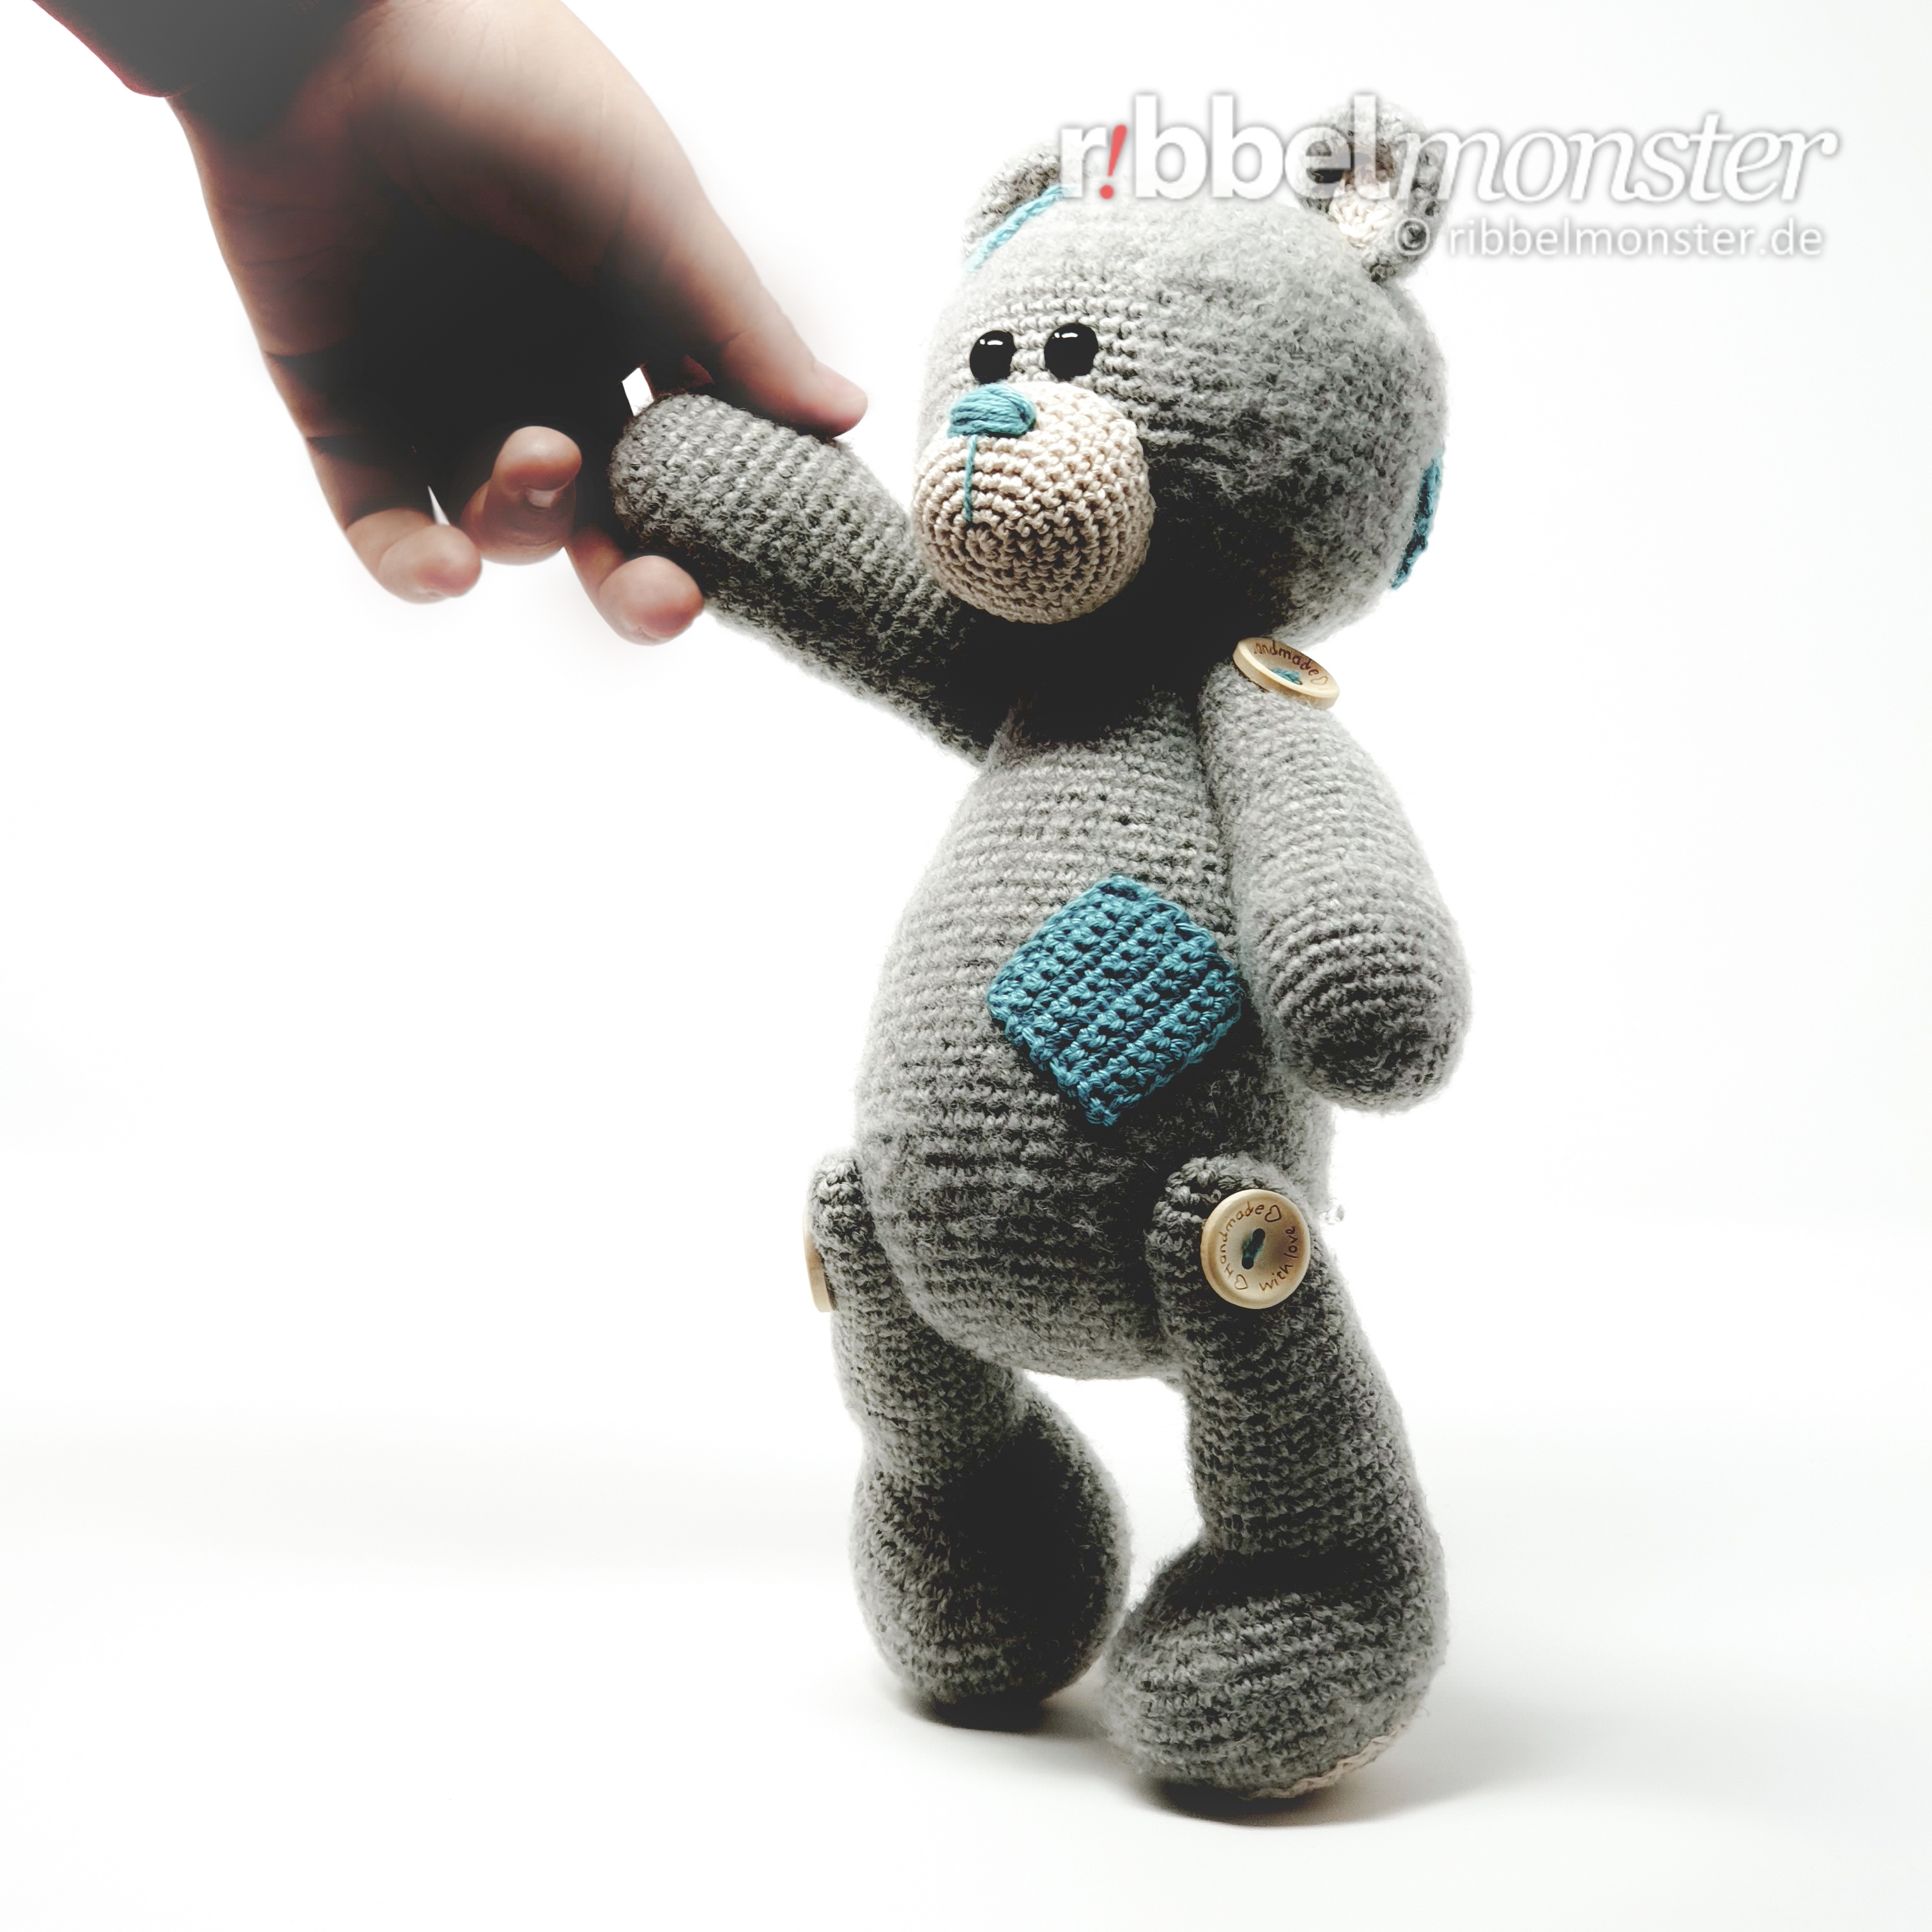
Sew head to body
First we sew the head around to the body. Both openings point to each other. The middle between the 6 treble crochet stitches (UK!) at the neck sits at the back and the middle between the eyes at the front. You can orient yourself to the Tutorial to sew together open parts.
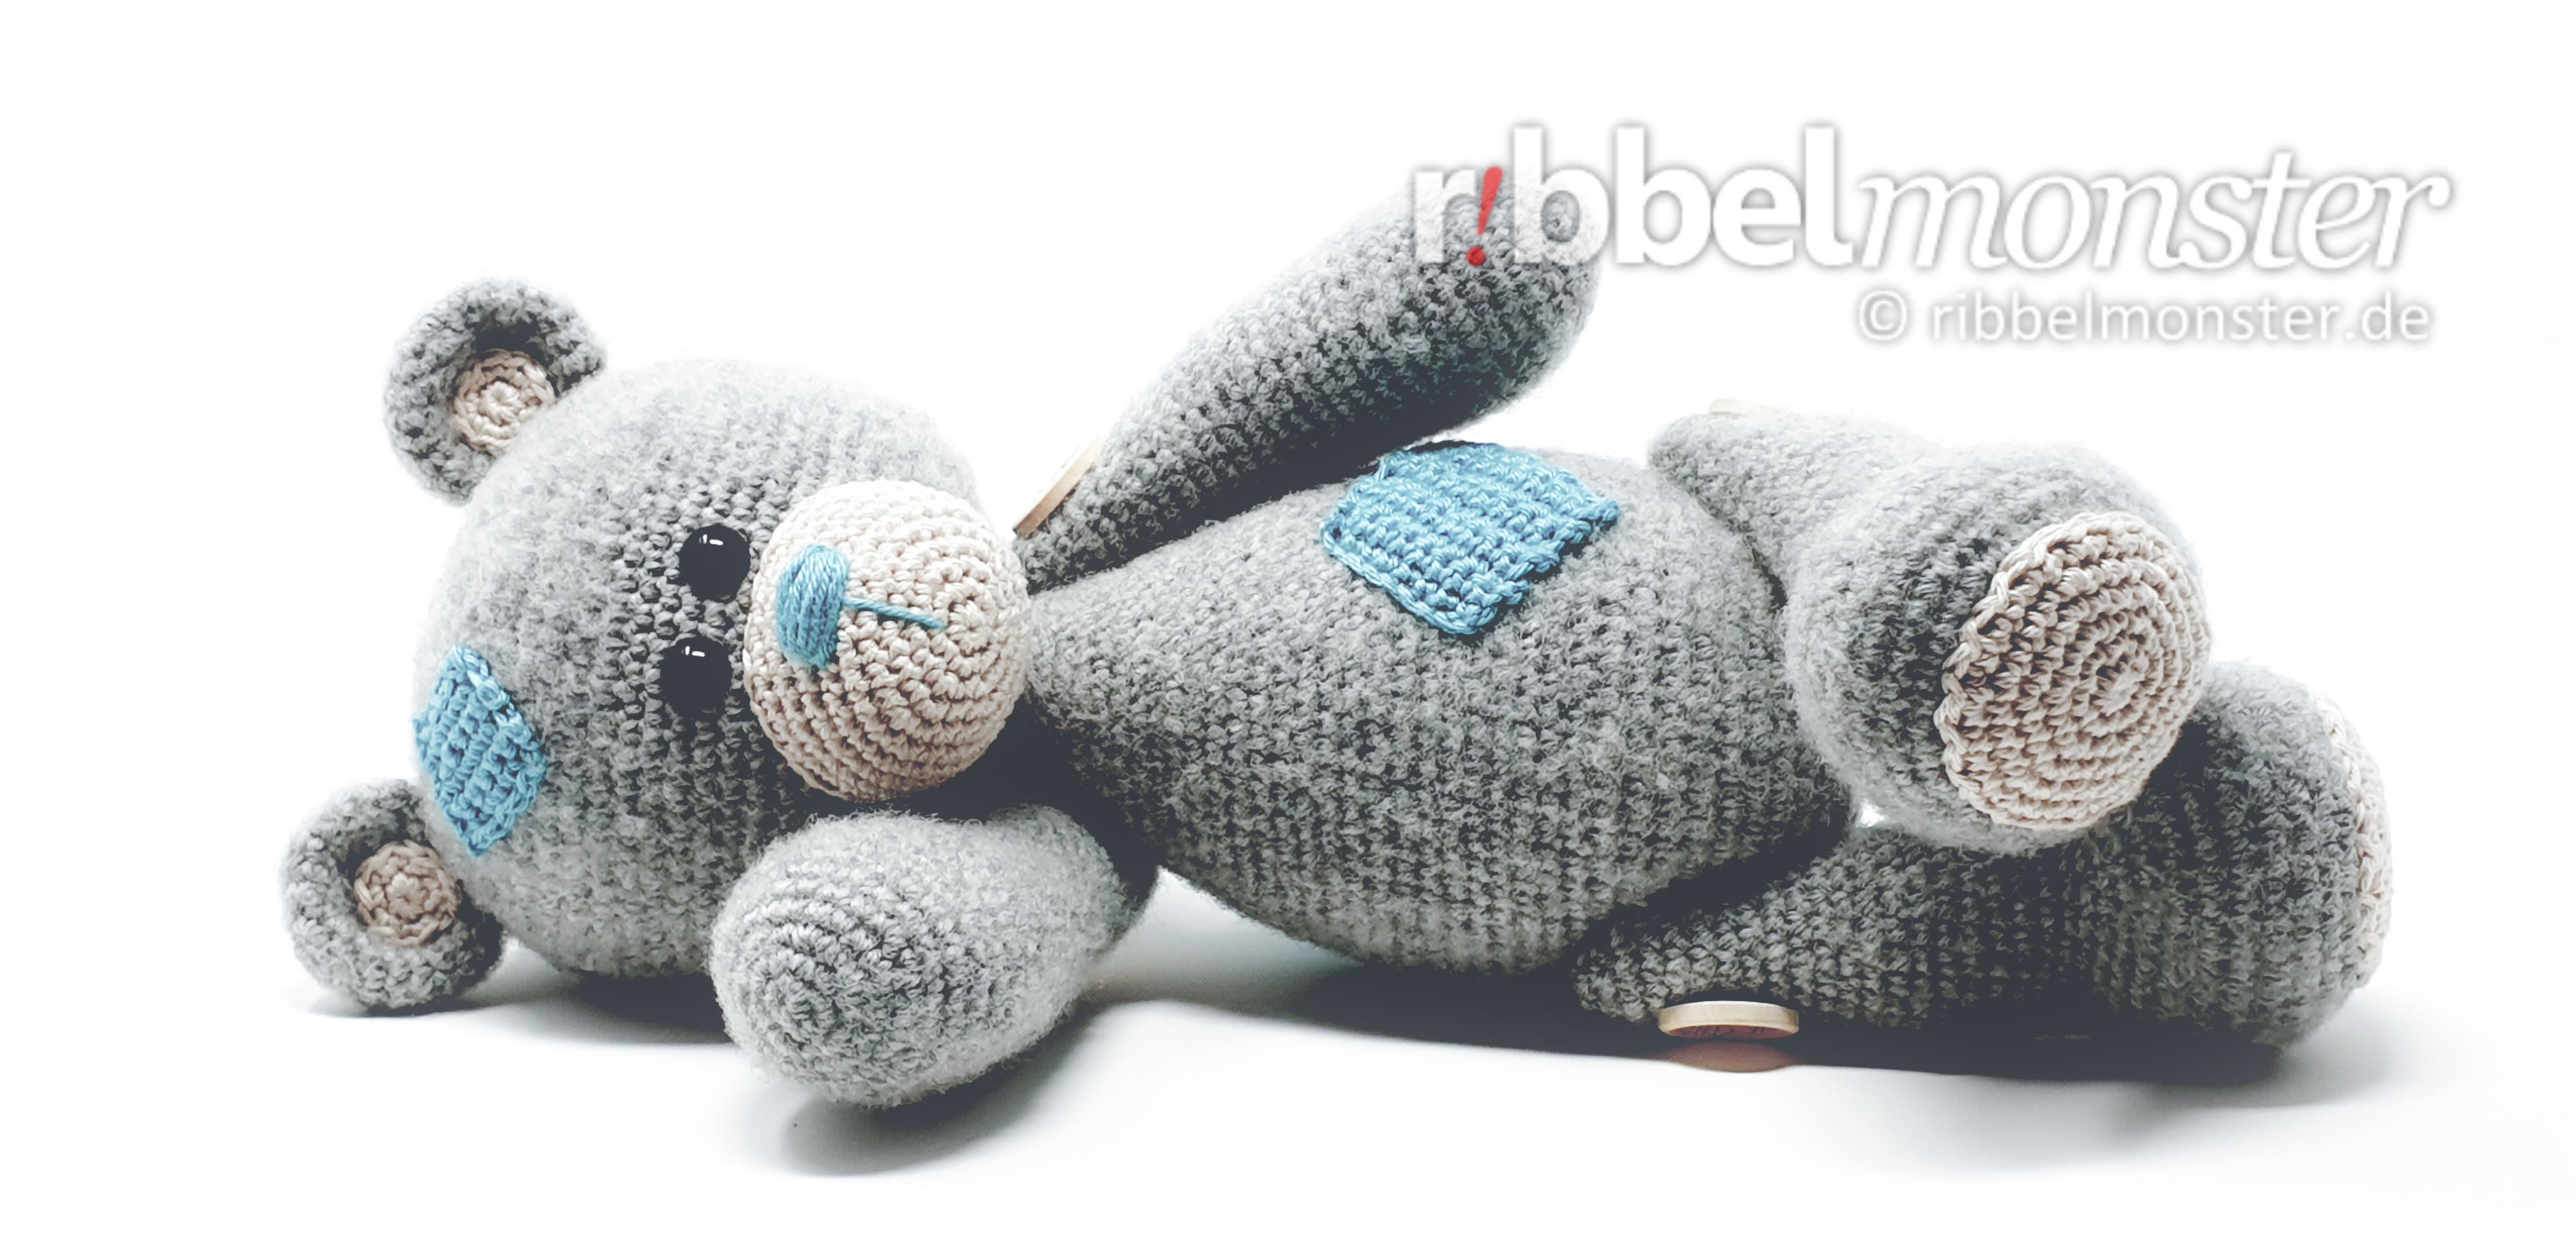
Brush Fur
Nun kannst du mit einer Nadelbürste das Fell aufbürsten, damit es hübsch flauschig wird. Beachte das dies nicht mit jedem Garn funktioniert, deshalb werden hier nur die grauen Teile gebürstet. Wenn du anderes Garn verwendet hast, solltest du es unbedingt zuerst an einem Probestück testen.
Sew on the snout
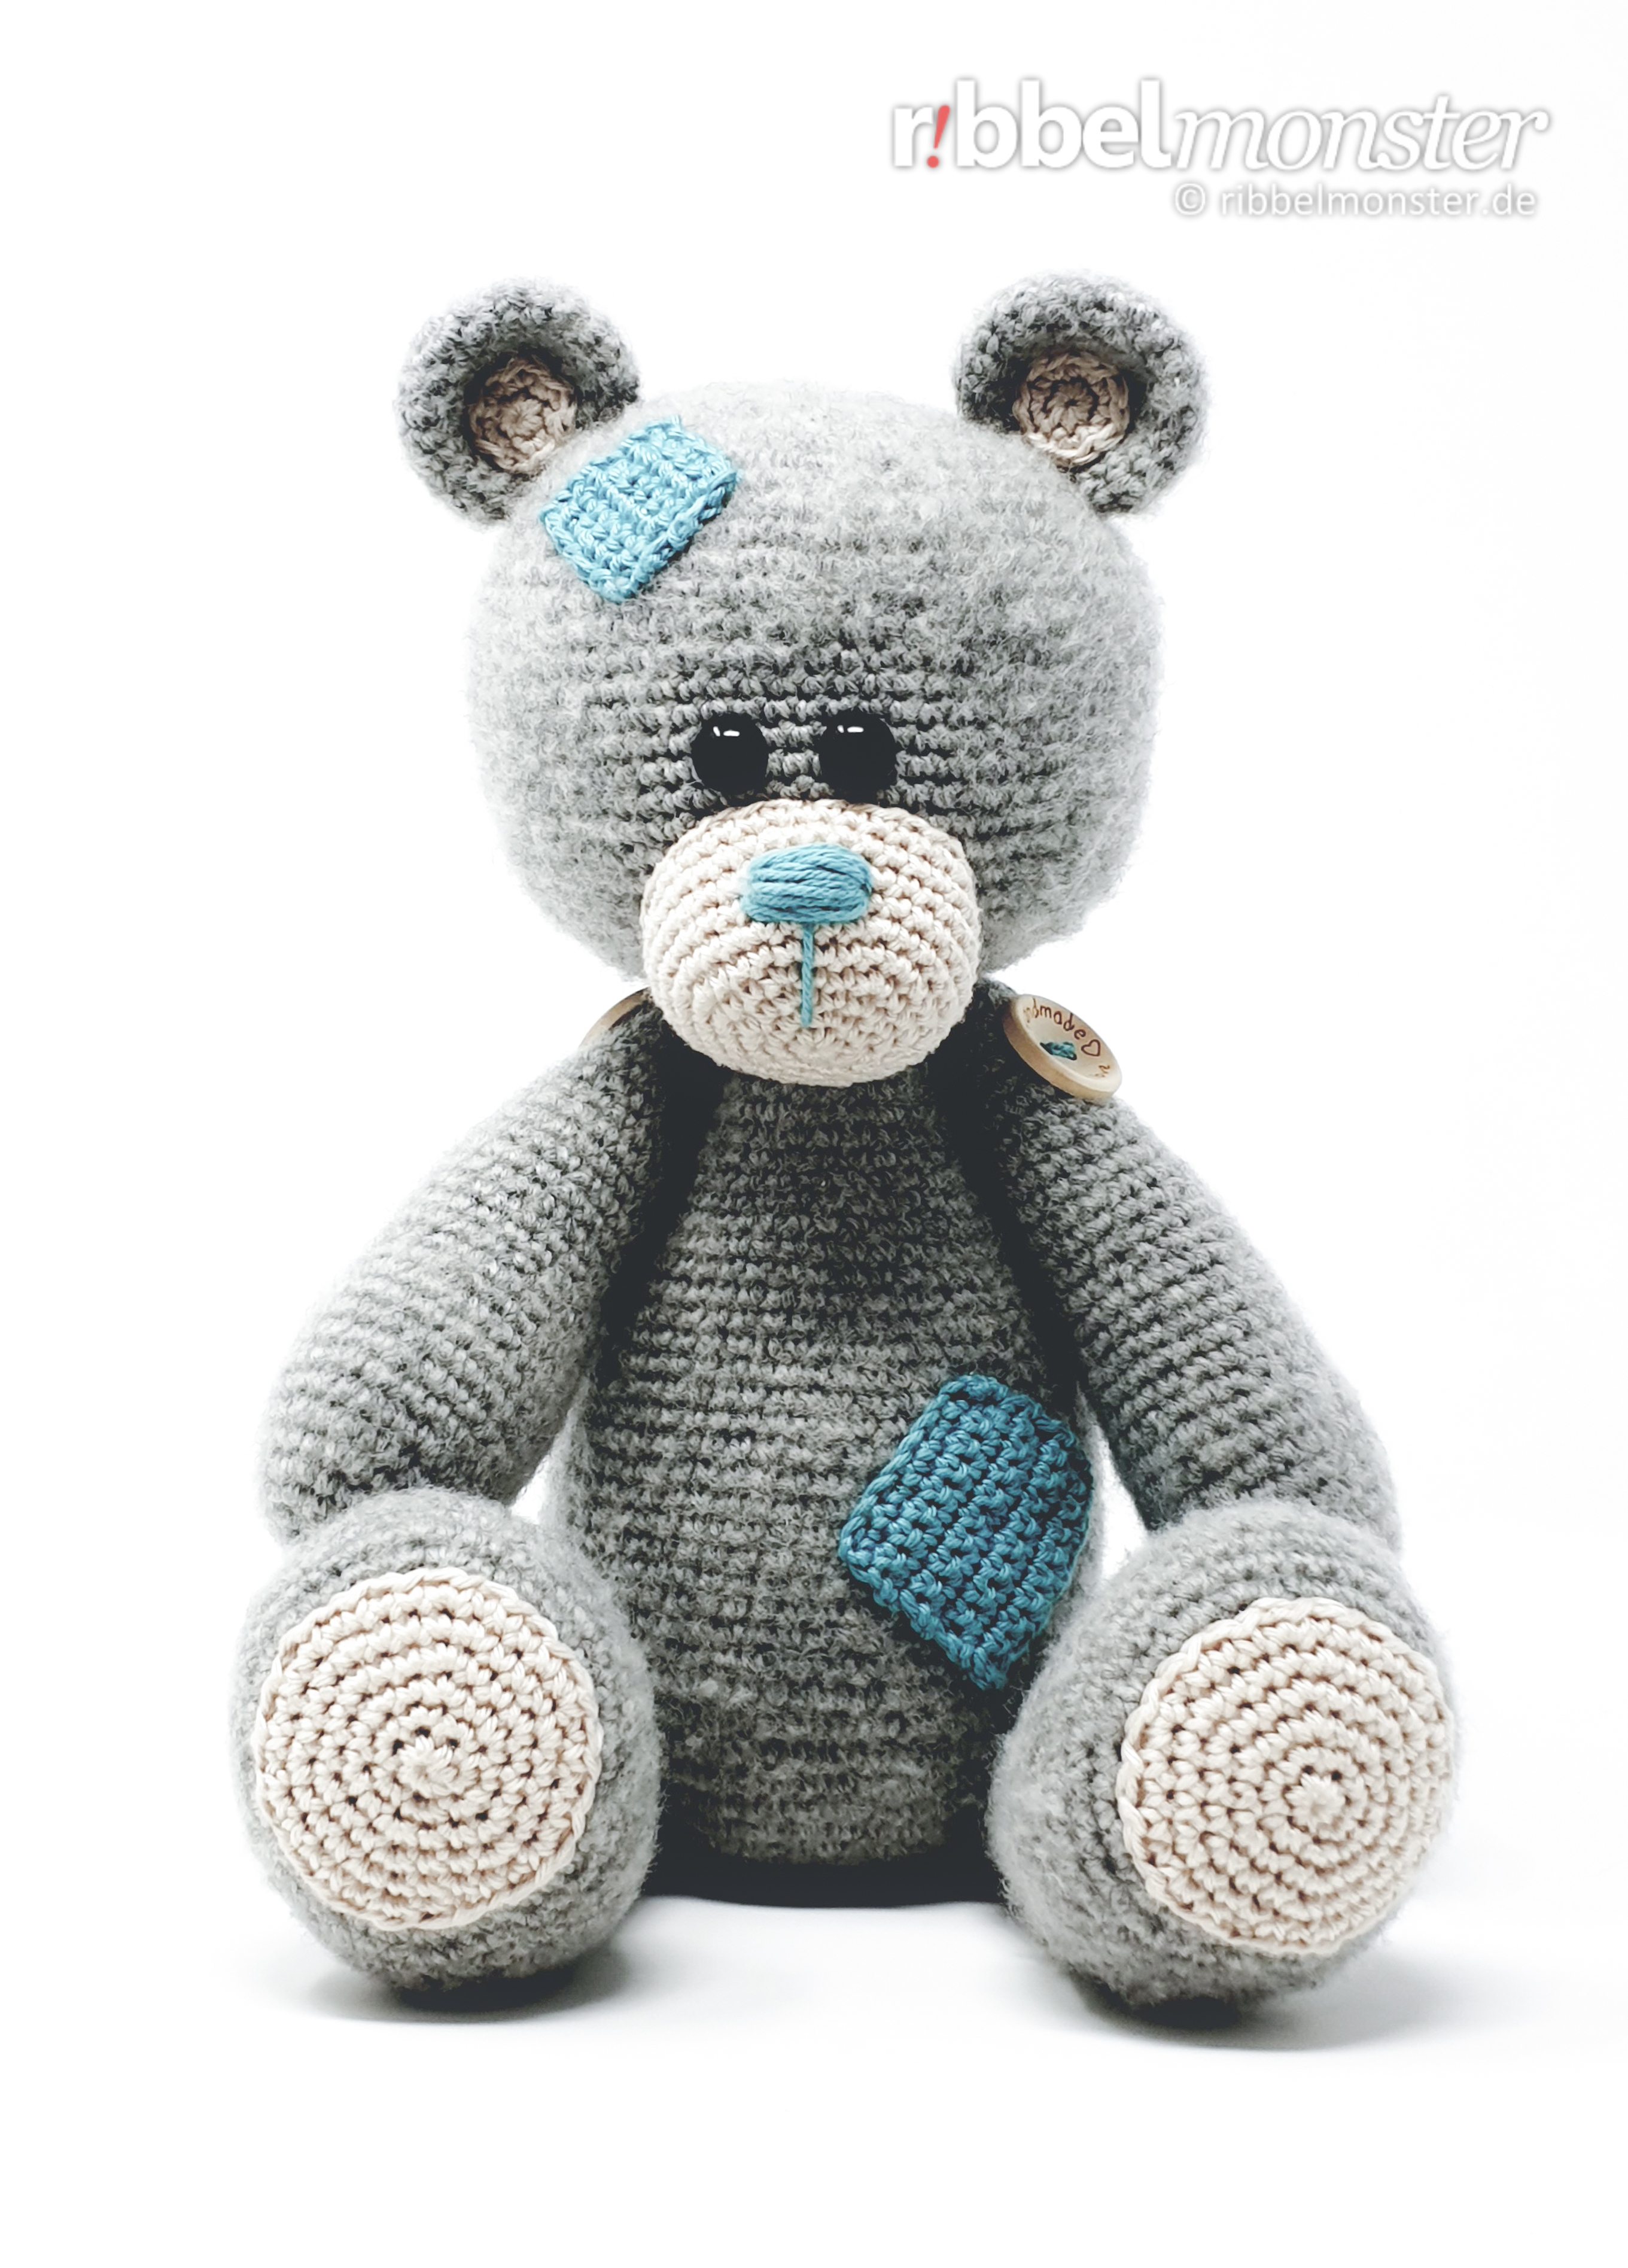
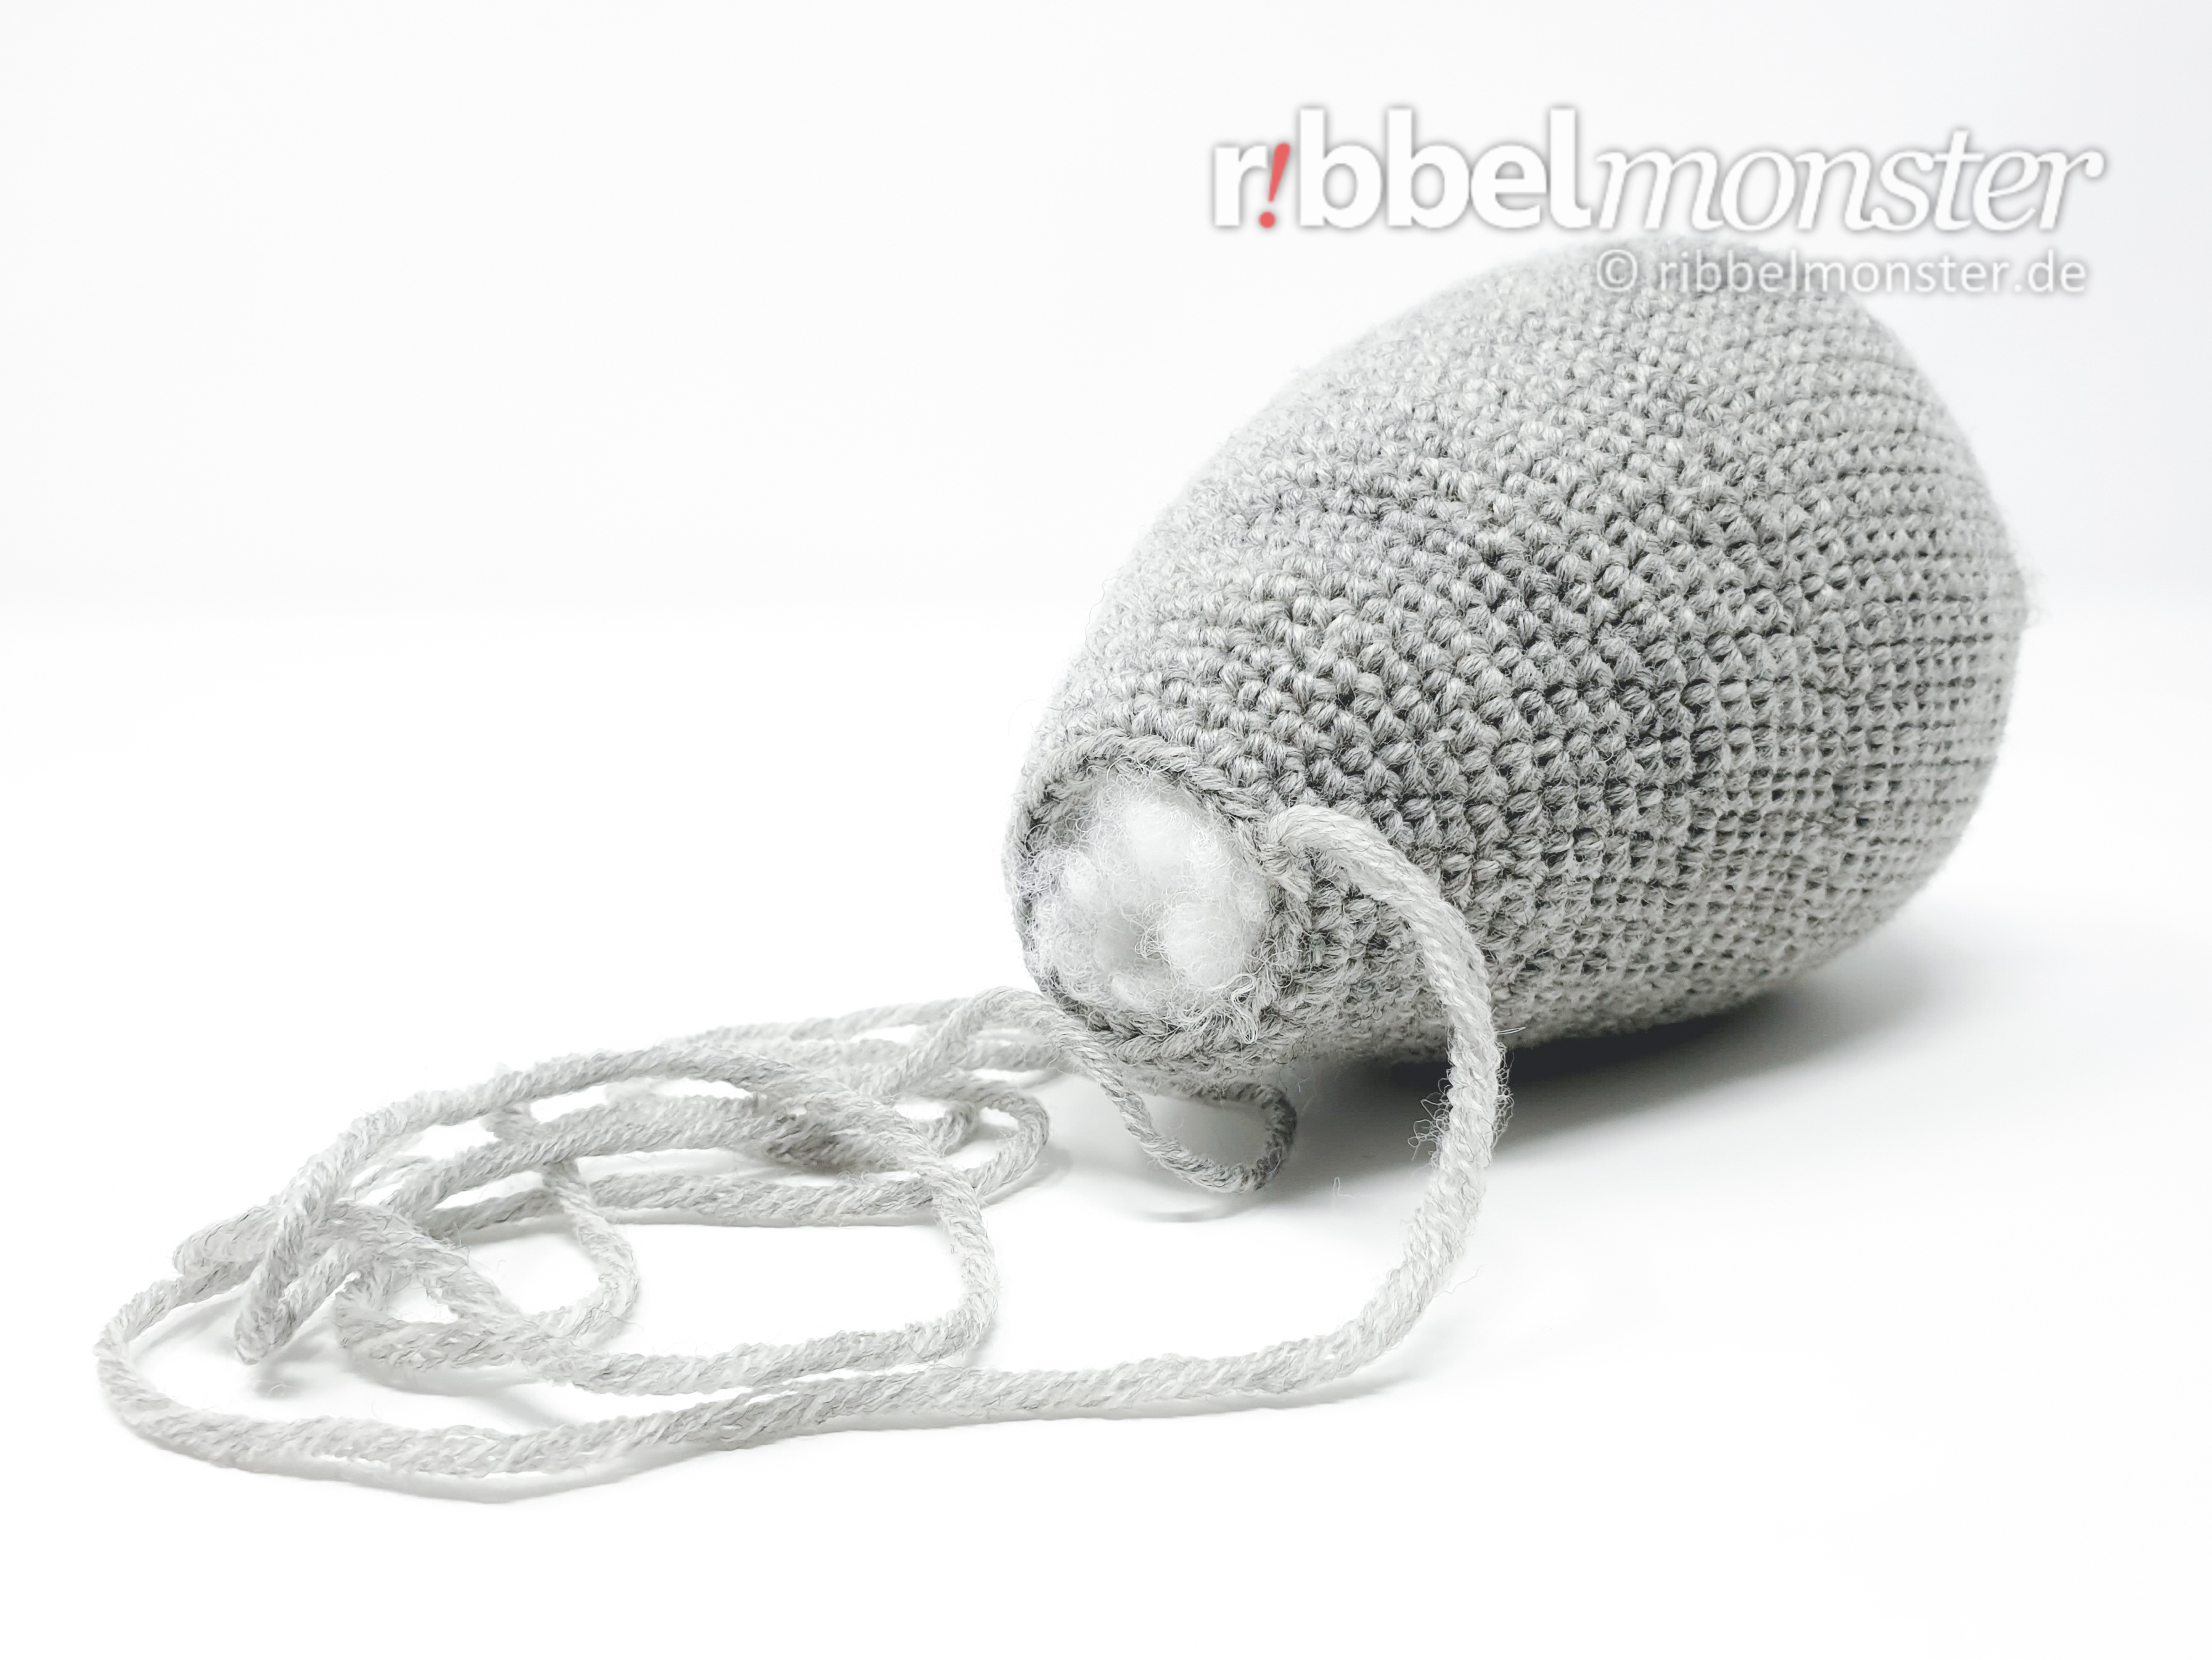
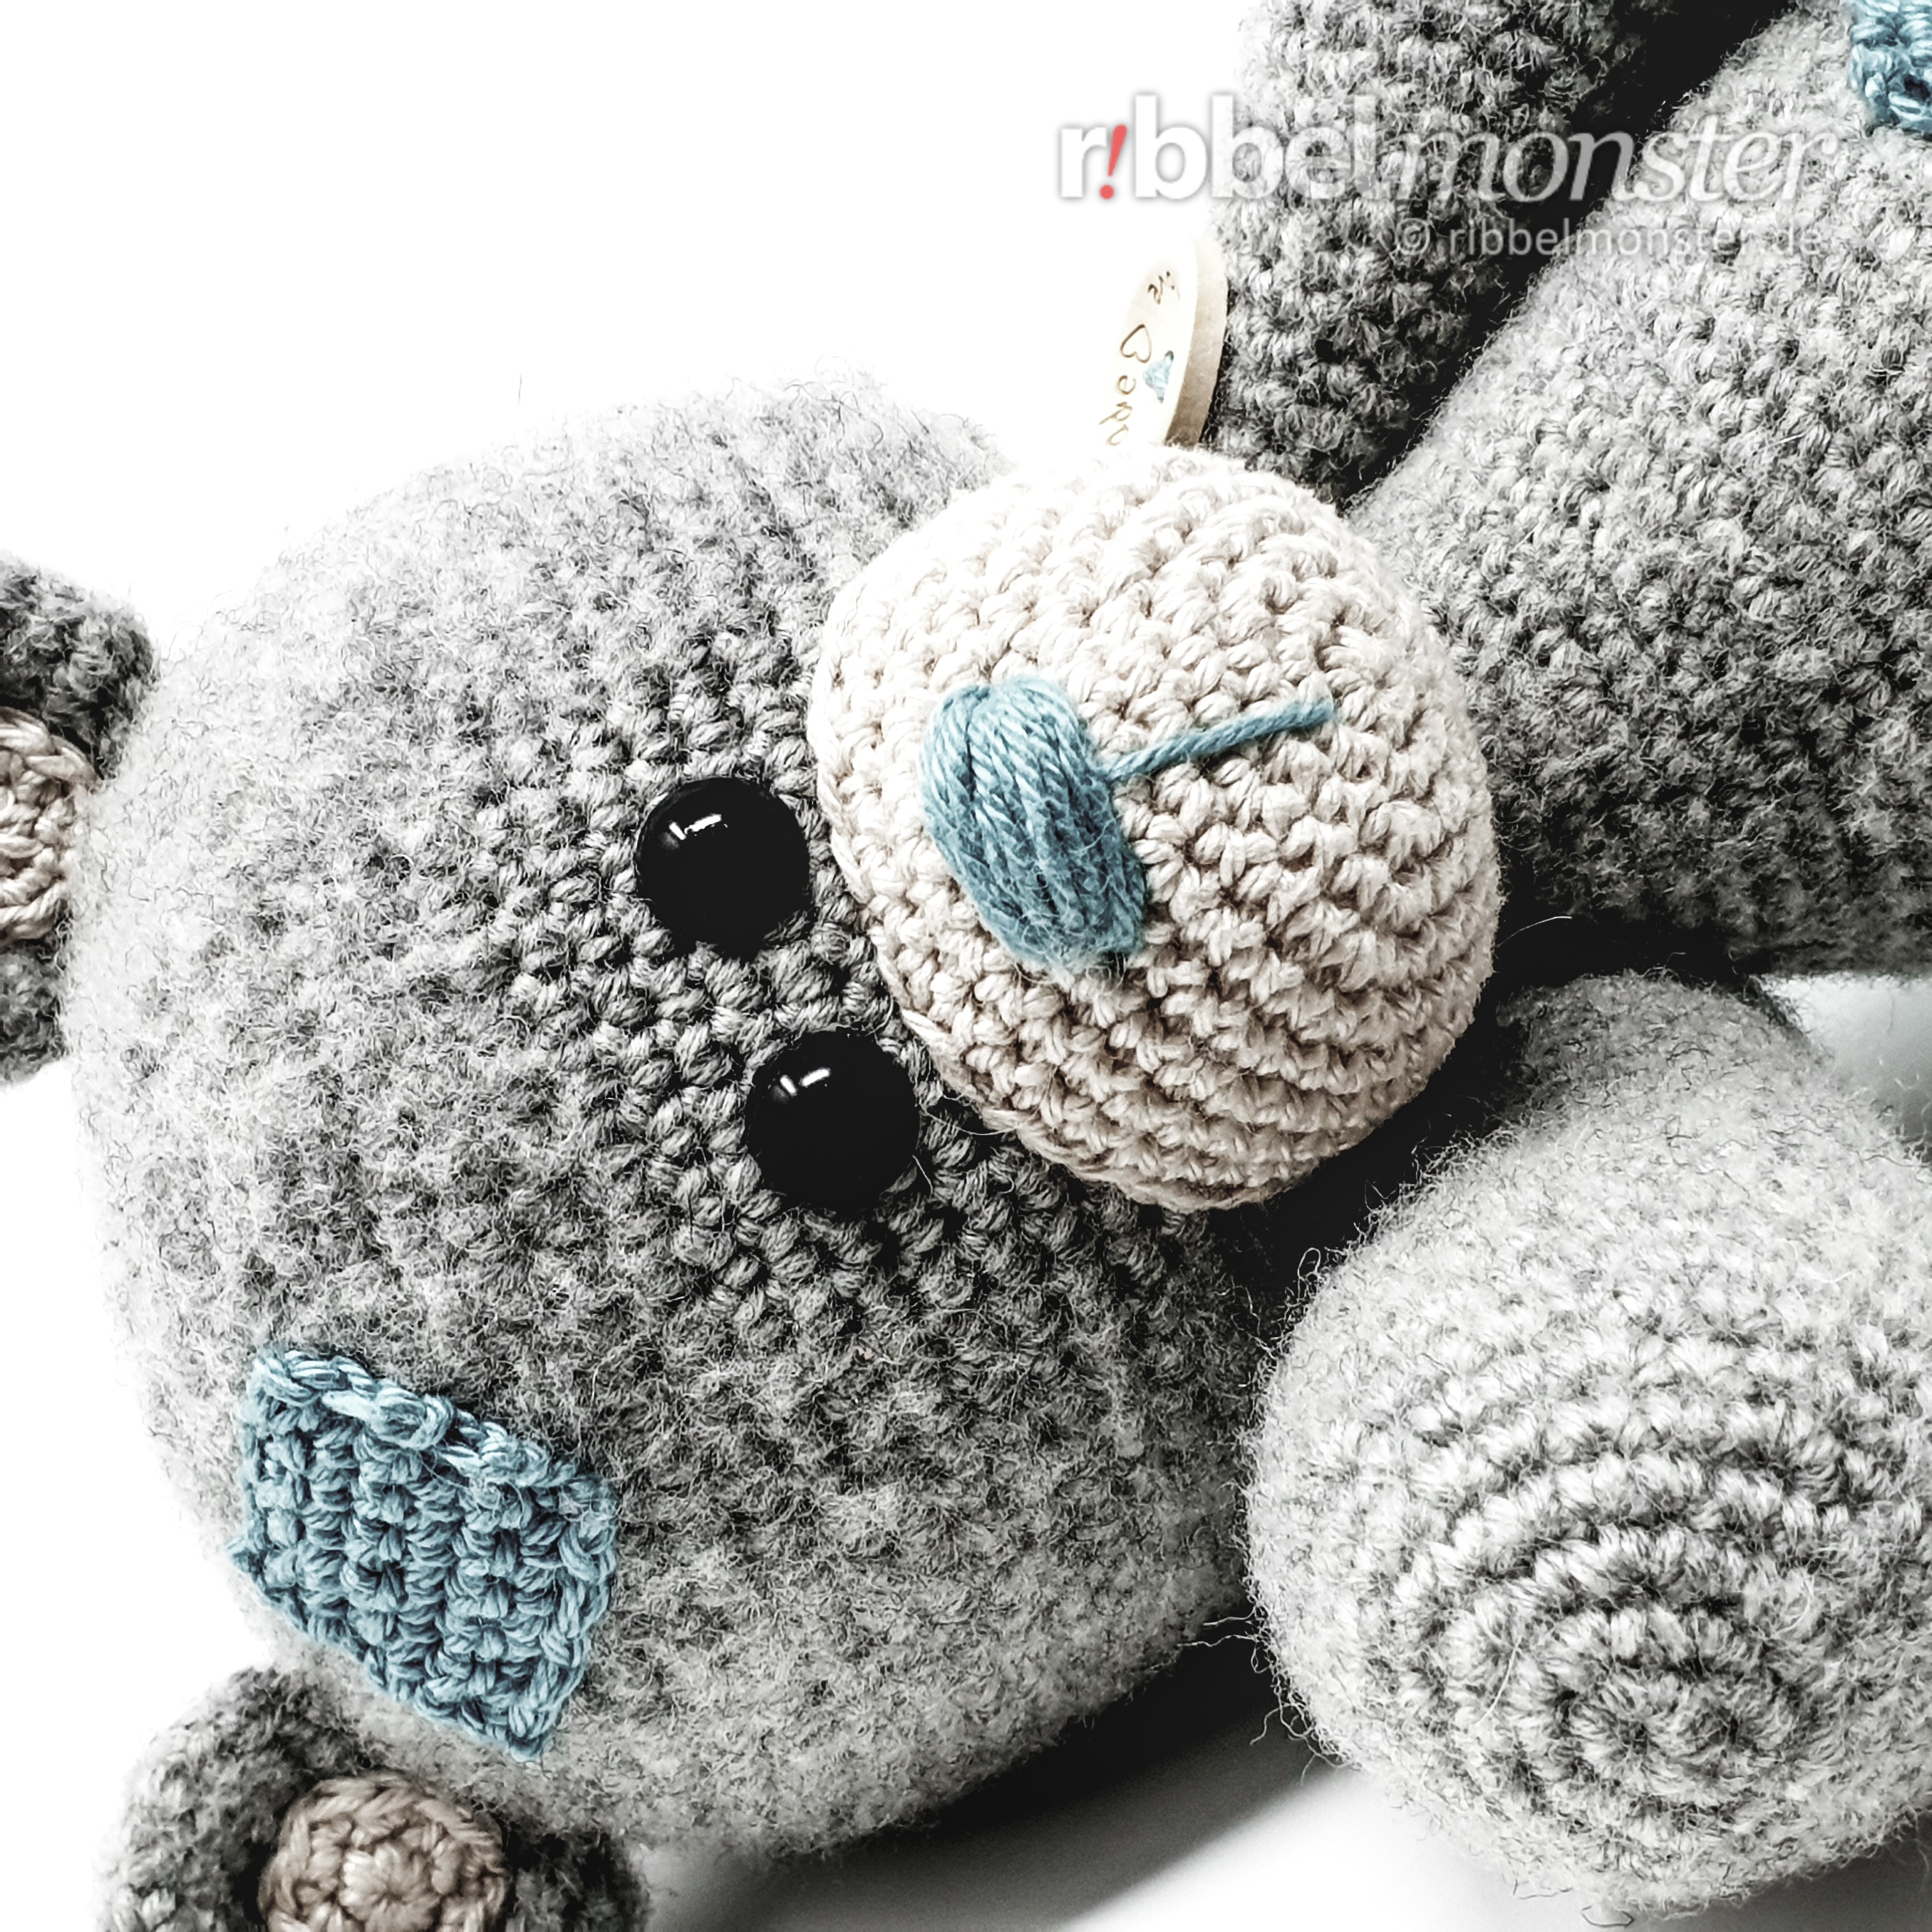
Then we sew the snout with the thread end around to the head. For this you attach it first once around with pins. It sits exactly in the middle between the eyes with the upper edge touching the middel of the eyes. Now you can sew the snout step by step. Shortly before closing the snout is filled and stuffed. Finally you secure and weave in the thread end inside.
Sew on ears
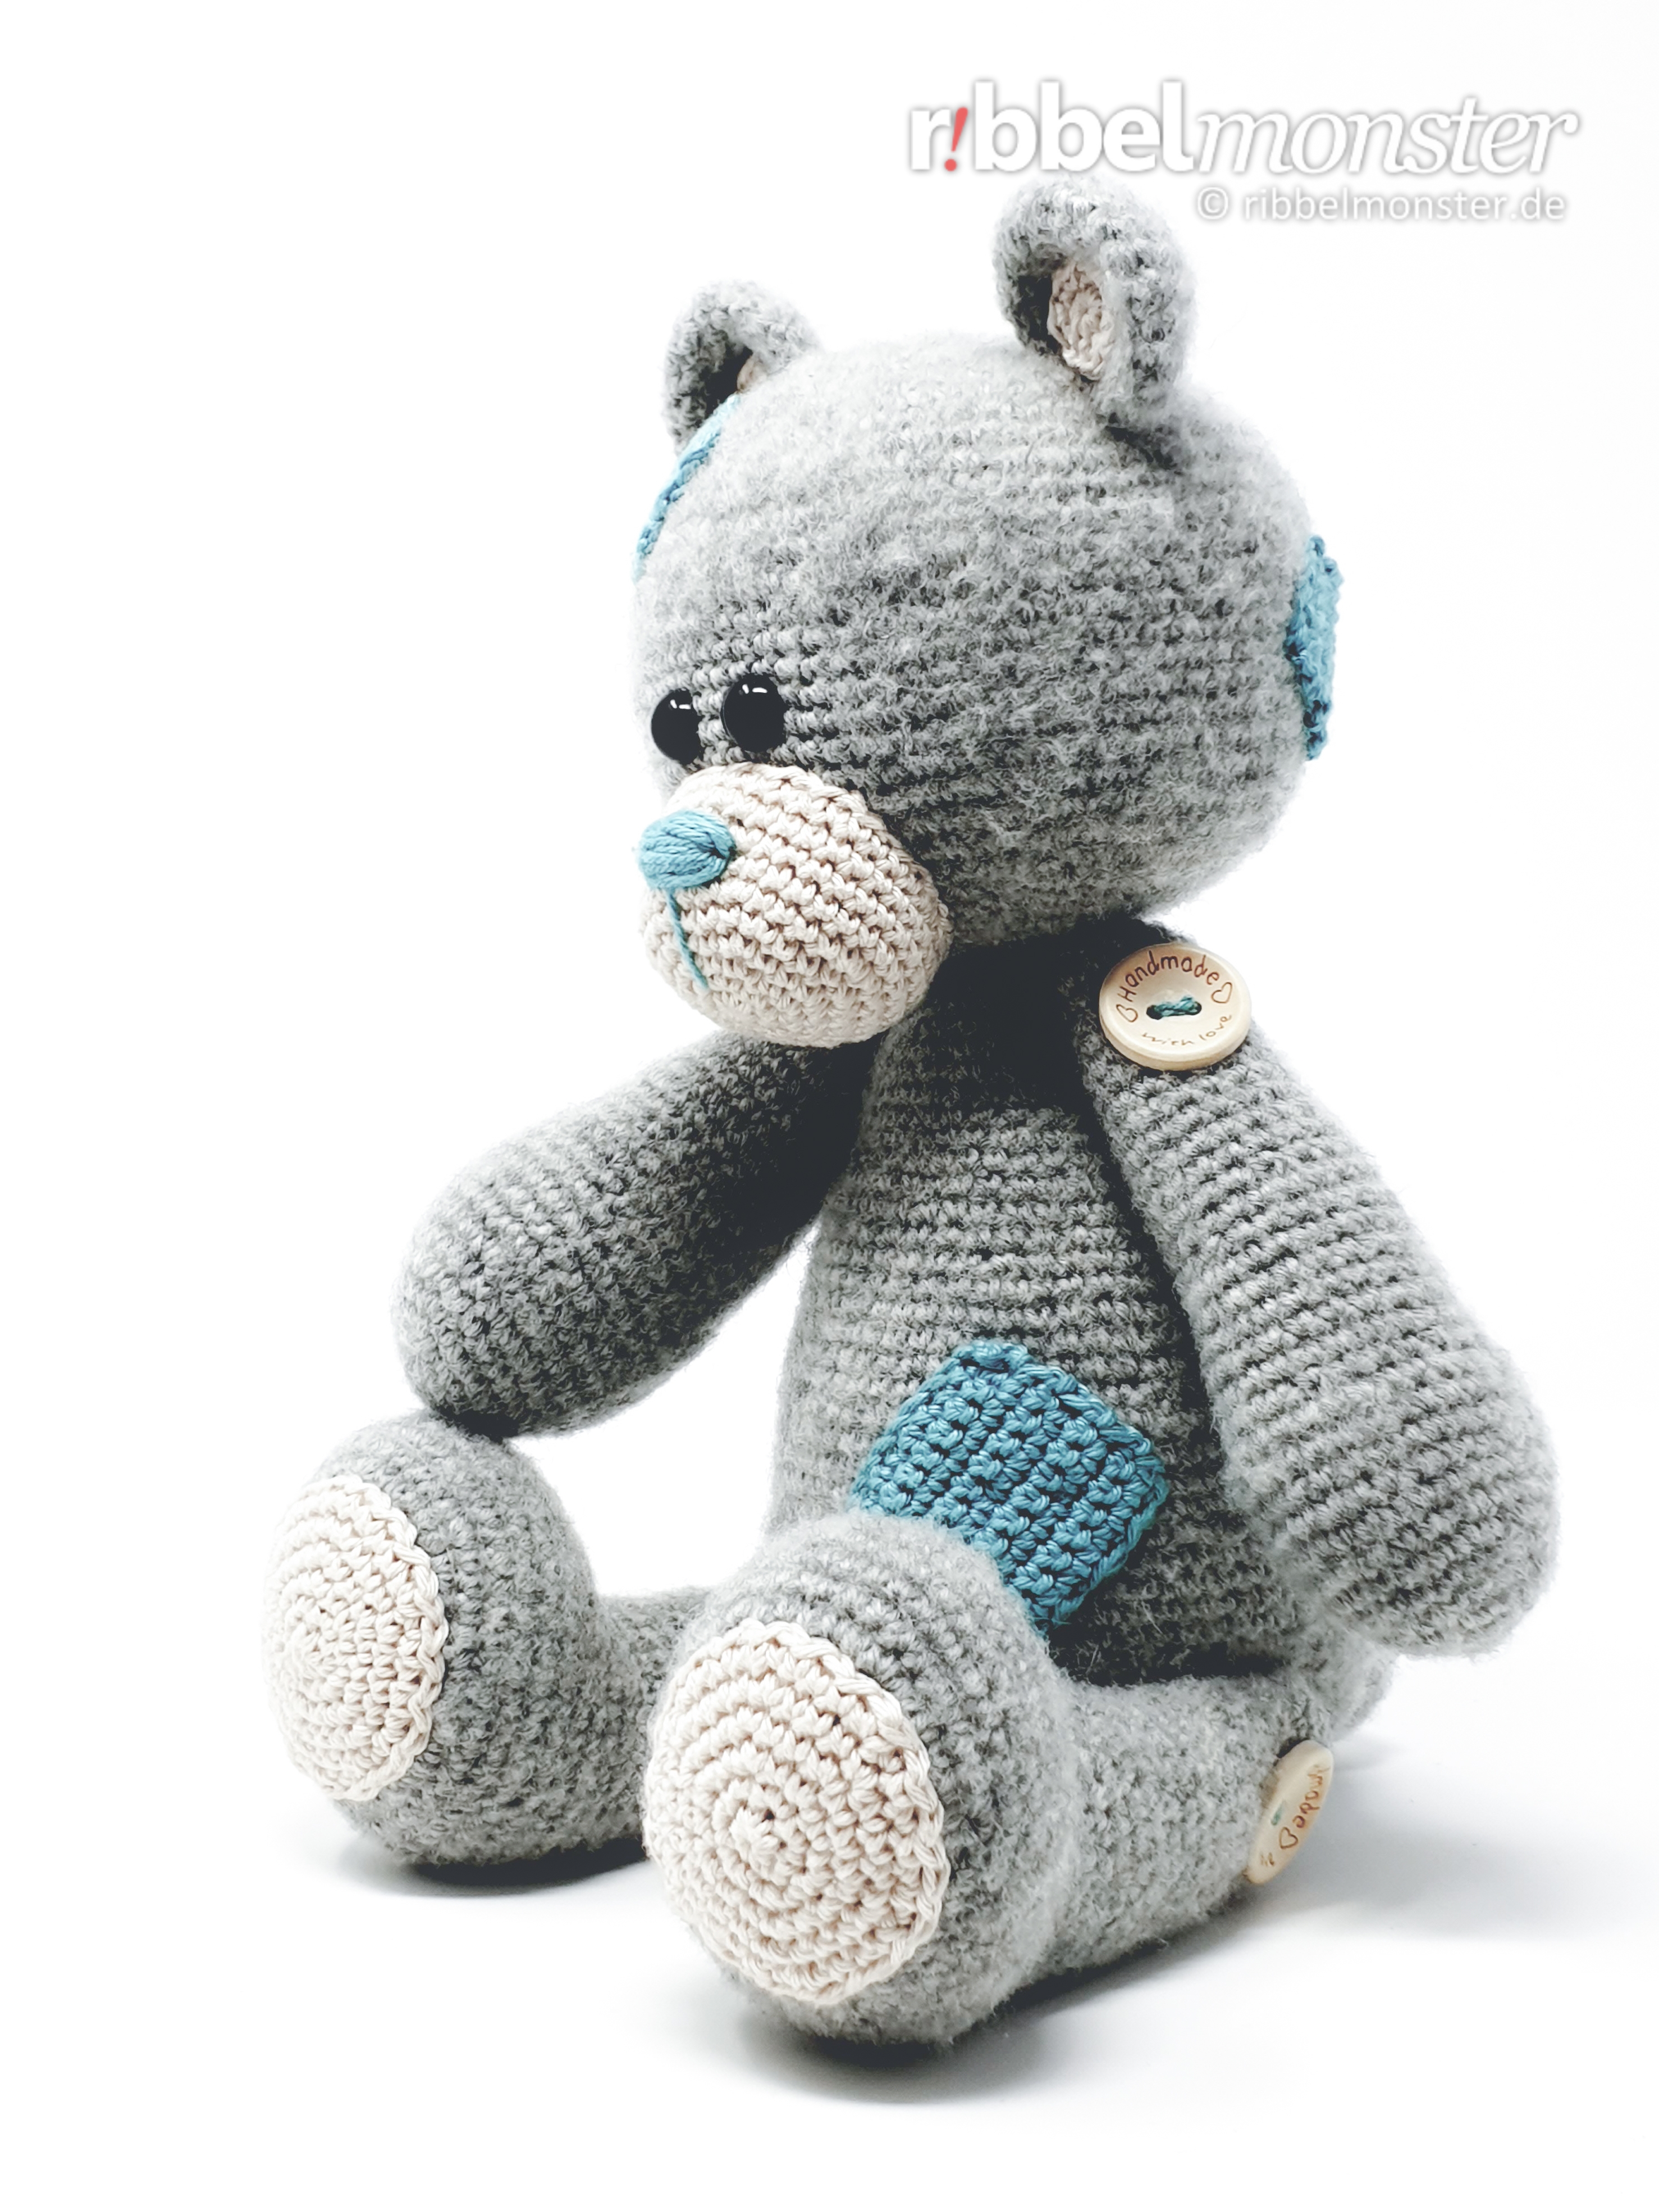
Then the ears are folded flat and sewn with the thread ends with the opening to the head. They sit in a line parallel to the eyes on top of the head. They start after the 8th and end after the 12th round. When the ears are finished the thread ends are secured and weaved in inside the head.
Sew on arms and legs
Now mark the middle over the front of the body to place the arms and the legs at the same distance right and left of it.

Without button joints: The arms and legs are sewn to the body with the flat folded opening and the respective thread ends. Fold the top of the arms so that the break line runs in a line to the palms. The legs are fold the other way so that the break line runs through the middle of the foot tips. It is best to attach the arms and legs first with pins to check the positions. The arms are sewn with the flat-folded opening horizontally around the 39th round and have 14 stitches distance on the front. The legs on the other hand, are sewn with the flat-folded opening perpendicular to the center of the 13th round with 29 stitches at the front, while the toes point upwards. Finally, the thread ends are secured and weaved in inside the body.
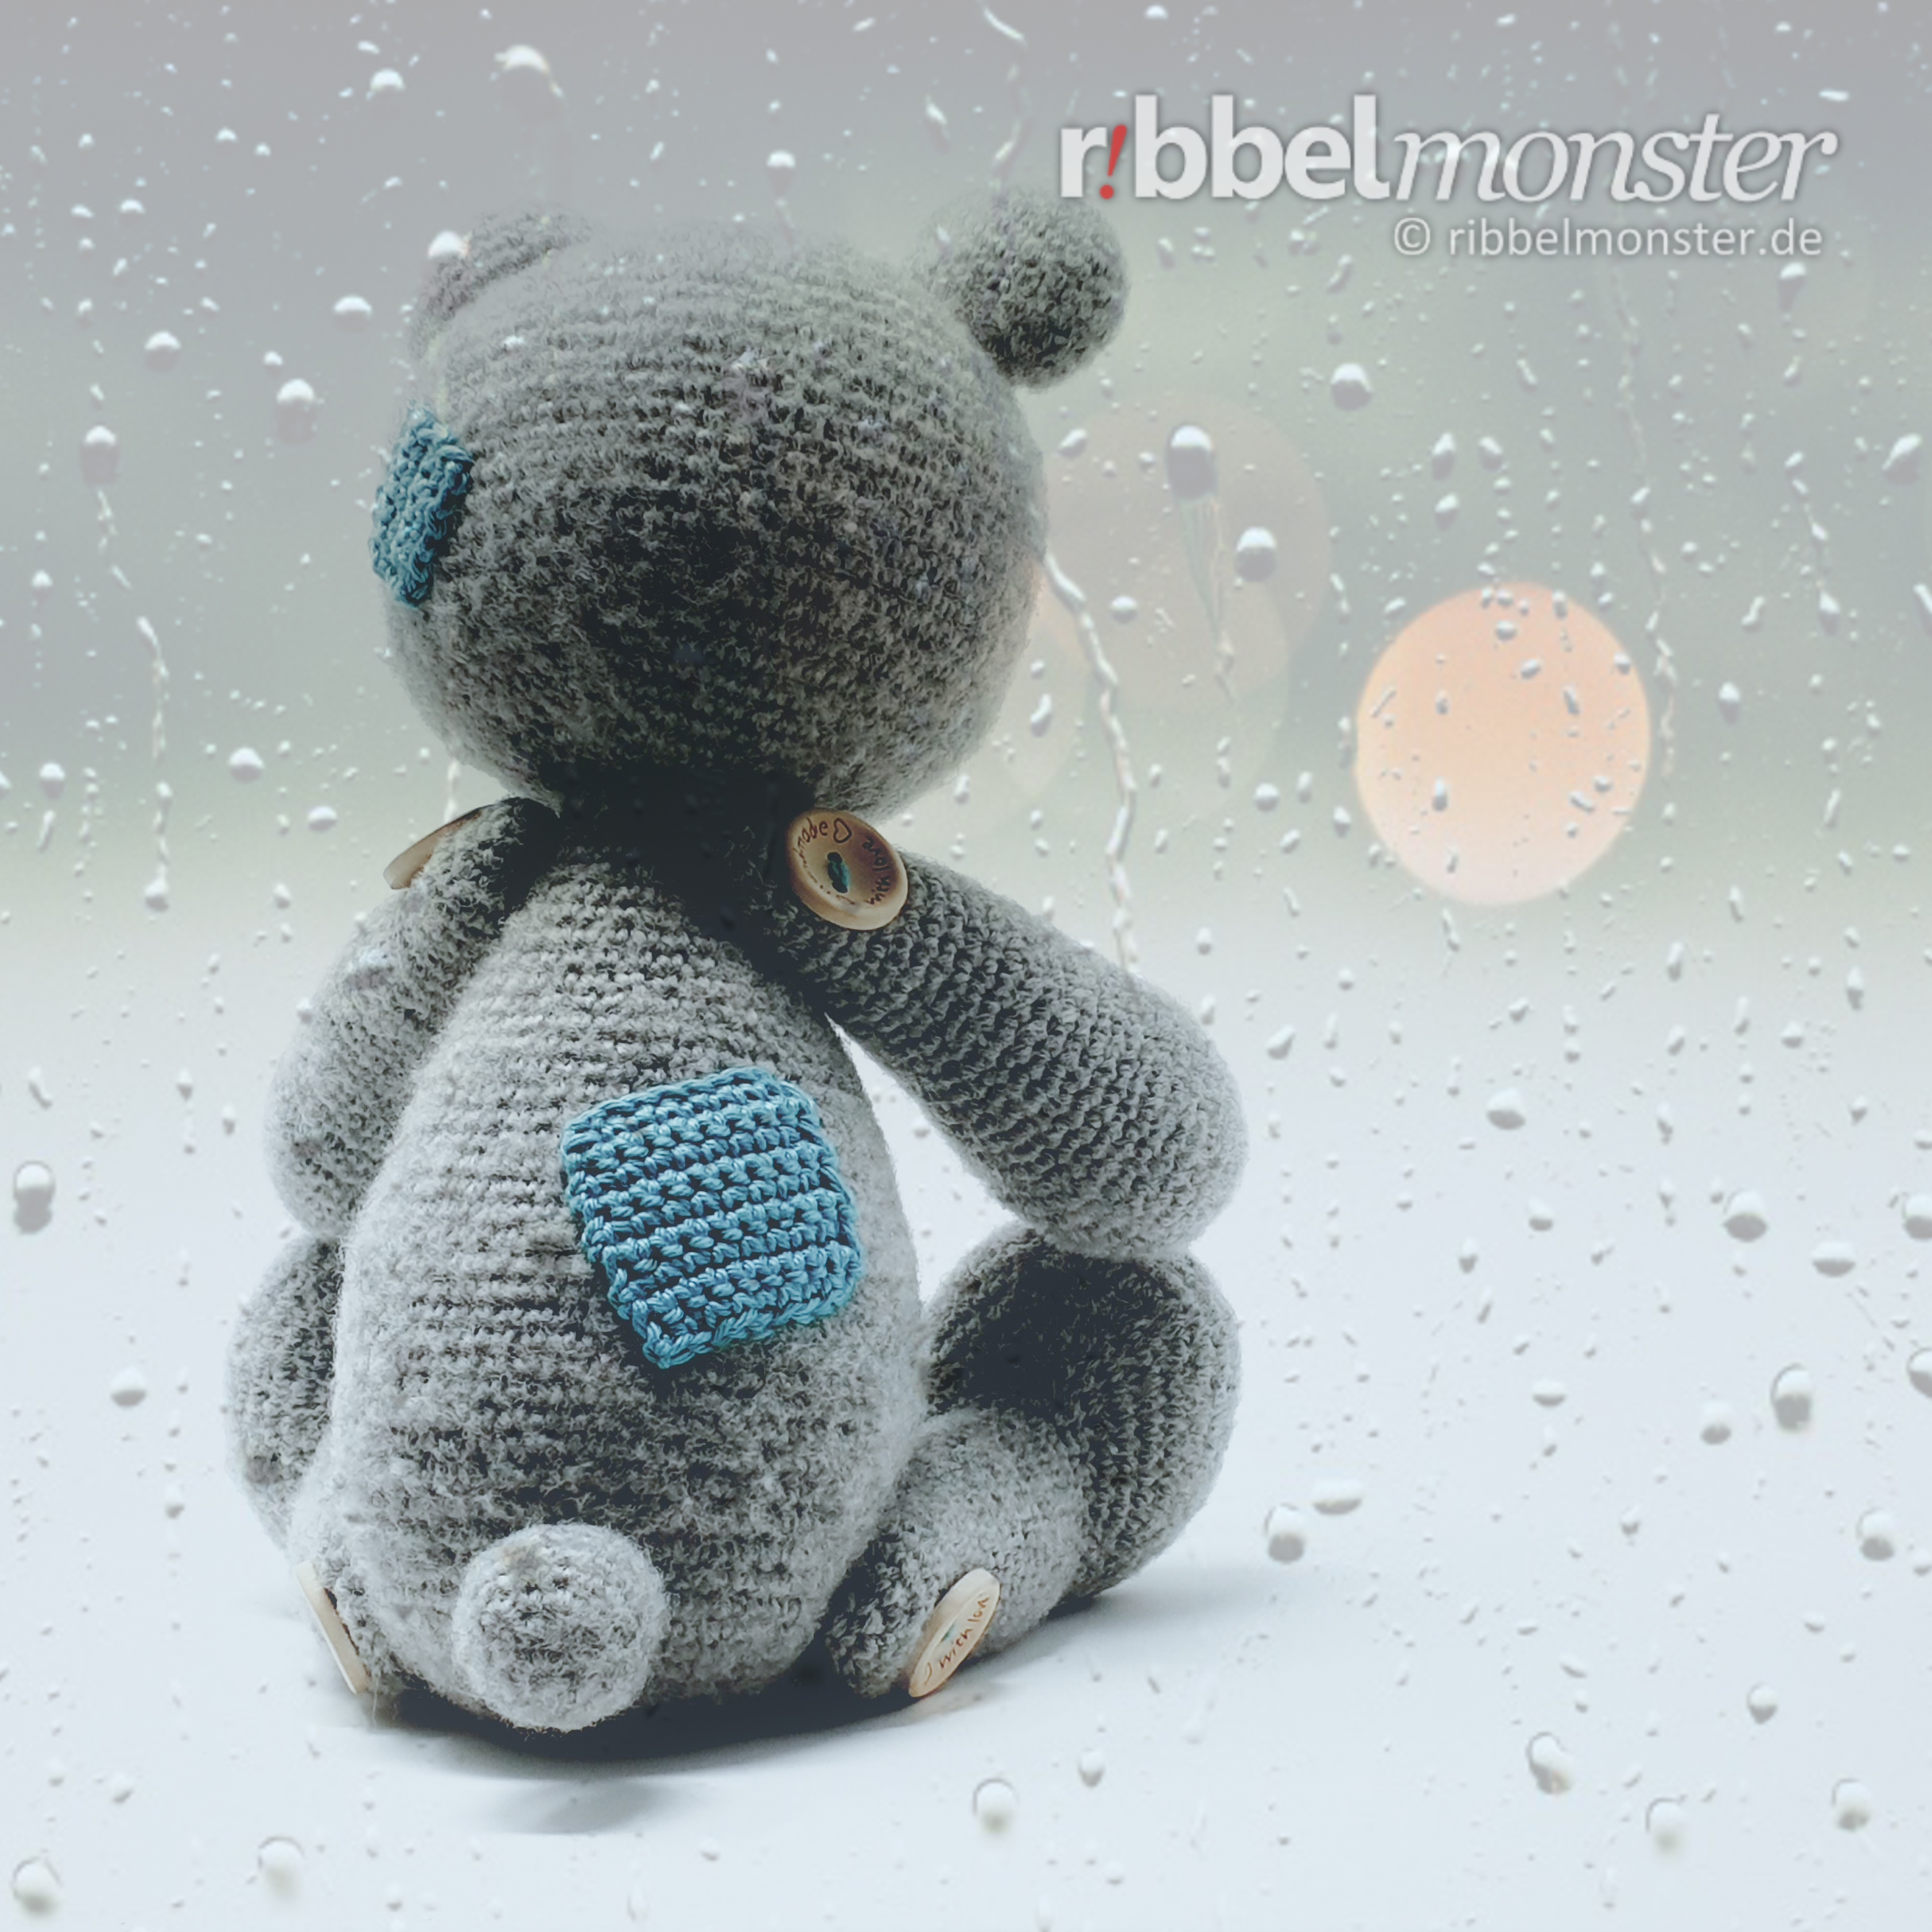
With button joints: The arms and legs are attached paired with button joints to the body using a separate thread and buttons. It is best to first mark the respective entry holes with pins in order to hit the positions exactly. The entry holes of the arms sit after the 39th round and have 14 stitches distance on the front. The entry holes of the legs sit after the 13th round with a distance of 29 stitches on the front, while the toes point forward and up. If you have no idea how to make button joints, the tutorial for button joints will help you.
Sew on Soles, Inner Ears and Patches
Als nächstes wollen wir die Sohlen und Innenohren aufnähen. Verwende dazu die Fadenenden und nähe sie einfach einmal ringsherum entlang der Außenkante fest. Die Sohlen sitzen mittig auf der Unterseite der Füße und die Innenohren im Inneren der Ohren, so das die Unterseite den Kopf berührt.
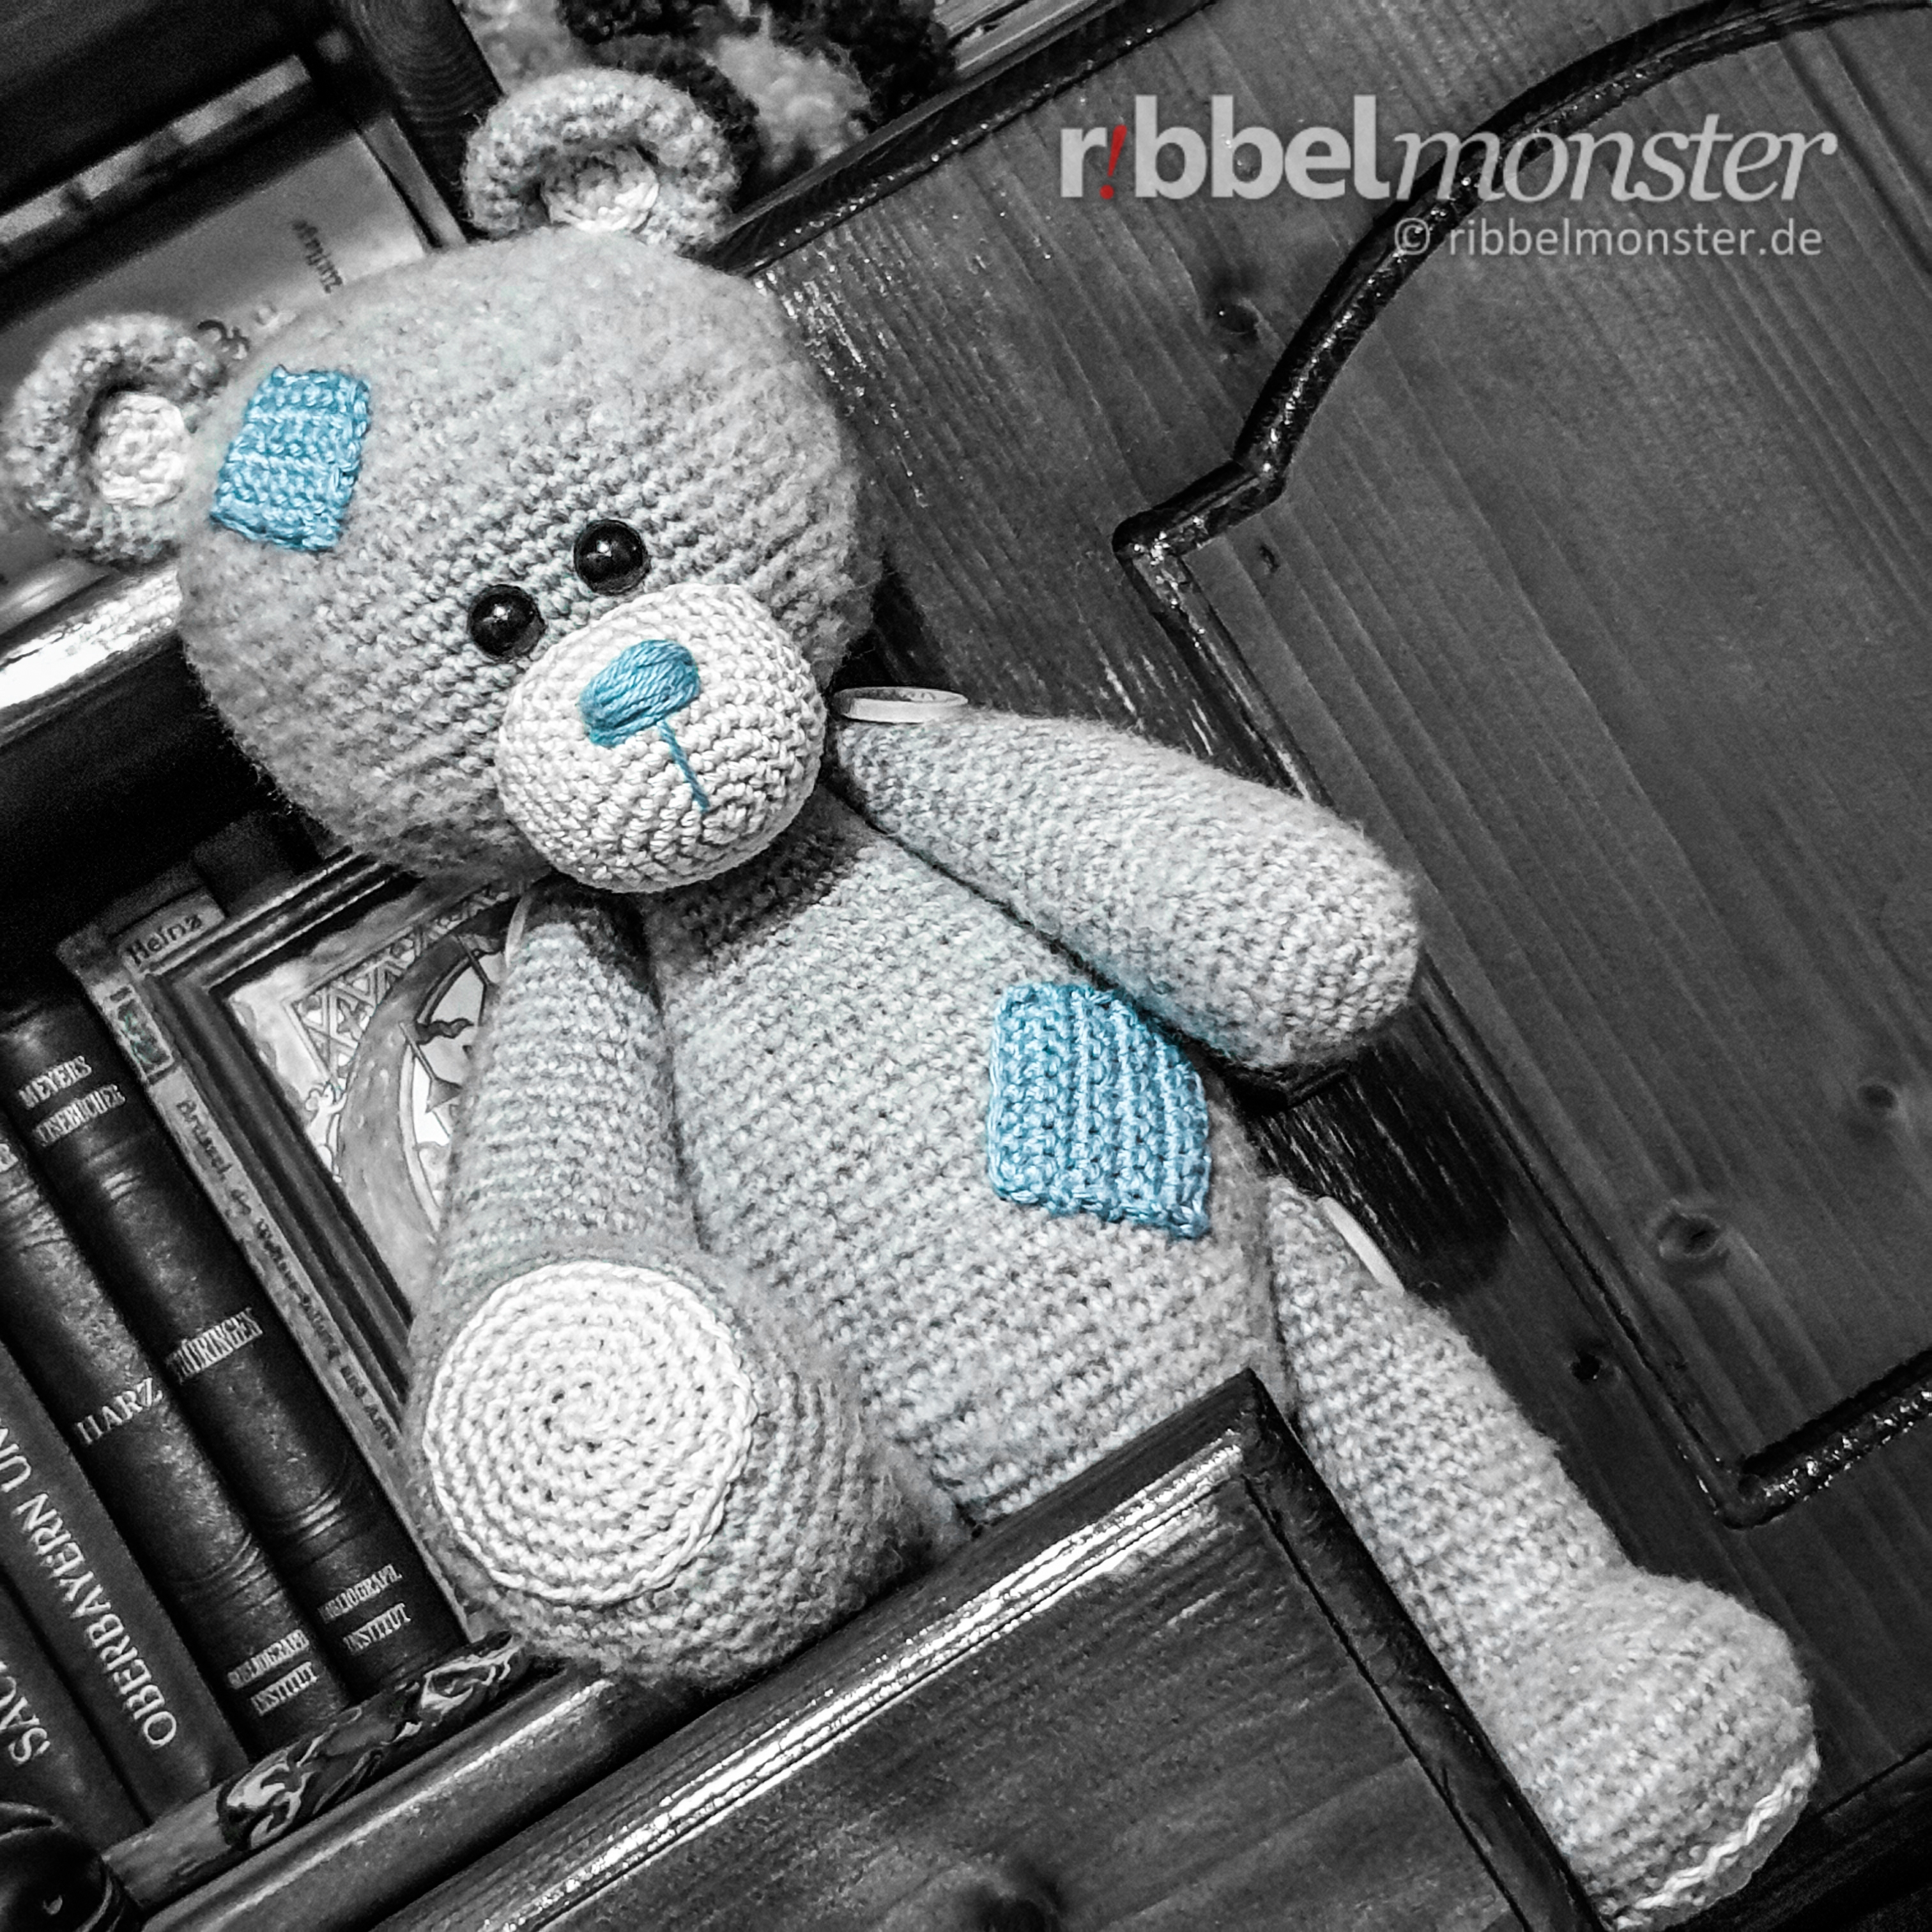
Die Flicken werden ebenfalls mit dem Fadenende ringsherum entlang der Außenkante fest genäht. Dabei sitzt jeweils ein kleiner Flicken auf der Vorderseite und der Rückseite des Kopfes. Von den großen Flicken sitzt jeweils einer auf der Vorderseite und der Rückseite des Körpers.
Sew on tail
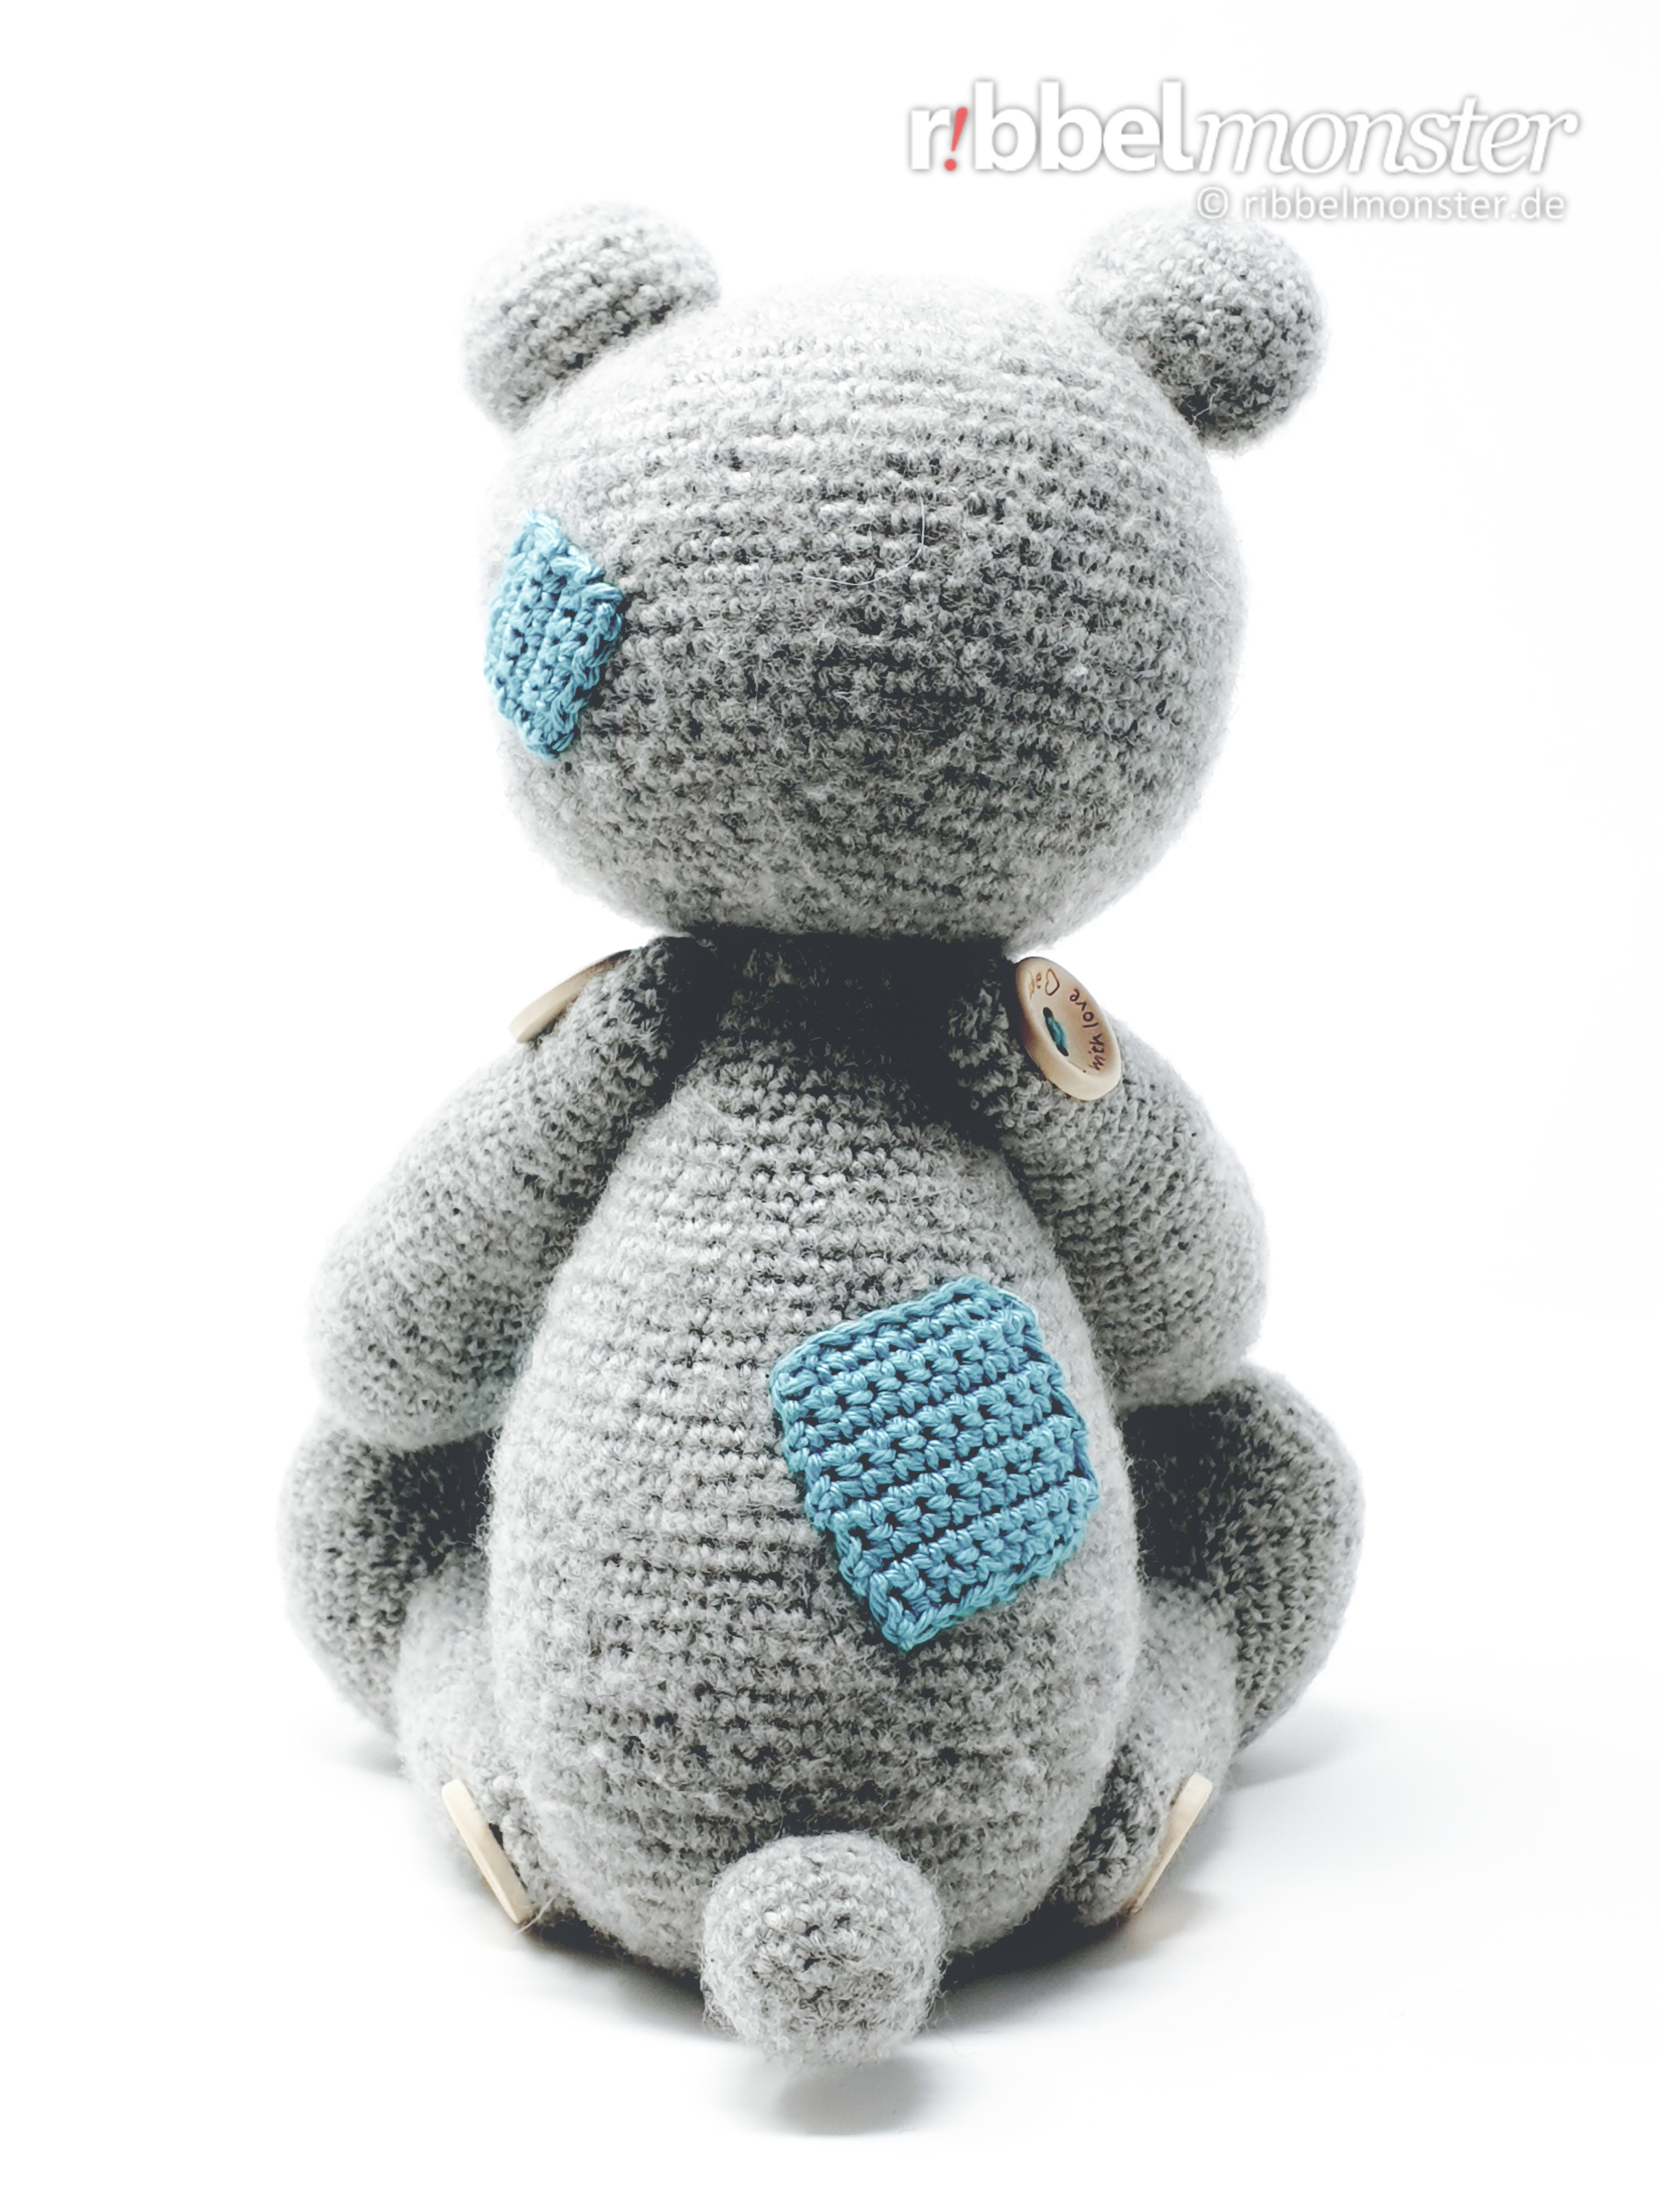
Zuletzt nähst du noch den Schwanz mit der flach gefalteten Öffnung an das Hinterteil. Der Schwanz sitzt um die 12. Runde in der Mitte auf der Rückseite des Körpers. Verwende das Fadenende vom Schwanz um ihn an zu nähen und sichere es zum Schluss im Inneren.
Design Details
Jetzt kannst du noch nach Belieben ein paar Details gestalten.
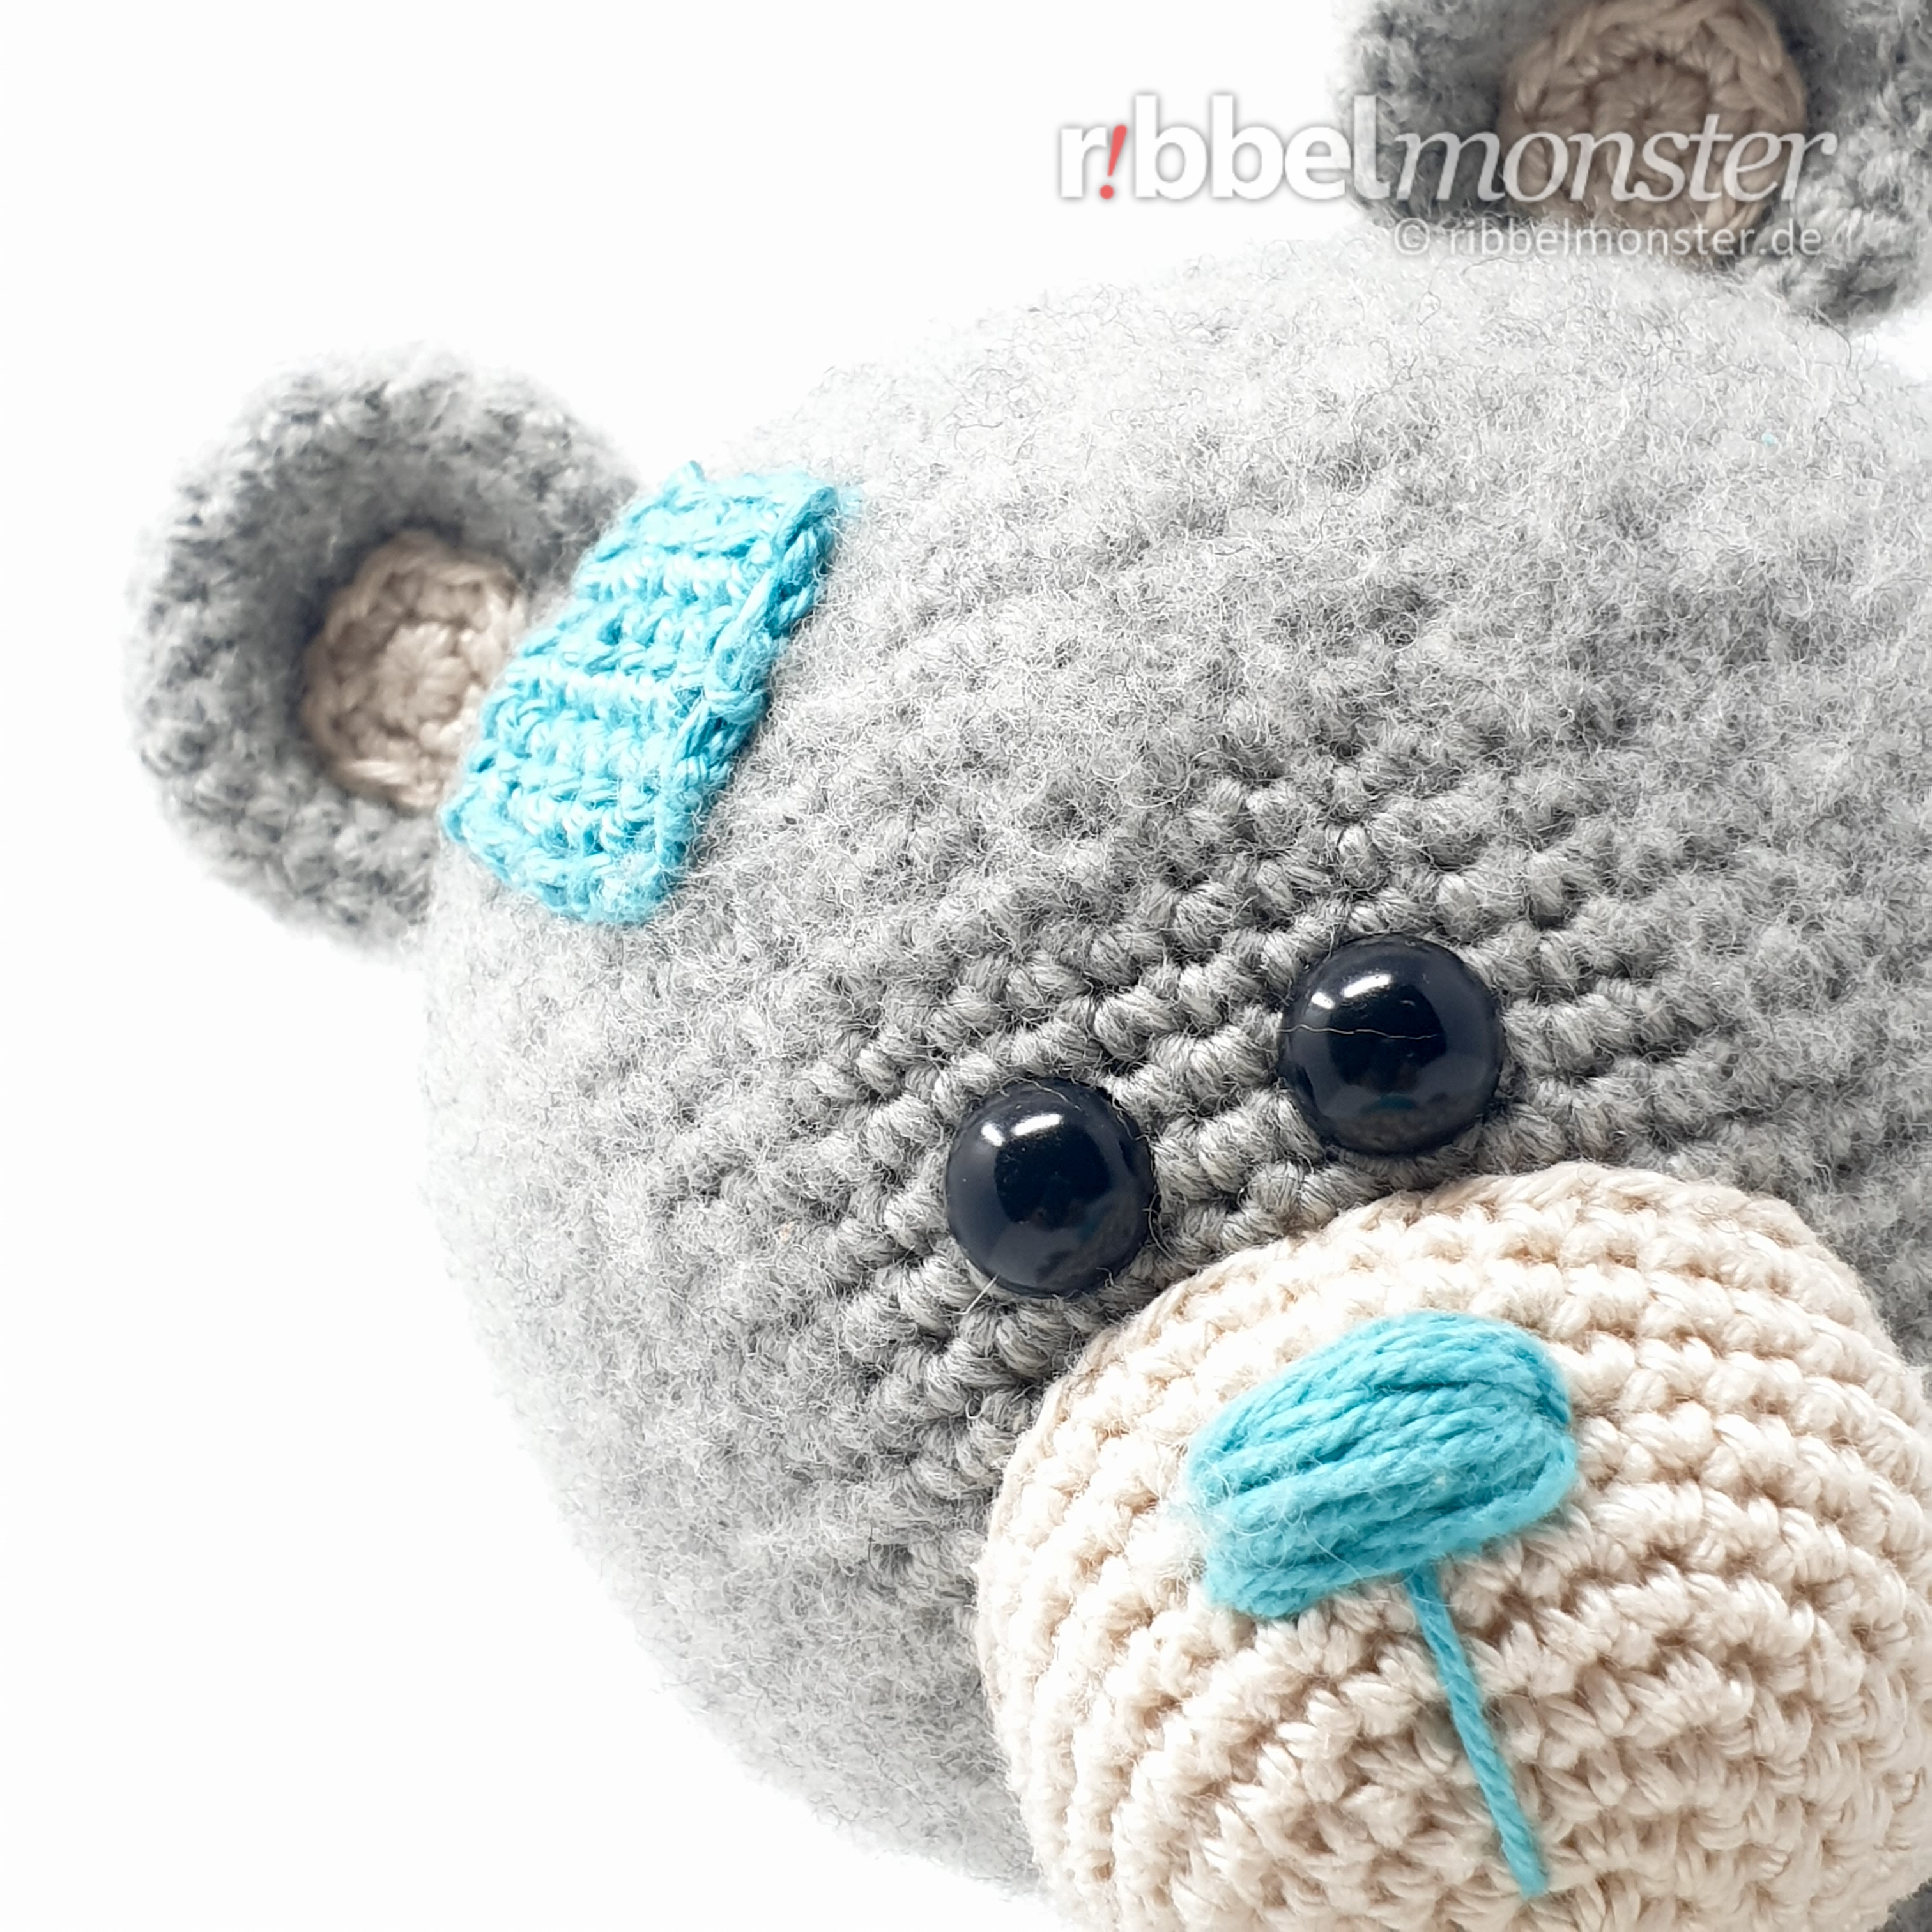
Wahrscheinlich möchtest du deinem Flickenbären auch eine Nase aufsticken. Dazu verwendest du das Garn der Flicken und stichst so oft waagerecht um 6 Maschen auf der Oberseite der Nase, bis sie groß genug ist. Wenn du möchtest kannst du dabei auch noch einen senkrechten Stich anfügen. Zum Schluss werden die Fadenenden im Inneren gesichert.

Wenn du möchtest kannst du auch Augenbrauen, einen Mund, Stiche um die Flicken, Knöpfe, Bänder, Stickereien und mehr hinzufügen. Denke aber stets daran, das oft weniger einfach mehr ist. Deshalb hat mein Flickenbär auch keine weiteren Details bekommen, denn Fell, Nase und Flicken sorgen bereits für ausreichend Charme.
Schön das du da warst!
Magst du dem Ribbelmonster einen Kommentar da lassen?
